6 guides ready to print - choose Save as PDF in the print window for a handout. Back to the help centre
TinERP user guide
Administrators
Owners and admins · Users, roles, approval rules, security, the audit log and document numbers.
Printed 3 October 2026 · the latest version is always in the help centre online
Contents
Administrators
Manage users
Roles and permissions
Set who approves what
Security settings
The audit log
Document numbers
Administrators · Owners and admins · about 4 min
Manage users
A user is someone who can sign in to TinERP. That isn't the same as an employee record in HR: a driver can be an employee who never signs in, and an outside accountant can sign in without being an employee. To invite someone, see Set up your organization.
1. See who can sign in
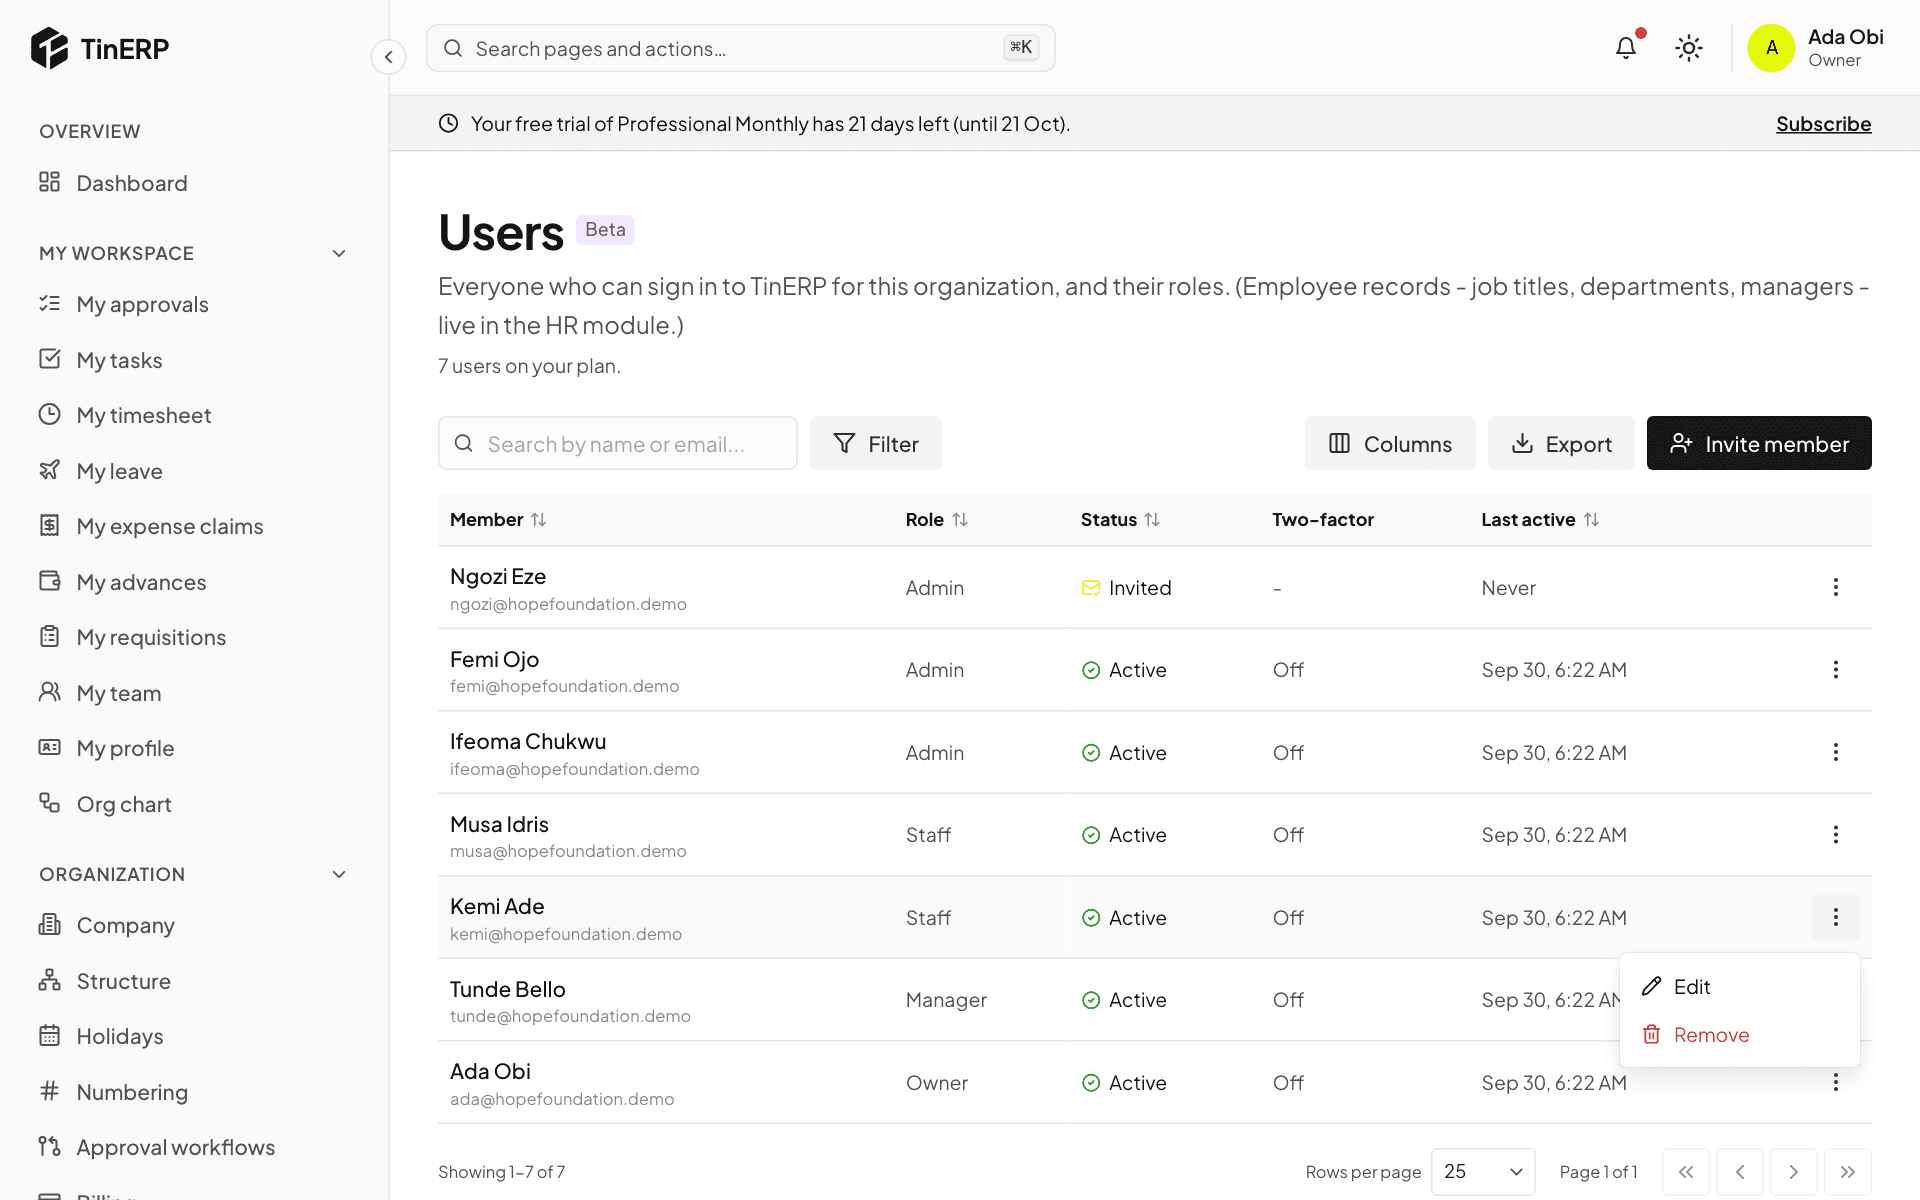
Go to Access & security → Users. The table shows each person's role, their status (Active, Invited or Suspended), whether they use two-factor sign-in, and when they were last active. The line under the title shows how many users your plan includes.
Open the menu at the end of a row for what you can do: Edit and Remove for everyone; Resend invite for someone who hasn't joined yet; Reset two-factor for someone who uses it.
The Users page with the menu open on Kemi's row, showing Edit and Remove
2. Change a role, or suspend someone
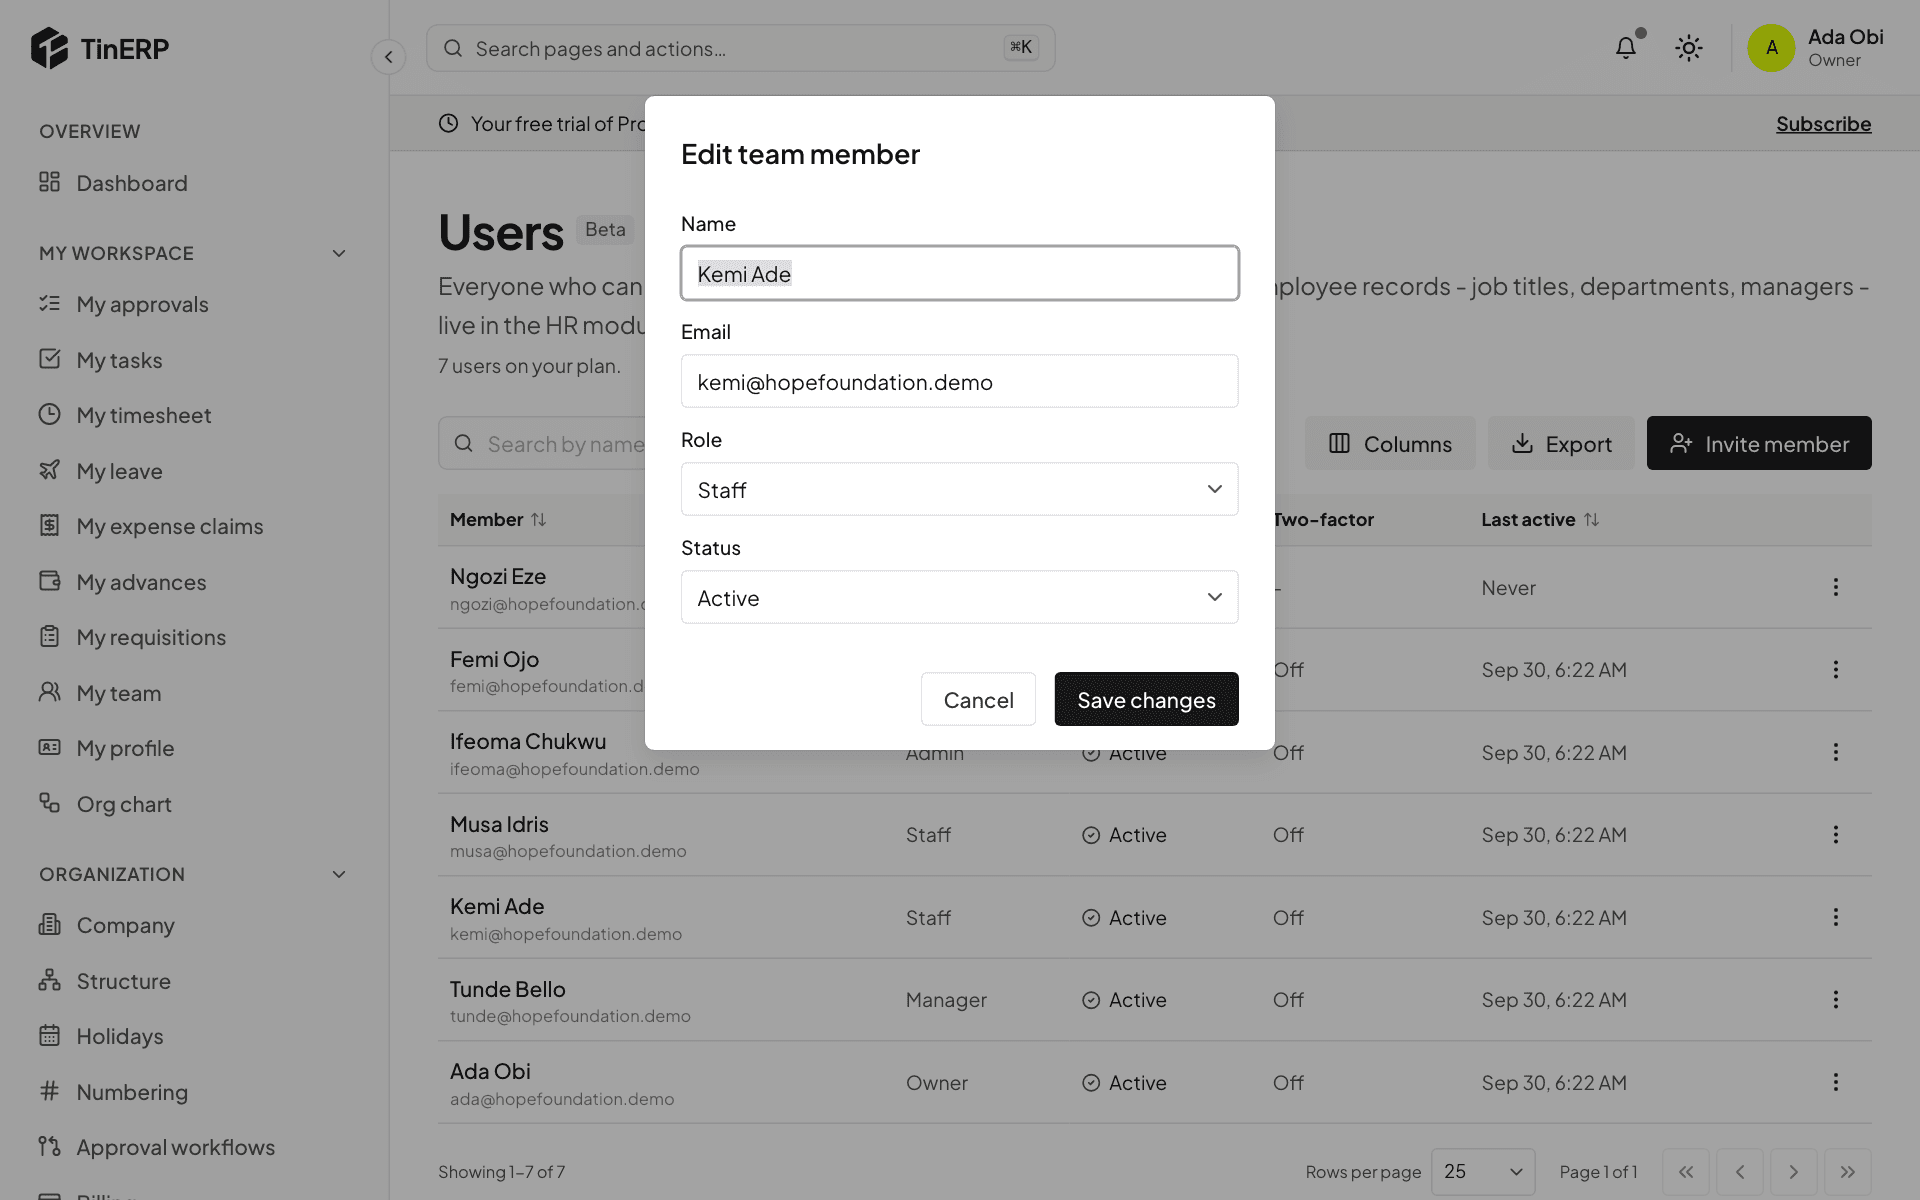
Choose Edit. Pick their new Role - it applies straight away, and they're told.
To stop someone signing in without removing them, set Status to Suspended; set it back to Active to let them in again. Select Save changes.
The Edit team member window with name, email, role and status
3. Help someone who lost their phone
If someone can't sign in because they've lost the phone with their authenticator app, choose Reset two-factor. It turns their two-factor sign-in off and signs them out. They then sign in with their password and set it up again on their new phone - straight away, if your organization requires it.
You can't reset your own, and only an owner can reset another owner's.
4. Remove someone
Choose Remove to take away their access for good. The audit log keeps what they did. If they might come back, suspend them instead.
Questions
Do I need to remove people who leave?
Not if HR records their exit: on their last day, their login is suspended and they're signed out everywhere.
Why can't I give someone a particular role?
Nobody can give more than they have. You can only give roles whose permissions you have yourself.
Administrators · Owners and admins · about 5 min
Roles and permissions
Everyone has one role. TinERP starts you with Owner, Admin, Manager and Staff. You can change all of them except Owner, and add your own - an HR officer or a finance officer, for example.
1. See your roles
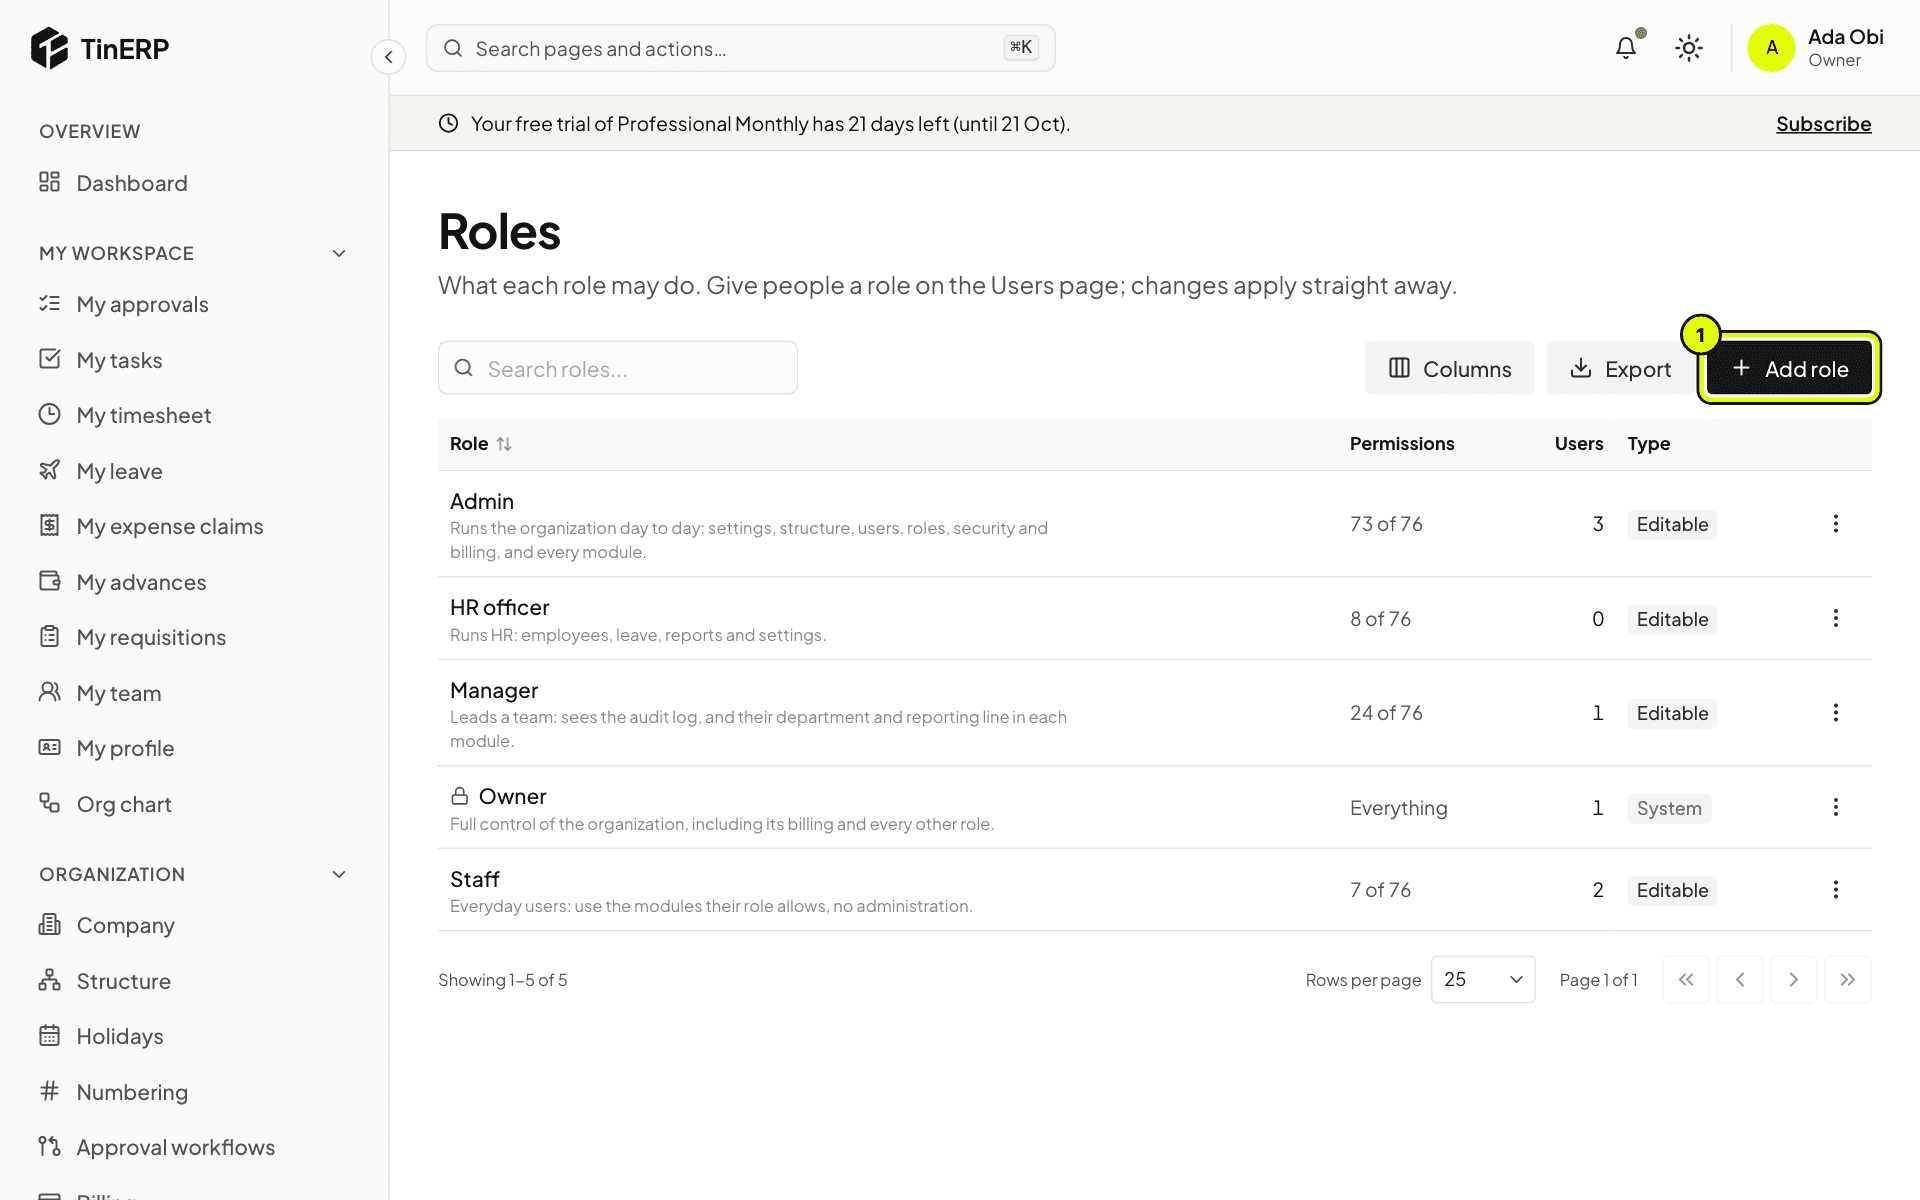
Go to Access & security → Roles. Each role shows what it's for, how many permissions it has and how many users.
Owner always has everything - including what comes with new modules - and can't be changed. Admin runs the organization day to day. Manager leads a team: they see their department and reporting line in each module. Staff use TinERP for themselves.
The Roles page listing Admin, HR officer, Manager, Owner and Staff, with Add role marked 1
2. Add or change a role
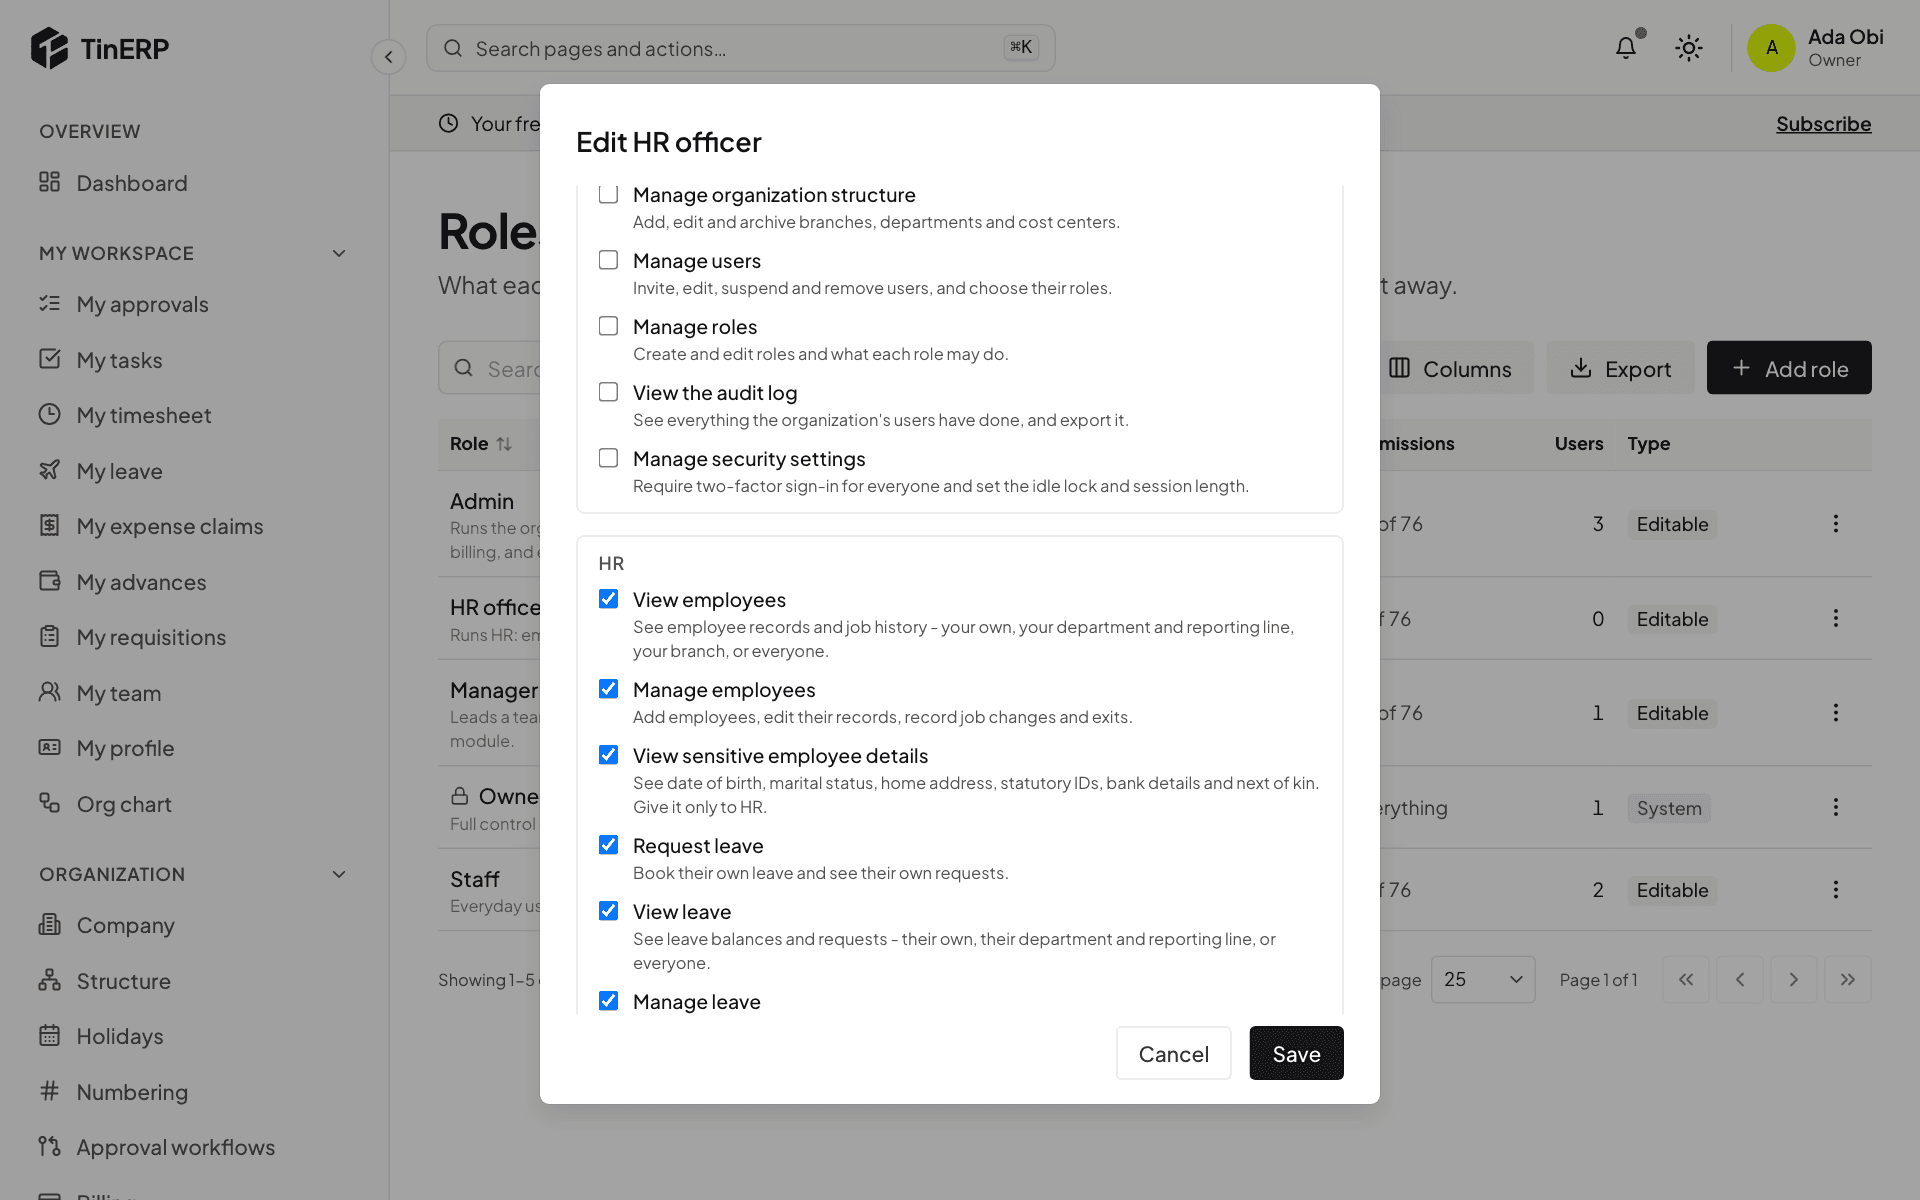
Select Add role (1), or open a role's menu and choose Edit. Give it a name and a line about what people with it do, then tick its permissions - they're grouped by module, each with a line saying what it allows. Select Save.
Editing the HR officer role: the HR permissions ticked
Tip: Sensitive employee details - date of birth, home address, ID numbers, next of kin, bank details and documents - have their own permission that no starting role has. Give it only to your HR role.
3. Give people the role
Go to Users, open the person's menu, choose Edit and pick the role. Changes to a role apply at once to everyone who has it.
Questions
Does someone need a permission to approve things?
No. Who approves is decided by your approval rules - see Set who approves what - not by roles.
Can I delete a role?
Yes, from its menu - once you've given everyone who has it another role. Owner can't be deleted.
Administrators · Owners and admins · about 6 min
Set who approves what
Every kind of request - leave, timesheets, expense claims, advances, purchases, payments and more - has its own approval rules. TinERP's defaults work from day one; change them when your policy is different.
1. Choose a kind of request
Go to Organization → Approval workflows and pick a kind of request on the left. Kinds that belong to modules outside your plan are listed separately.
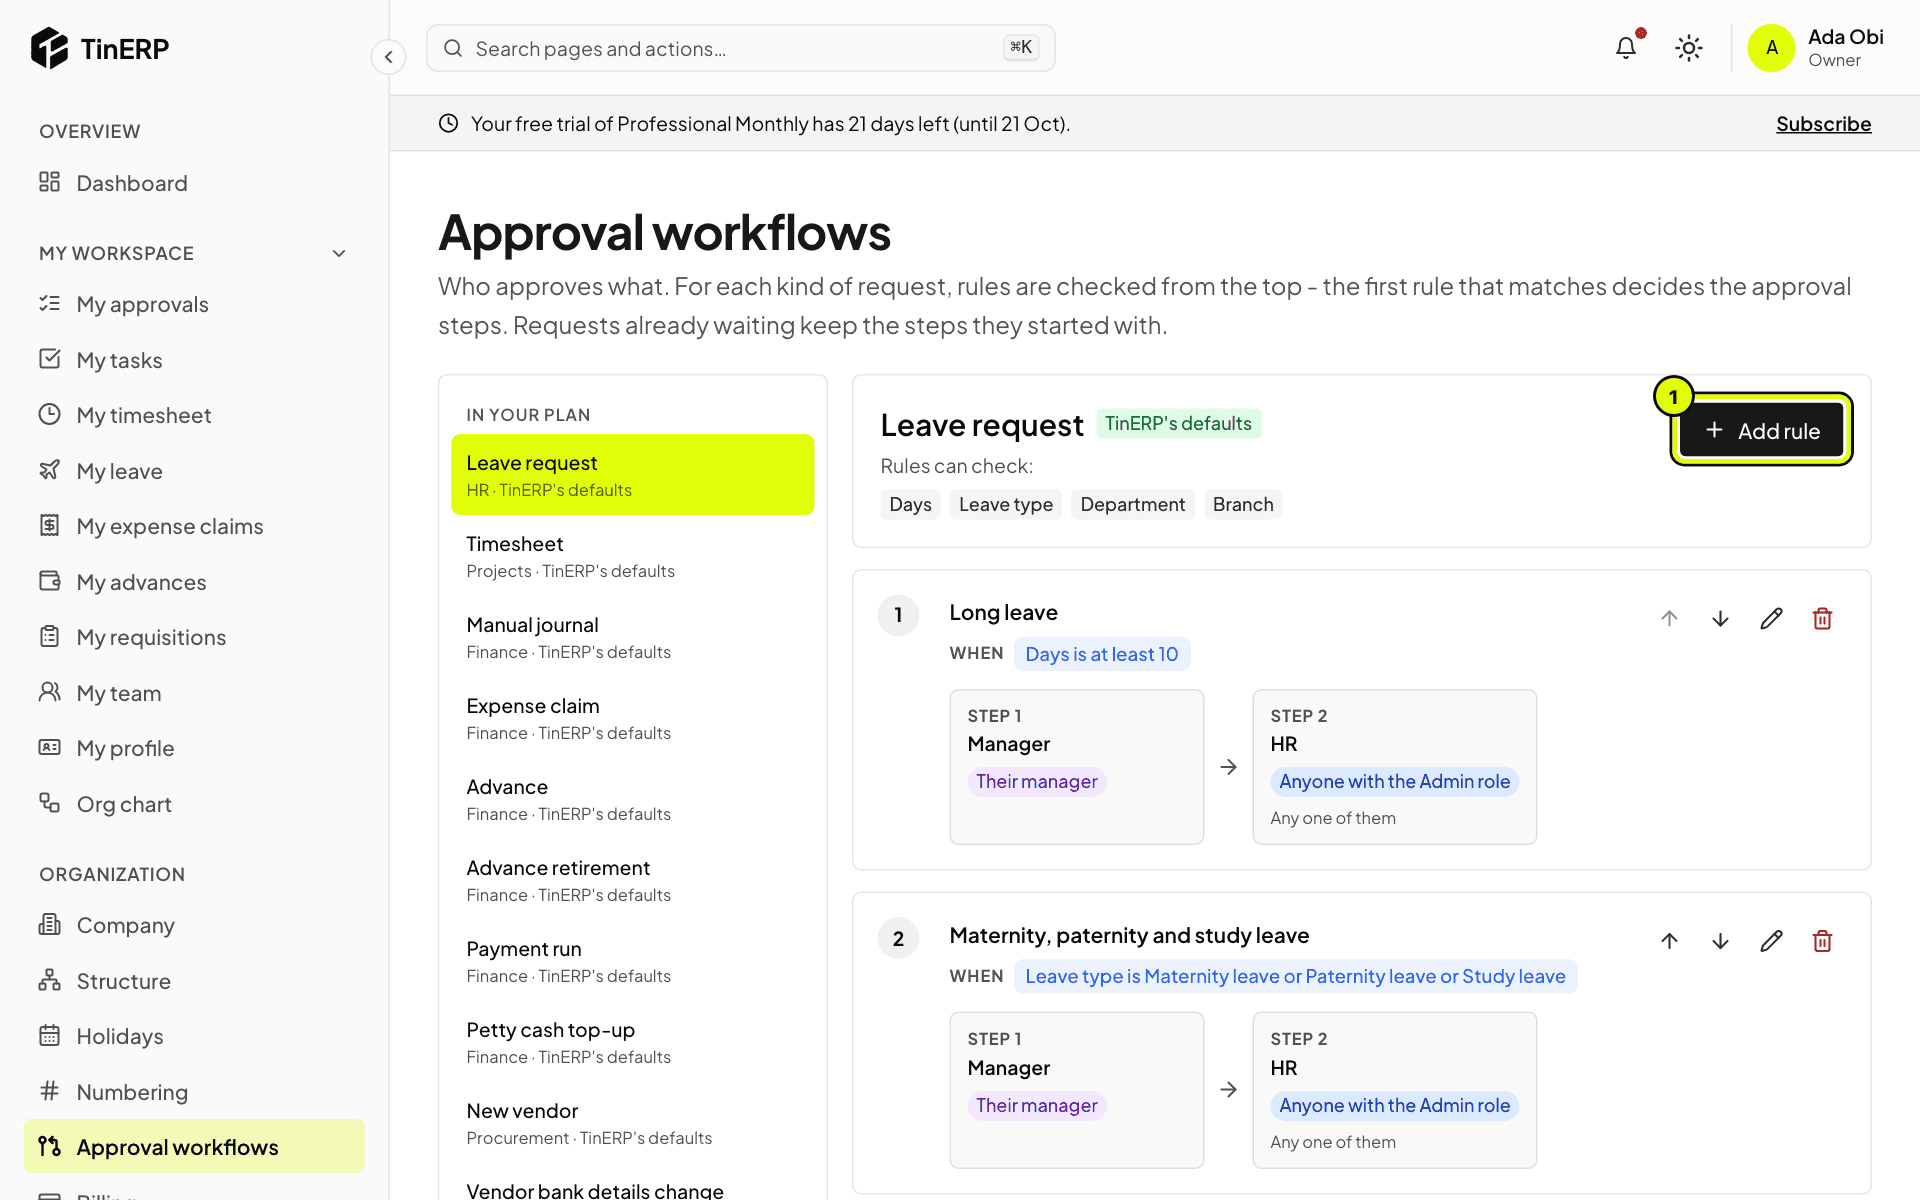
Rules are checked from the top: the first rule whose conditions match a request decides who approves it. The chips under the title show what rules can check - for leave, the days, the leave type, the department and the branch; for money, the amount.
Approval workflows for leave requests: the Long leave and Maternity, paternity and study leave rules, with Add rule marked 1
2. Add or change a rule
Select Add rule (1), or the pencil on a rule. Give it a name, then set:
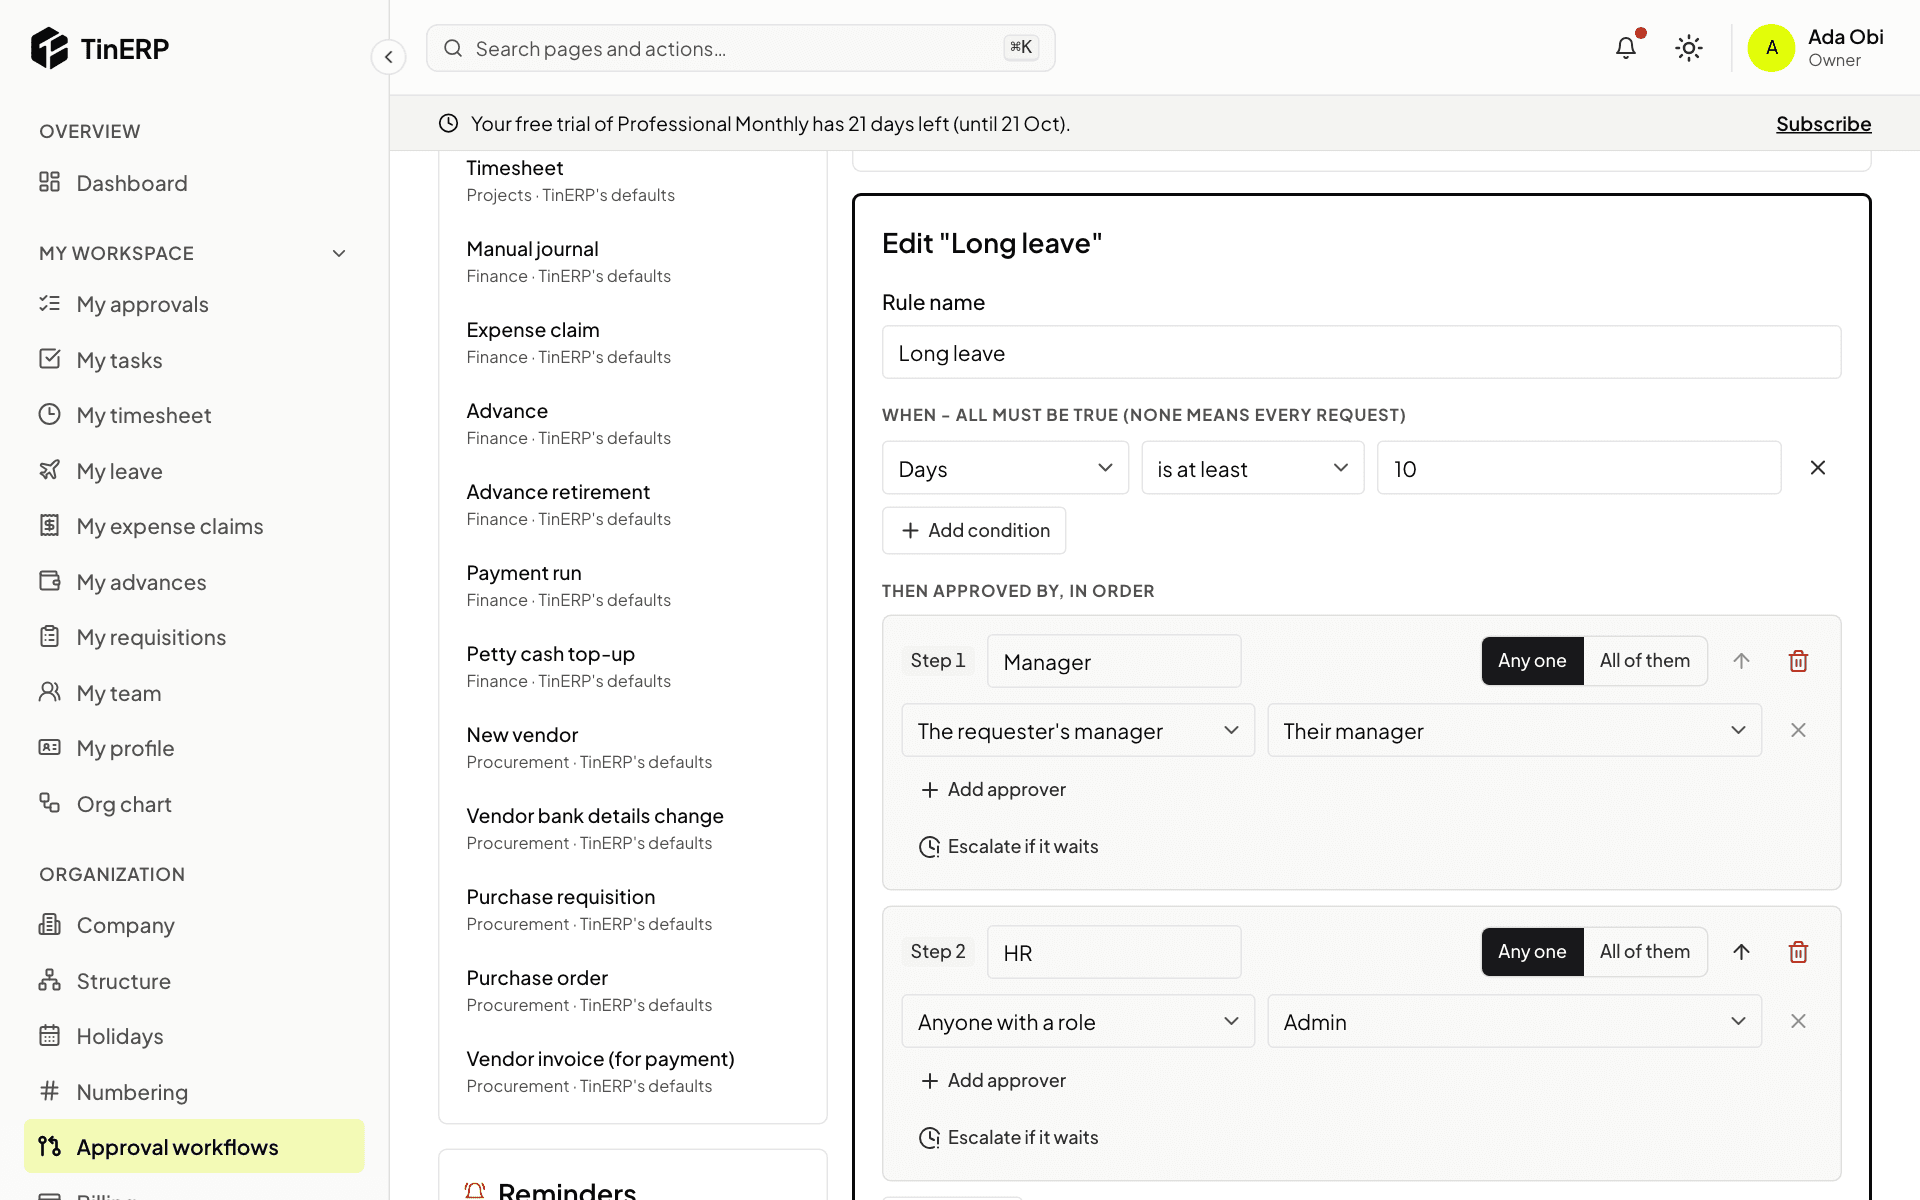
When - the conditions, which must all be true, such as Days is at least 10. No conditions means every request.
Then approved by, in order - the steps. Each step's approvers can be the requester's manager (or their manager's manager), the head of their department, anyone with a role, or named people, and the step needs Any one or All of them. Select Save rule.
Editing the Long leave rule: Days is at least 10, then the manager, then anyone with the Admin role
Tip: A rule with no steps approves requests automatically - for example expense claims under a small amount.
3. Keep approvals moving
Under a step, Escalate if it waits adds more people if nobody decides within a number of working days - usually the manager's manager. Any one of them can then decide.
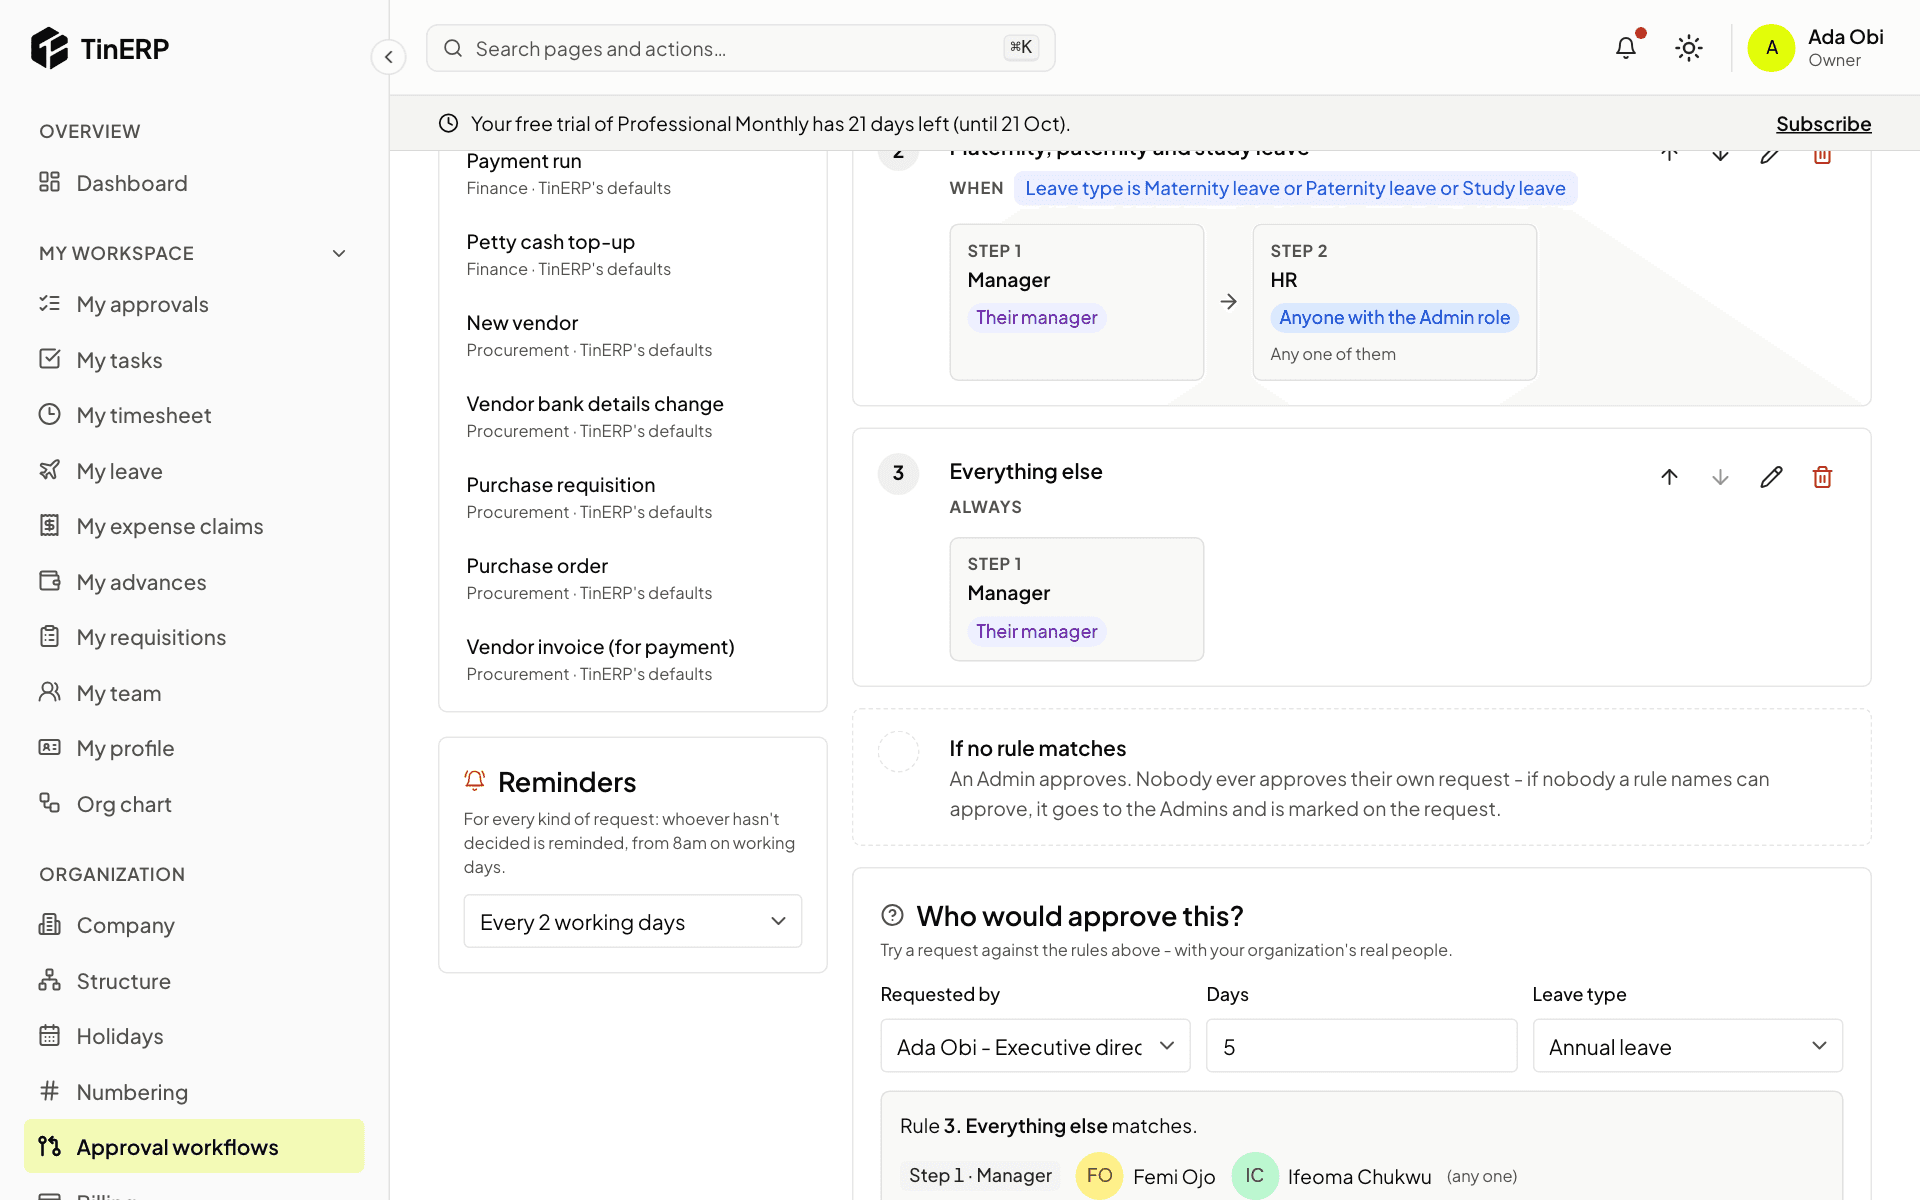
Reminders, on the left, apply to every kind of request: whoever hasn't decided is reminded every few working days, from 8am.
4. Try it before you rely on it
Scroll to Who would approve this?. Choose who is asking and fill in the request's details. TinERP shows which rule matches and the real people each step would go to. Nothing is saved.
The rest of the leave rules, the Reminders setting and Who would approve this?
Questions
Do my changes affect requests already waiting?
No. A request keeps the steps it started with; new requests use the new rules.
Can someone approve their own request?
Never. If a rule would send a request to the person who asked, they're left out. If nobody is left, it goes to the Admins and is marked on the request.
What happens when an approver is away?
They set Out of office in My account and choose someone to decide for them. You can also add escalation to a step.
How do I go back to TinERP's rules?
Select Use the defaults for that kind of request. Requests already waiting keep their steps.
Administrators · Owners and admins · about 3 min
Security settings
These settings apply to everyone in your organization. They can make TinERP stricter than its own limits, never looser.
1. Require two-factor sign-in
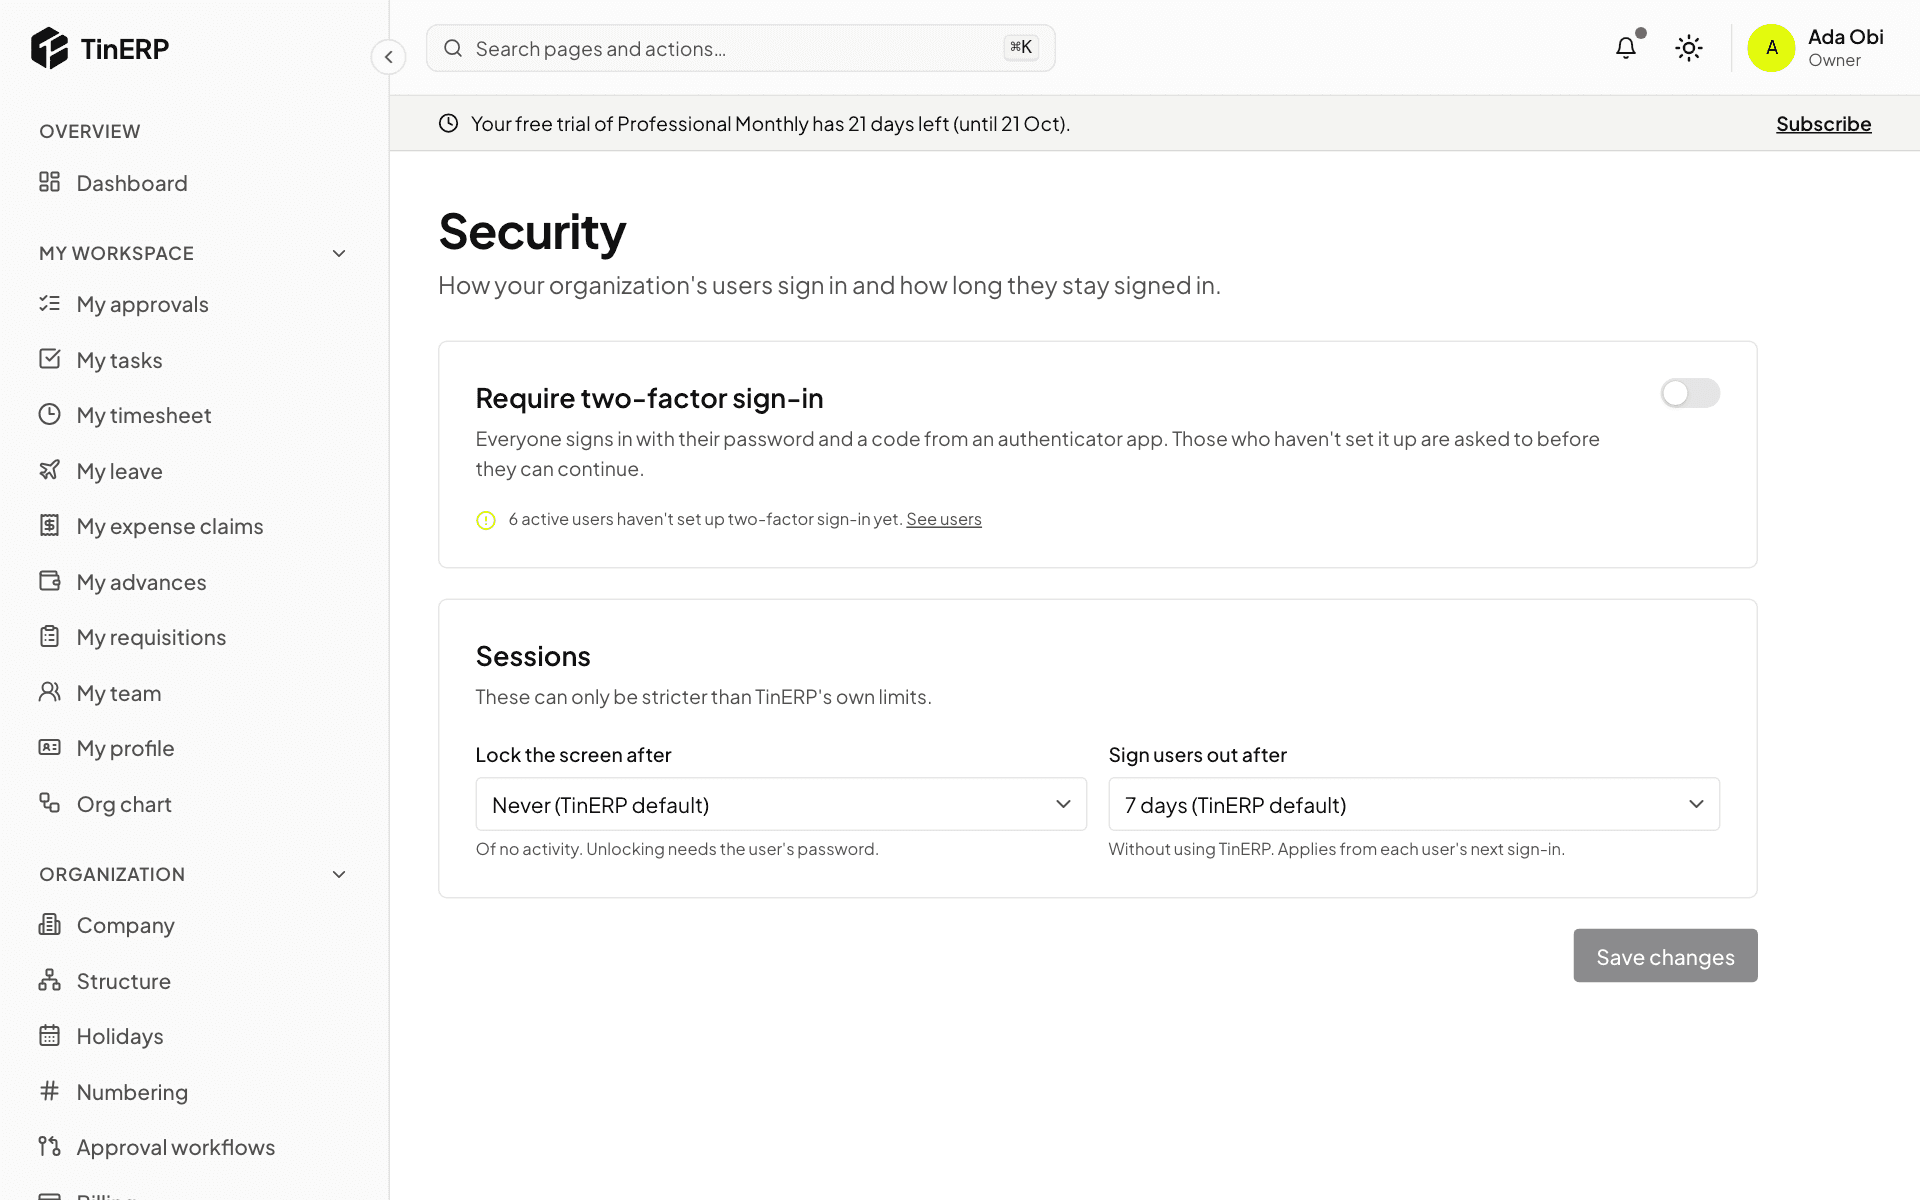
Go to Access & security → Security and turn on Require two-factor sign-in. Everyone then signs in with their password and a 6-digit code from an authenticator app. People who haven't set it up are asked to before they can continue.
Set it up on your own account first (My account). The page shows how many active users haven't set it up yet.
The Security page: Require two-factor sign-in, and the session settings
2. Choose session limits
Lock the screen after - a time with no activity, after which the screen locks until the person enters their password.
Sign users out after - a time without using TinERP. It applies from each person's next sign-in. Select Save changes.
Administrators · Owners, admins and managers · about 2 min
The audit log
TinERP records what your team does: sign-ins, changes with their old and new values, approvals and billing actions. Nobody can edit or delete the record.
1. Find what happened
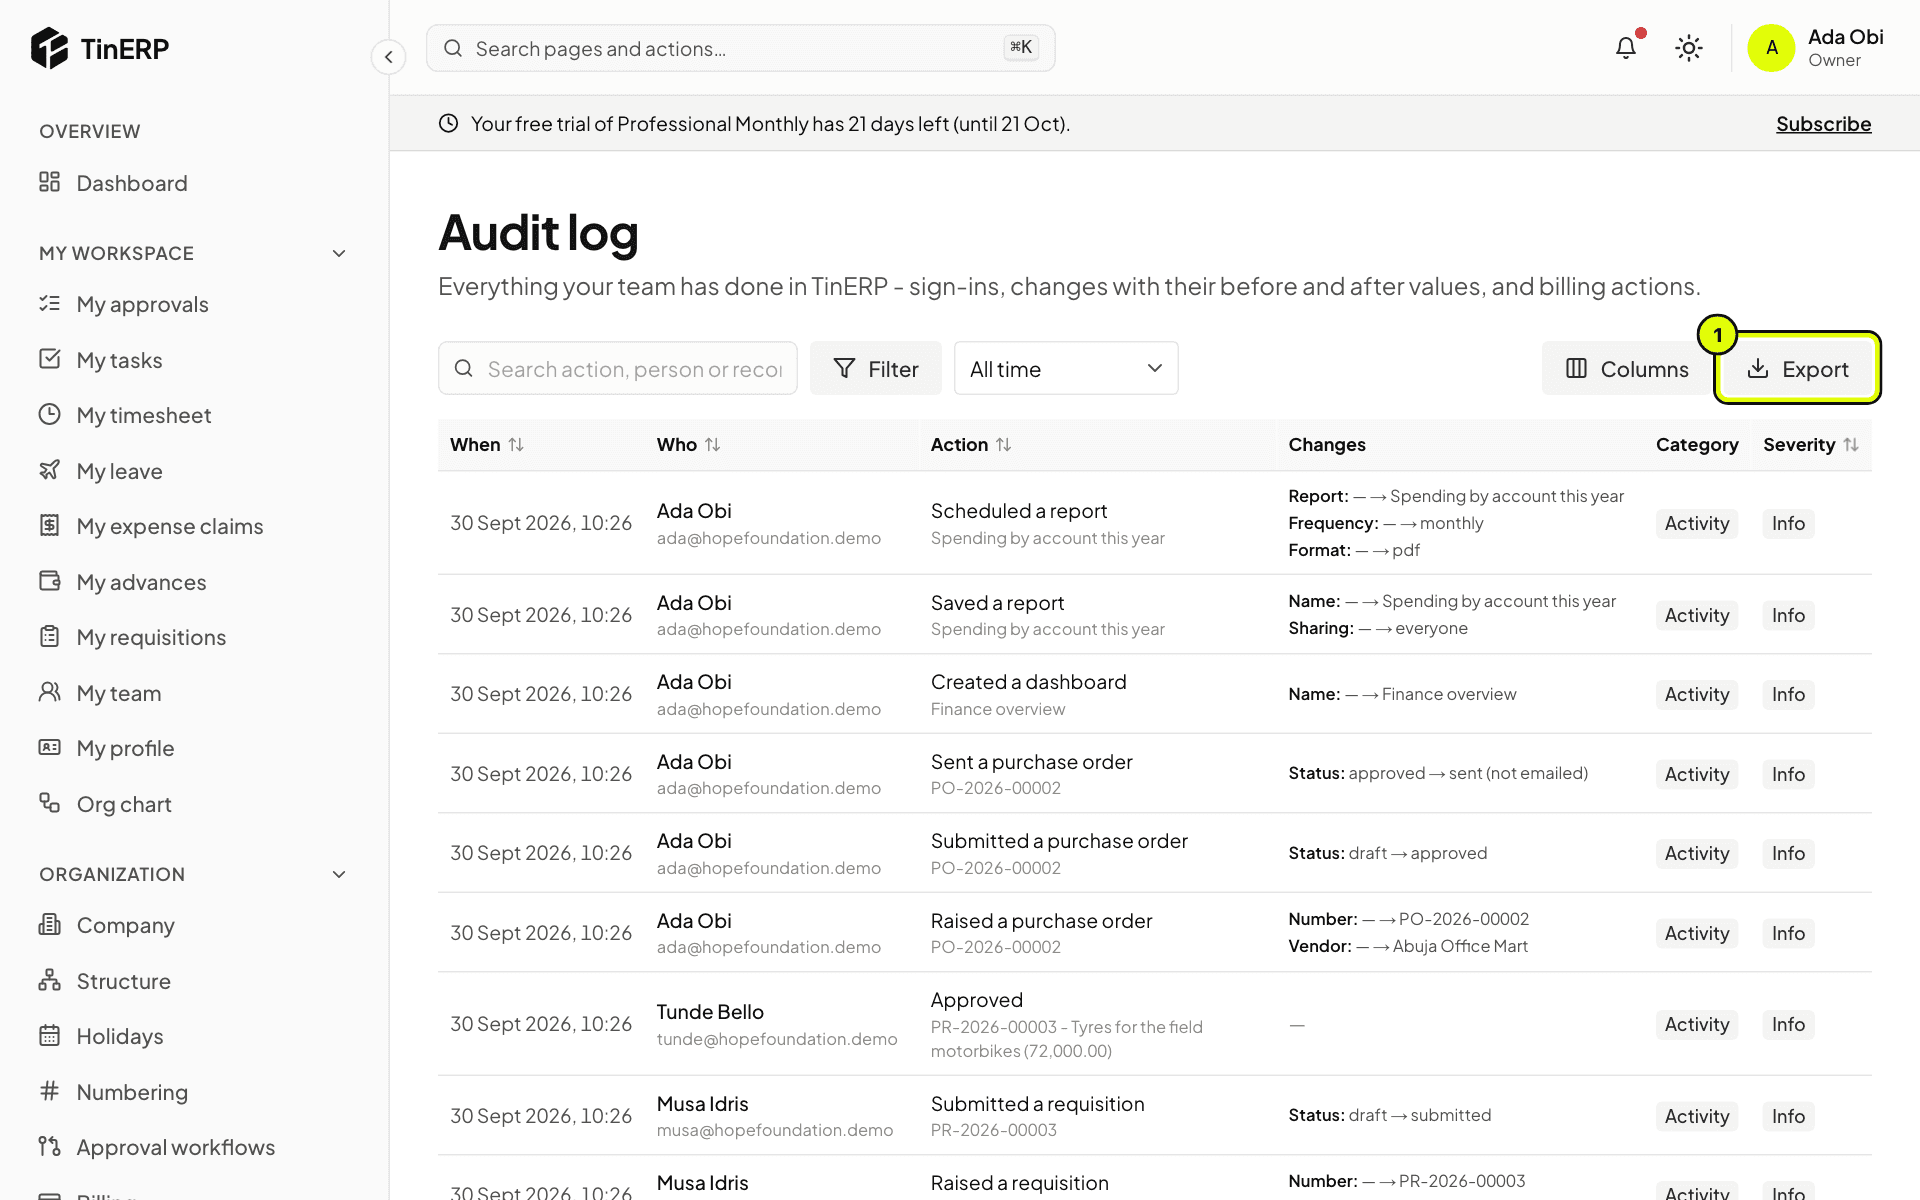
Go to Access & security → Audit log. Search for a person, an action or a record, filter by category or severity, and choose a period. Changes shows each field that changed, old → new.
Export (1) downloads what you've filtered as a CSV file - for your auditors, for example.
The Audit log with recent activity, the changes column and Export marked 1
Tip: Sensitive values - ID numbers, bank details, dates of birth - are recorded as changed, never shown.
Administrators · Owners and admins · about 3 min
Document numbers
Every numbered document has a format - employees, leave requests, projects, requisitions, purchase orders, invoices, journals and more. Set yours before you issue your first documents.
1. Change a format
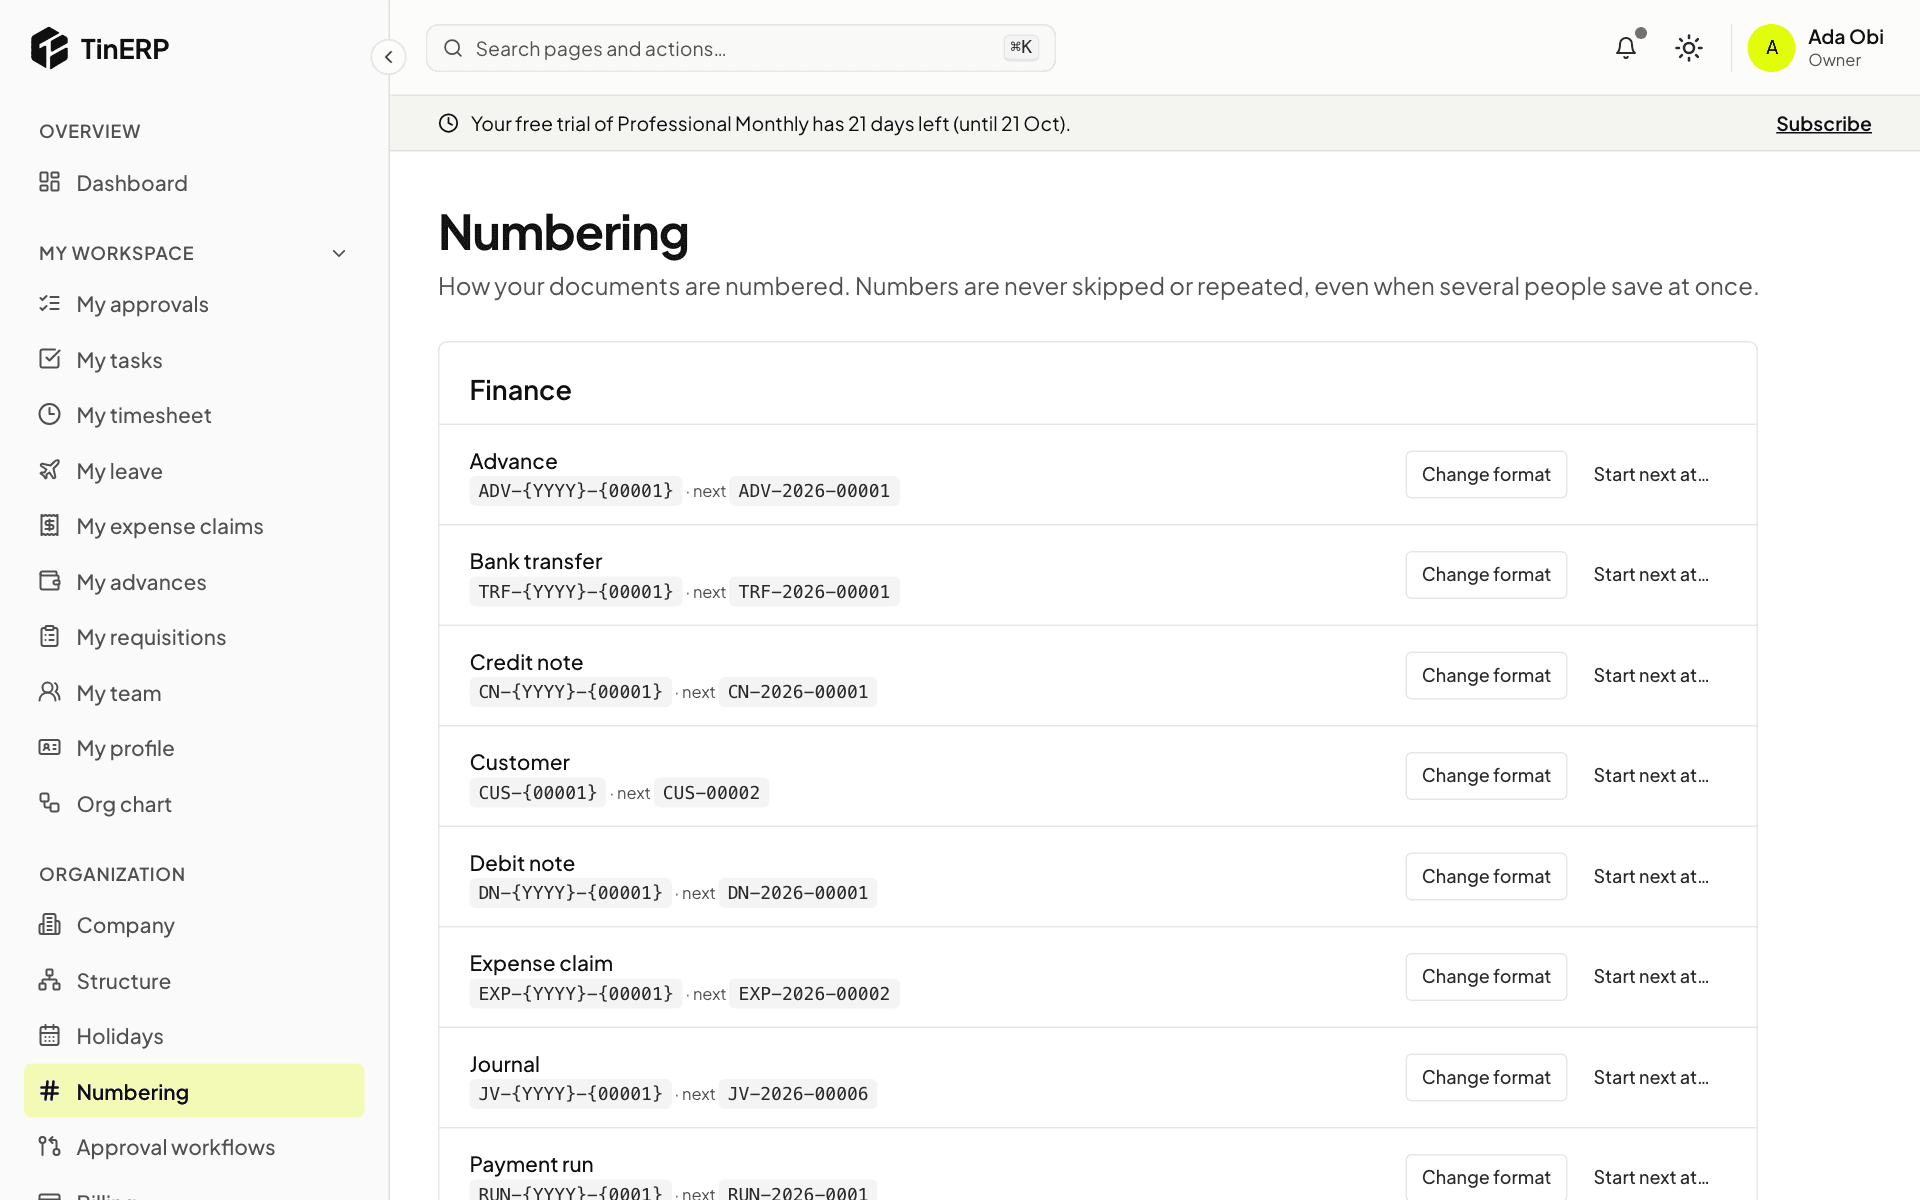
Go to Organization → Numbering. Each kind of document shows its format and the next number. Select Change format and build it from your own text and these parts: {YYYY} or {YY} for the year, {MM} the month, {FY} the financial year, {BRANCH} the branch code, and one counter such as {00001}. A preview shows the next number.
The counter starts again each year when the format includes the year, and counts separately for each branch when it includes {BRANCH}.
The Numbering page with each document's format, its next number, Change format and Start next at
2. Carry on from your old system
Select Start next at… and enter the next number - for example 1043 if your last invoice was 1042. You can only move forward, so a number is never given twice.