8 guides ready to print - choose Save as PDF in the print window for a handout. Back to the help centre
TinERP user guide
Procurement
Buyers and store keepers · From an approved requisition to an invoice approved for payment: vendors, orders, quotations, receiving and matching.
Printed 3 October 2026 · the latest version is always in the help centre online
Contents
Procurement
How Procurement works
Add and approve vendors
Categories, items and settings
Raise and send purchase orders
Get quotations
Receive deliveries
Match and approve vendor invoices
Procurement reports
Procurement · Buyers and procurement teams · about 4 min
How Procurement works
Procurement follows one chain: requisition → (quotations) → purchase order → receiving → vendor invoice → payment. Each step is done by a different person, so no one can buy, receive and pay on their own.
1. Who does what
Anyone raises a requisition in My requisitions; their line manager approves it. Buyers turn approved requisitions into orders - after getting quotations when it's worth it - and send them. Store keepers record what arrives. Accounts enter the vendor's invoice, which is matched to the order and the delivery and approved for payment. Finance pays it.
The Admin role can do all of it. Most organizations give buyers, store keepers and approvers their own roles, and TinERP keeps them apart: whoever raised an order doesn't receive it, and whoever submitted or received doesn't approve the invoice.
2. The dashboard
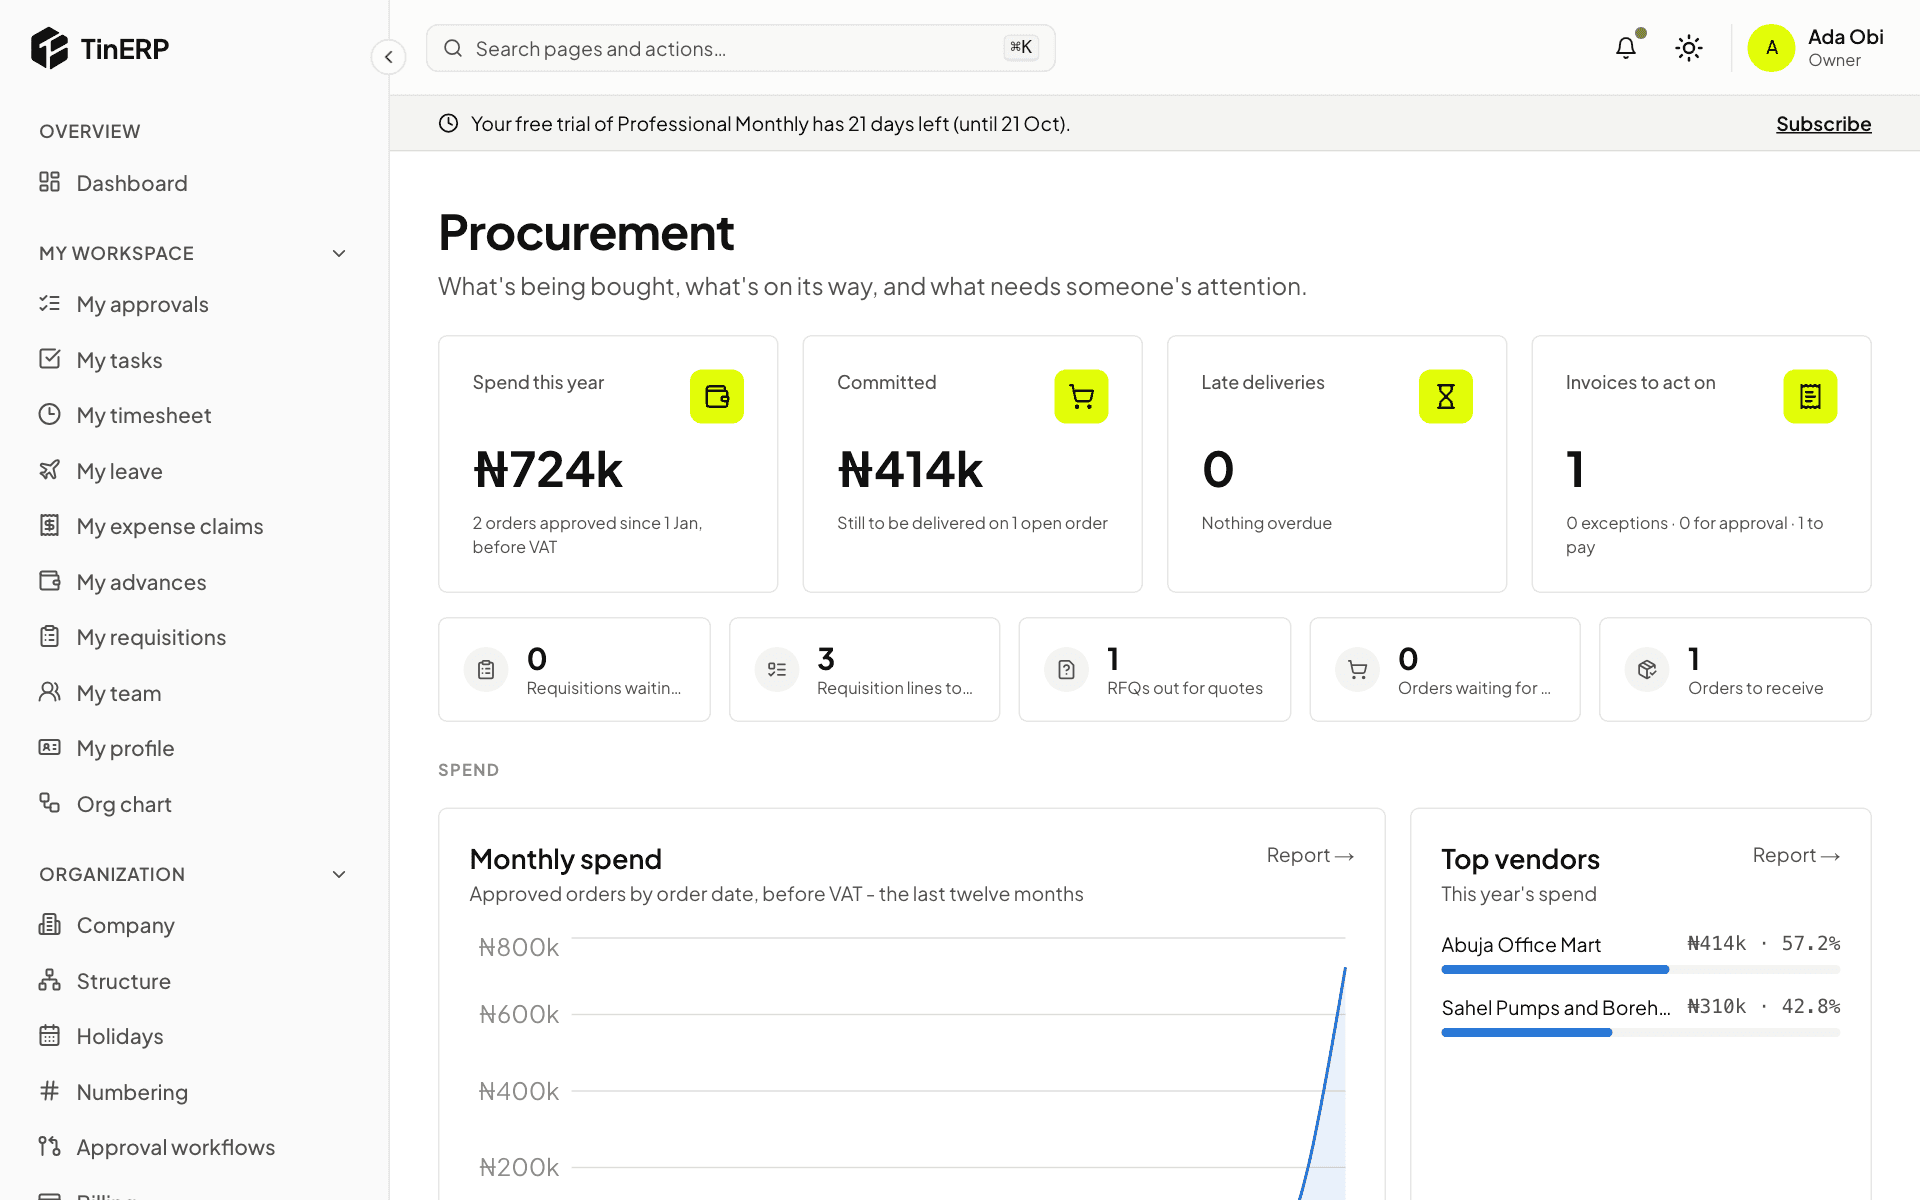
Procurement → Dashboard shows this year's spend, what's committed on open orders, late deliveries and invoices to act on, then the pipeline - requisitions waiting, lines to order, quotations out, orders to approve and to receive. Select any figure for its list.
The Procurement dashboard: spend, committed, late deliveries, invoices to act on and the pipeline
Questions
Staff can't see the Procurement menu.
That's by design: everyone raises requisitions from My workspace → My requisitions. The Procurement menu is for the people who run buying.
Procurement · Buyers and procurement managers · about 4 min
Add and approve vendors
Orders only go to approved vendors. Each vendor is checked once - who they are, their documents and their bank details - and approved by someone other than whoever added them.
1. Add a vendor
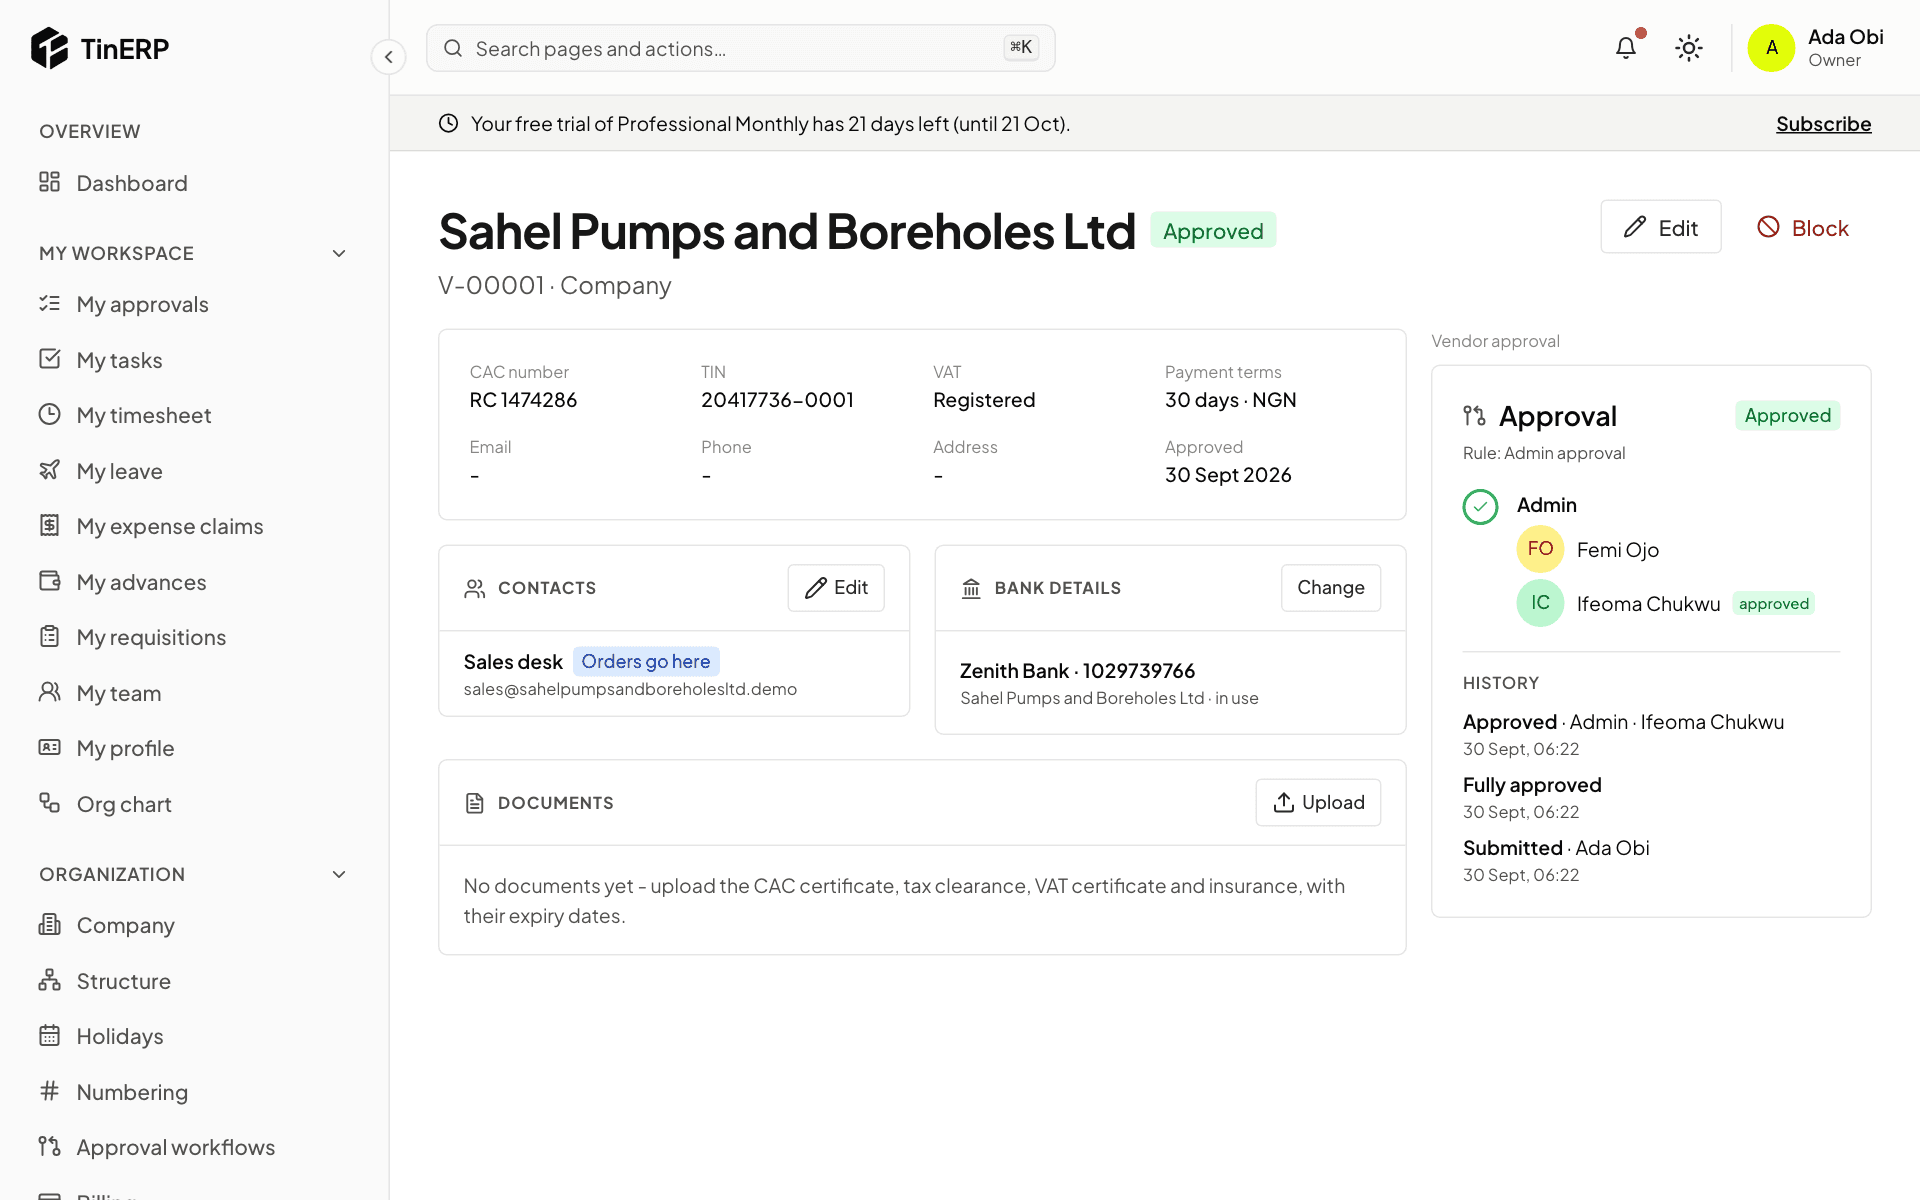
Go to Procurement → Vendors and add one: company or individual, their names, CAC number and TIN (the same twice is refused - it's almost always a duplicate), VAT registration, payment terms, what they supply, contacts - mark one Orders go here - and their bank details.
Under Documents, upload the CAC certificate, tax clearance, VAT certificate and insurance, with their expiry dates. You're told before one expires; an expired document stops new orders.
An approved vendor: details, contacts, bank details, documents and the approval
2. Get it approved
A new vendor is prospective. Select Submit for approval; someone else approves it (by default an Admin). Then orders can go to them.
3. Changing bank details
For an approved vendor, Change on their bank details makes a new account that waits for approval by someone other than you - the old one stays in use until then, and payments to them are held. Check new details with the vendor by phone, on a number you already have.
Tip: A request to change a vendor's bank account, especially by email, is a common fraud. Always confirm it another way.
4. Block a vendor
Block (with a reason) stops new orders to a vendor - for repeated late deliveries, say. Unblock when it's resolved.
Procurement · Procurement managers · about 4 min
Categories, items and settings
Set these up once. Categories and items make requisitions quicker and reports useful; the settings are your purchasing policy.
1. Spend categories and items
Procurement → Spend categories groups what you buy, two levels deep (IT → Hardware). With Finance, each category has an expense account: that's where its spending posts, and how orders are checked against the budget.
Finance chooses the account, not procurement. Anyone who can Manage the chart of accounts sees the Spend categories page too, with an account picker on each row, and is notified when a new category needs one. Buyers see Not mapped yet until then - they don't need any Finance permission. A vendor invoice in an unmapped category can't go to payables until it's mapped, or the vendor has a default expense account in Finance → Vendors.
Procurement → Items is your catalogue - code, name, goods or service, unit, category, preferred vendor and a guide price that orders keep up to date. People pick items when they raise requisitions.
2. Your purchasing rules
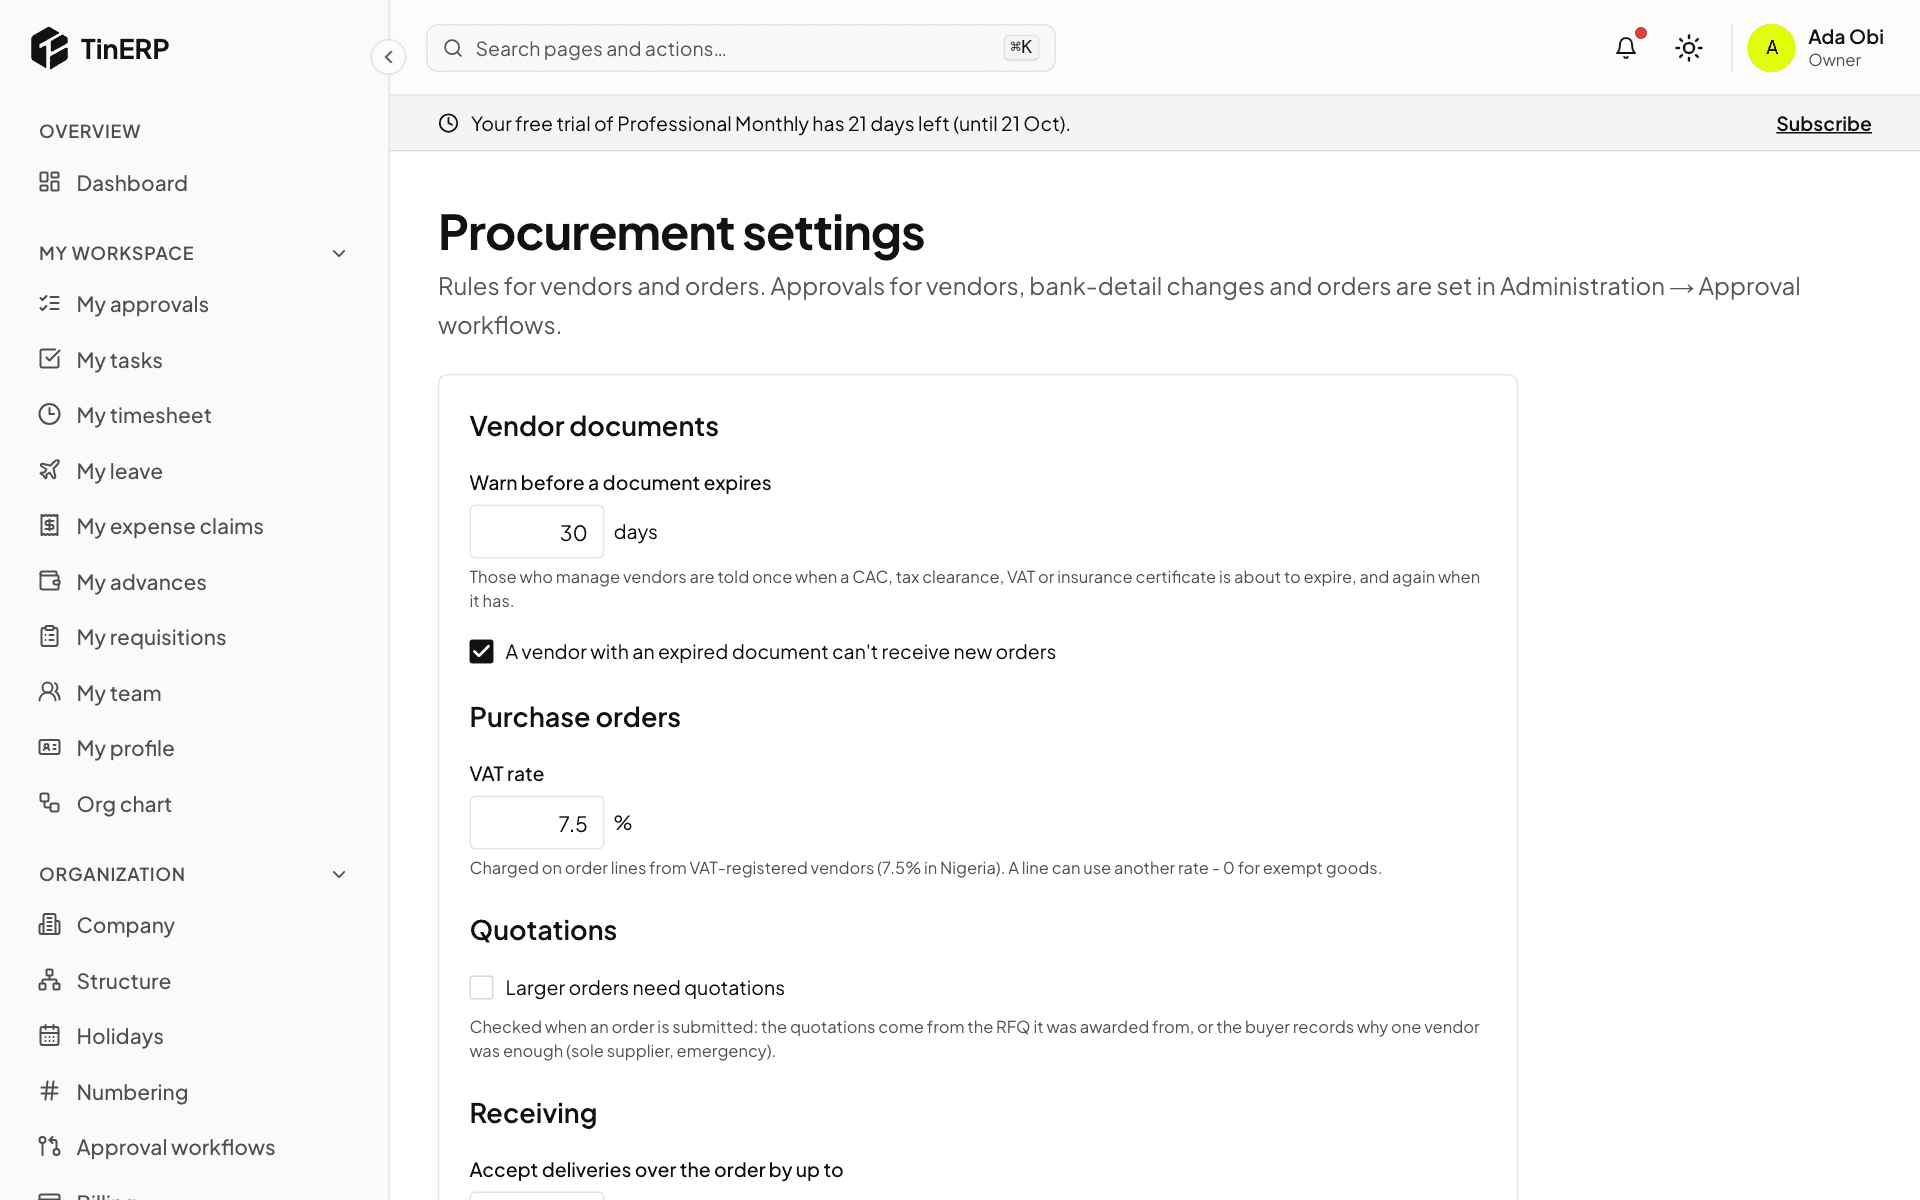
Procurement → Procurement settings: when to warn about vendor documents expiring; the VAT rate on orders; Larger orders need quotations - orders over an amount need a number of quotations, or a sole-supplier reason; how much over the order a delivery may be; whether whoever raised an order may also receive it; and how far above the order price an invoice may be and still match.
Procurement settings: vendor documents, orders, quotations, receiving and vendor invoices
Procurement · Buyers · about 5 min
Raise and send purchase orders
Approved requisition lines wait in To order until someone orders them. One order can take lines from many requisitions, as long as one vendor supplies them.
1. Pick what to order
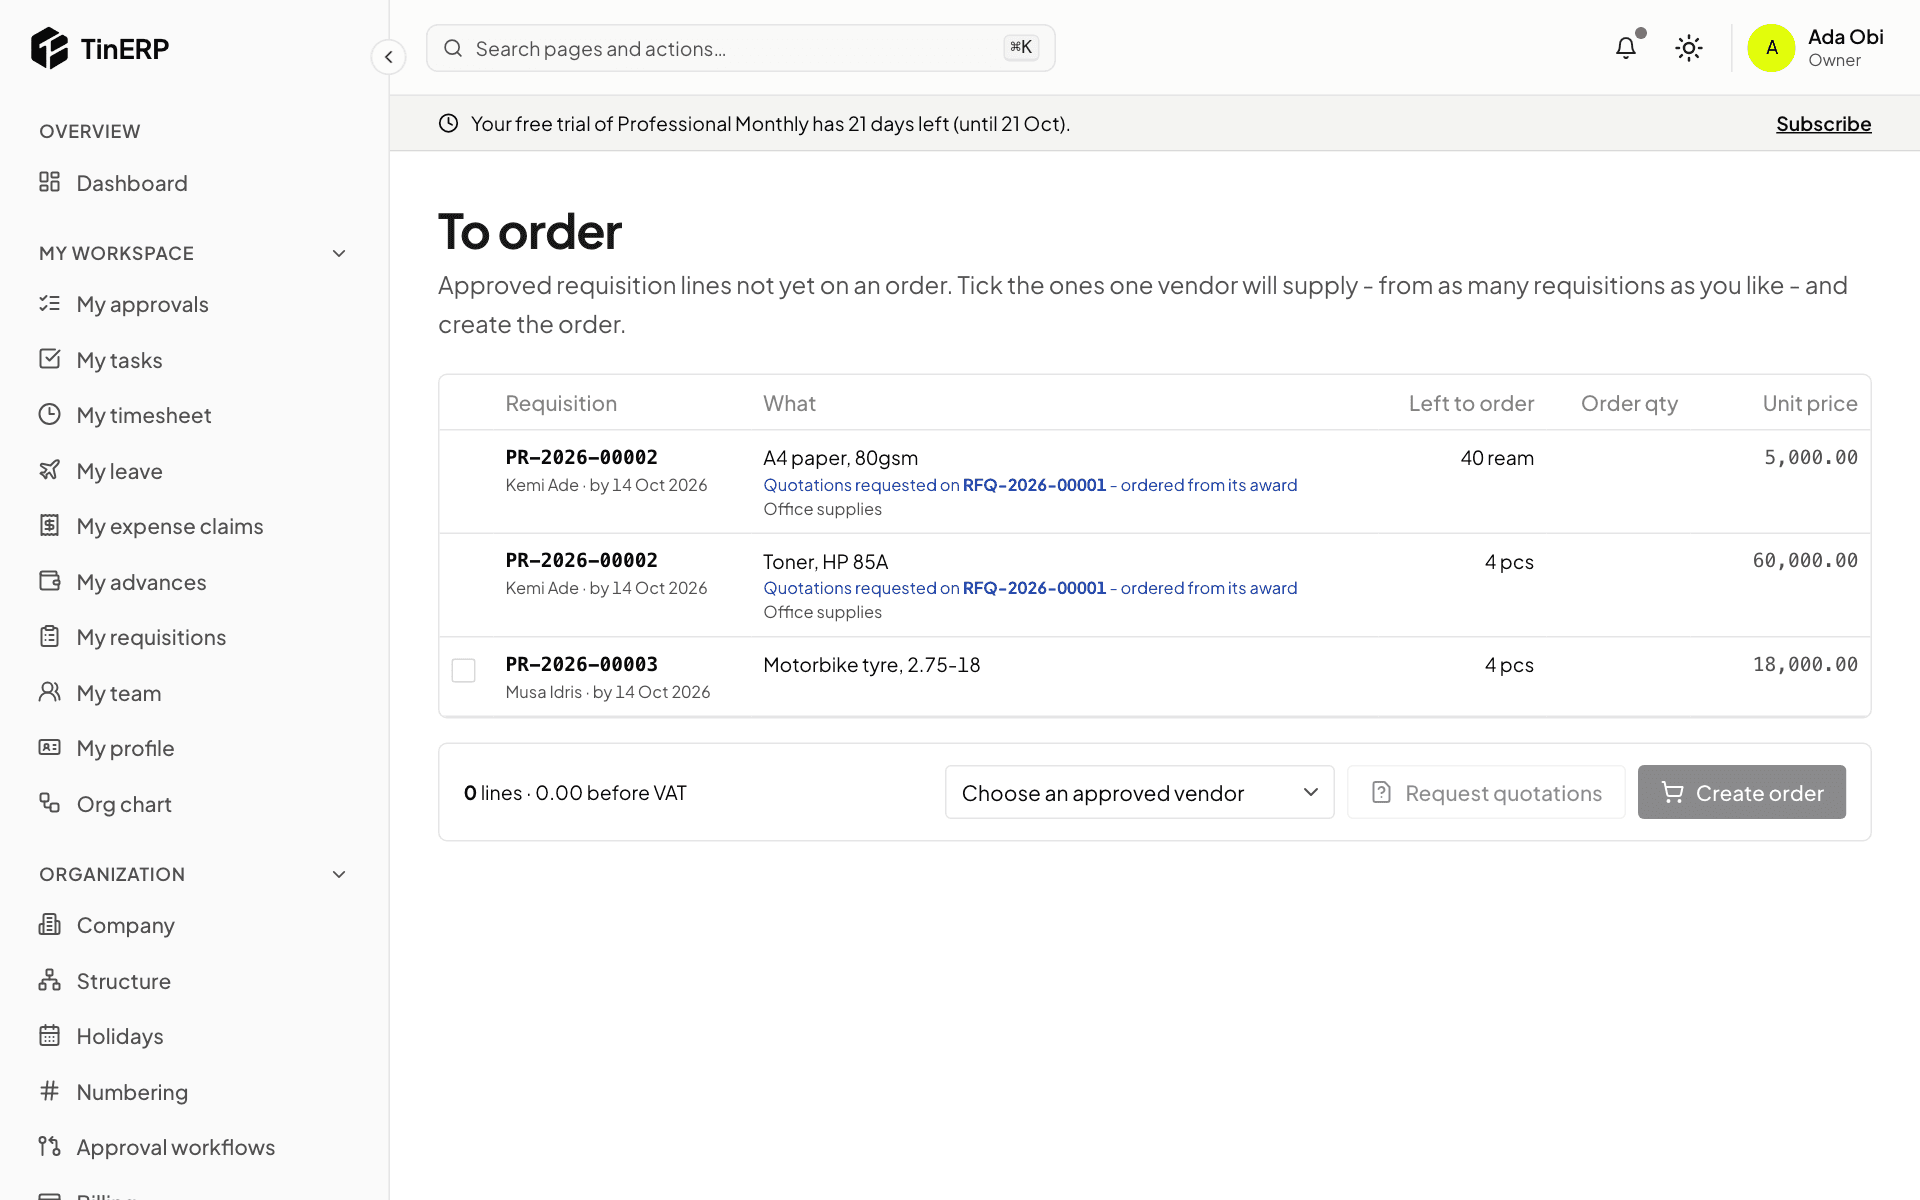
Go to Procurement → To order. Tick the lines one vendor will supply, change the quantity or price if needed, choose an approved vendor, and select Create order - a draft order is made. Or select Request quotations first (see Get quotations).
Lines already out for quotations show it, and are ordered from the award.
To order: paper and toner out for quotations, and motorbike tyres waiting to be ordered
2. Check and submit it
Open the draft order: the vendor, delivery date and place, terms, and the lines with their VAT. Edit anything, then Submit for approval. By default, orders over ₦1,000,000 need an Admin's approval; smaller ones are approved at once. Your organization can change this.
With Finance, the order is checked against the budget when submitted.
3. Send it to the vendor
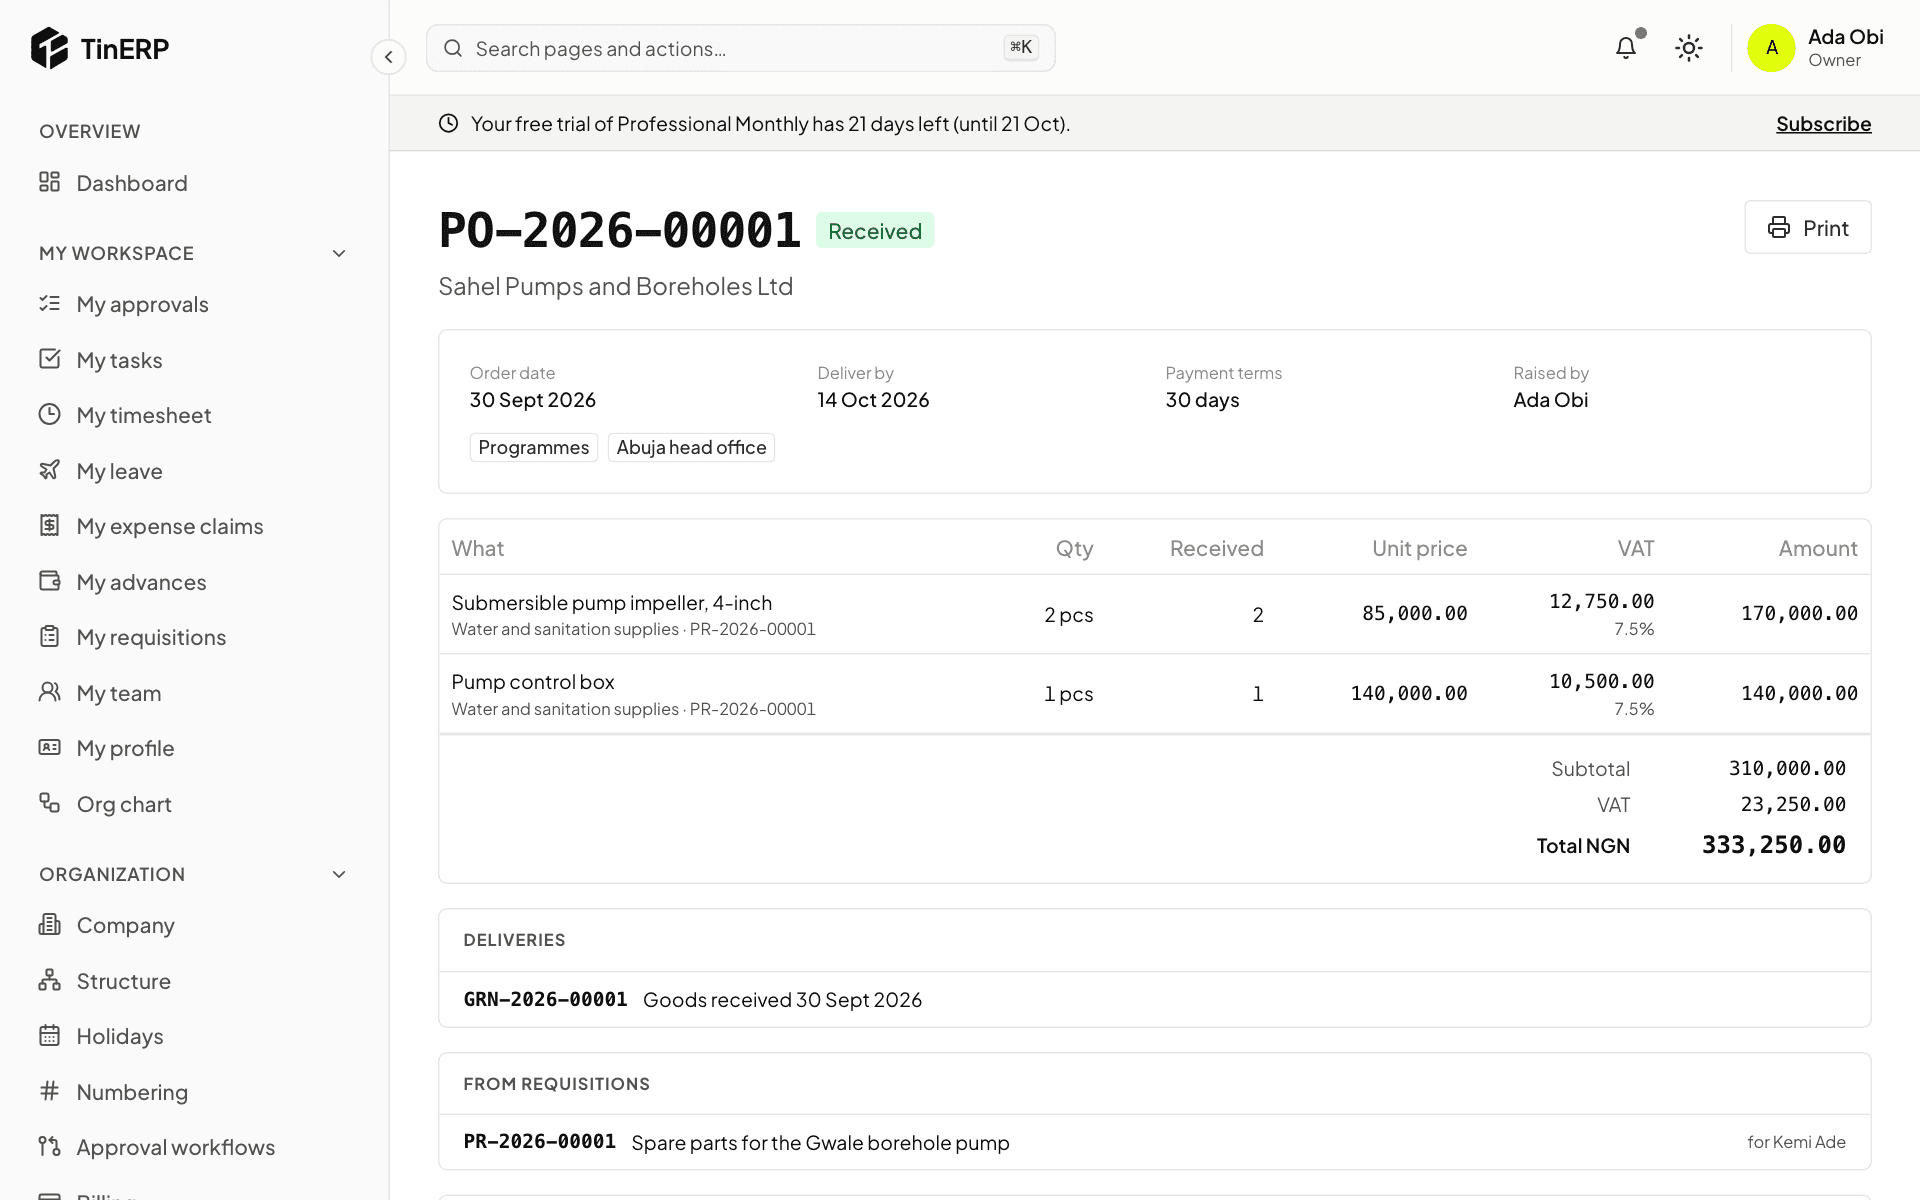
Once approved, send it: it's emailed to the vendor's orders contact, or mark it sent if you gave it to them another way. Print gives a copy on your letterhead to print or save as PDF. Whoever raised the requisition is told.
A purchase order from a requisition, received in full, with its approval and delivery
4. Change, cancel or close
Revise an approved order that hasn't been received (with a reason) - the old version is kept, and it's approved again only if the total goes up. Cancel order frees its requisition lines to order again. Close a part-received order when nothing more is coming.
Procurement · Buyers · about 5 min
Get quotations
A request for quotation (RFQ) asks several vendors to price the same lines. Your organization may require quotations above an amount.
1. Send the request
In To order, tick the lines and select Request quotations - or start one in Procurement → Quotations (RFQs). Give it a deadline, where to deliver, any instructions, and the vendors to invite. You can also set how quotations are weighed: price, delivery and quality.
Send to vendors emails each one. Vendors without an email are marked, so you can send it another way.
2. Record the quotations
As each quotation arrives, record it against the vendor: their reference, the date, how long it's valid, delivery days, payment terms, and a price for each line. Mark a vendor Won't quote if they decline.
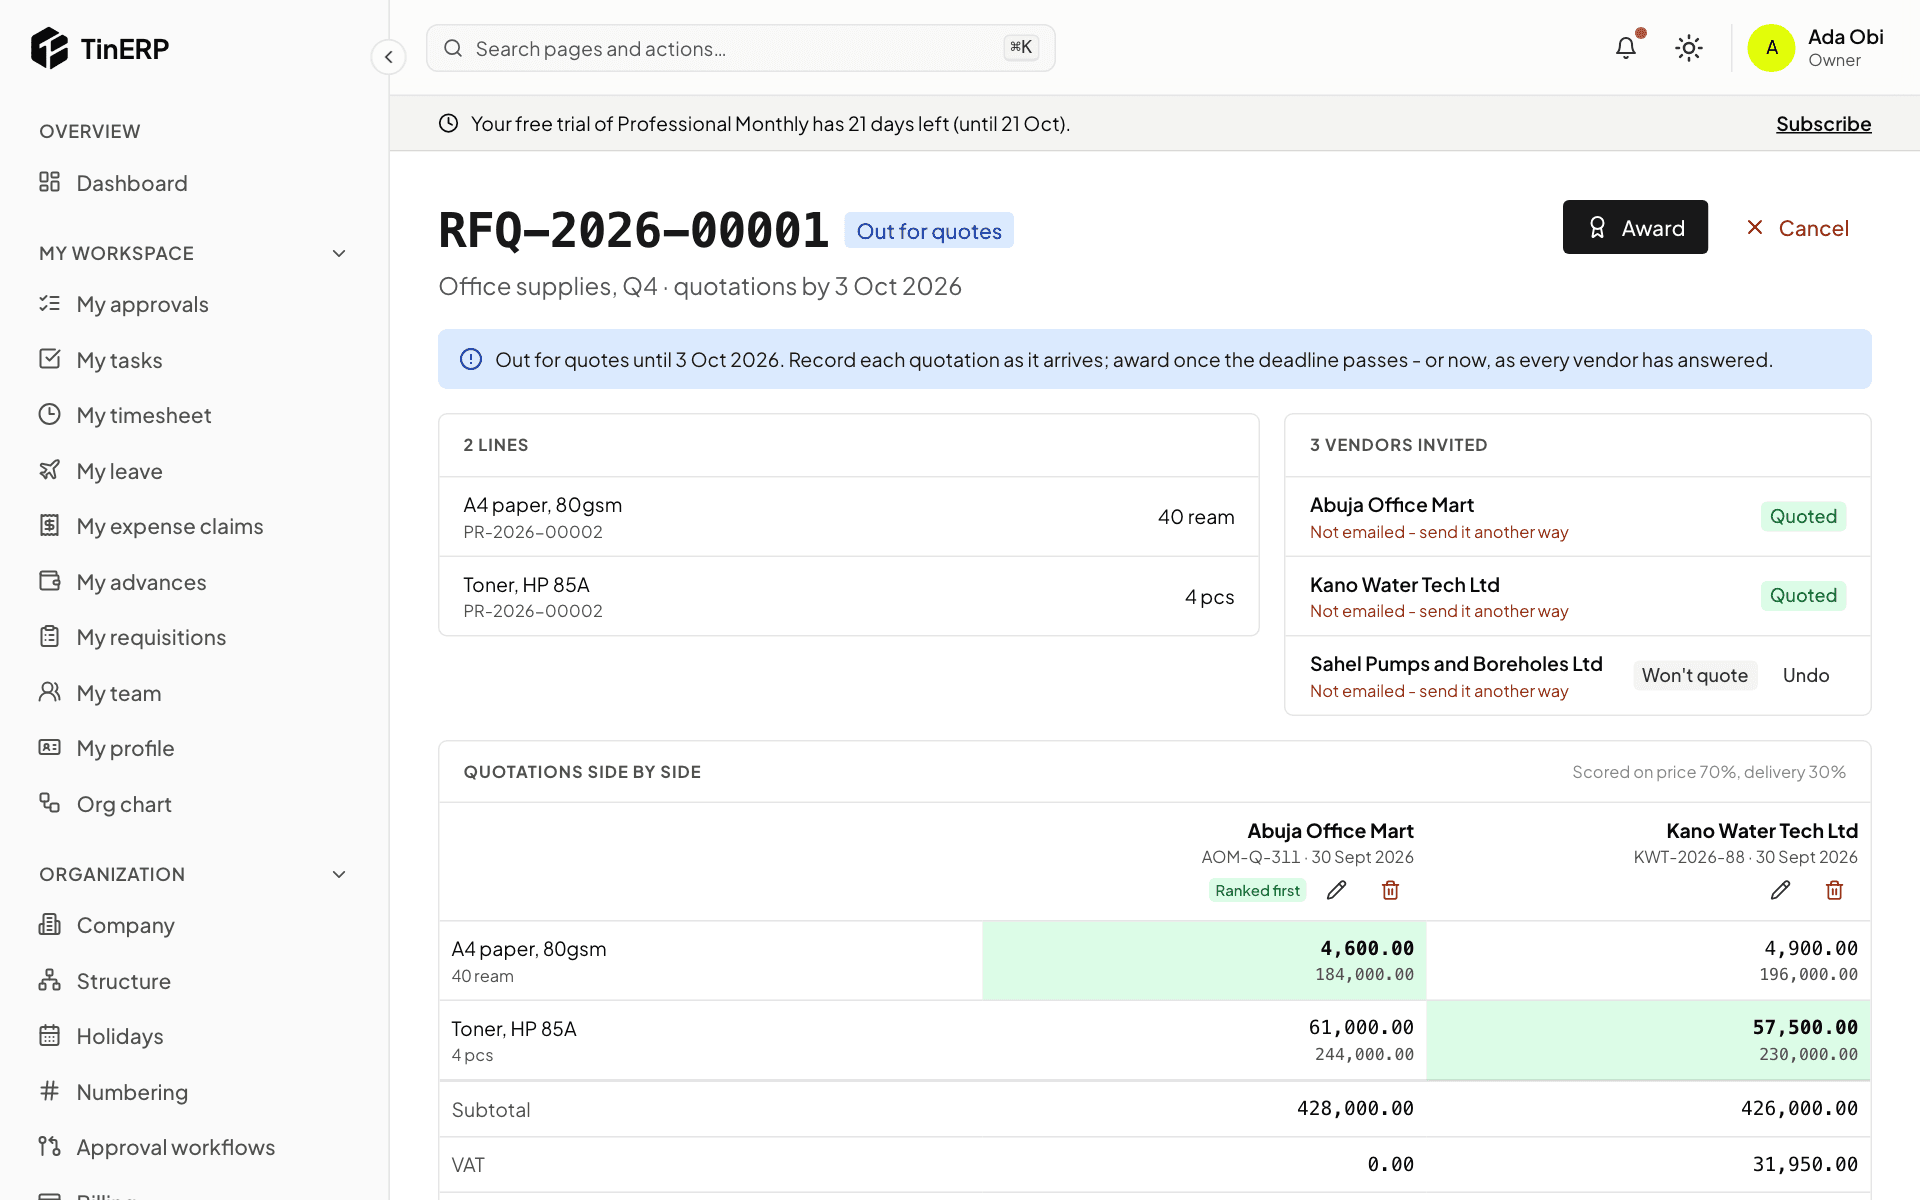
Quotations side by side compares them, with the lowest price for each line highlighted and the best overall Ranked first.
An RFQ with two quotations side by side and one vendor that won't quote
3. Award it
Once the deadline has passed - or every vendor has answered - select Award. Each line goes to one quotation; you can split lines between vendors. A line that doesn't go to its lowest price needs a reason. Award and create orders makes one draft order per vendor, at the quoted prices.
Procurement · Store keepers · about 3 min
Receive deliveries
Recording deliveries is what lets an invoice be matched: the vendor is paid for what actually arrived.
1. Receive a delivery
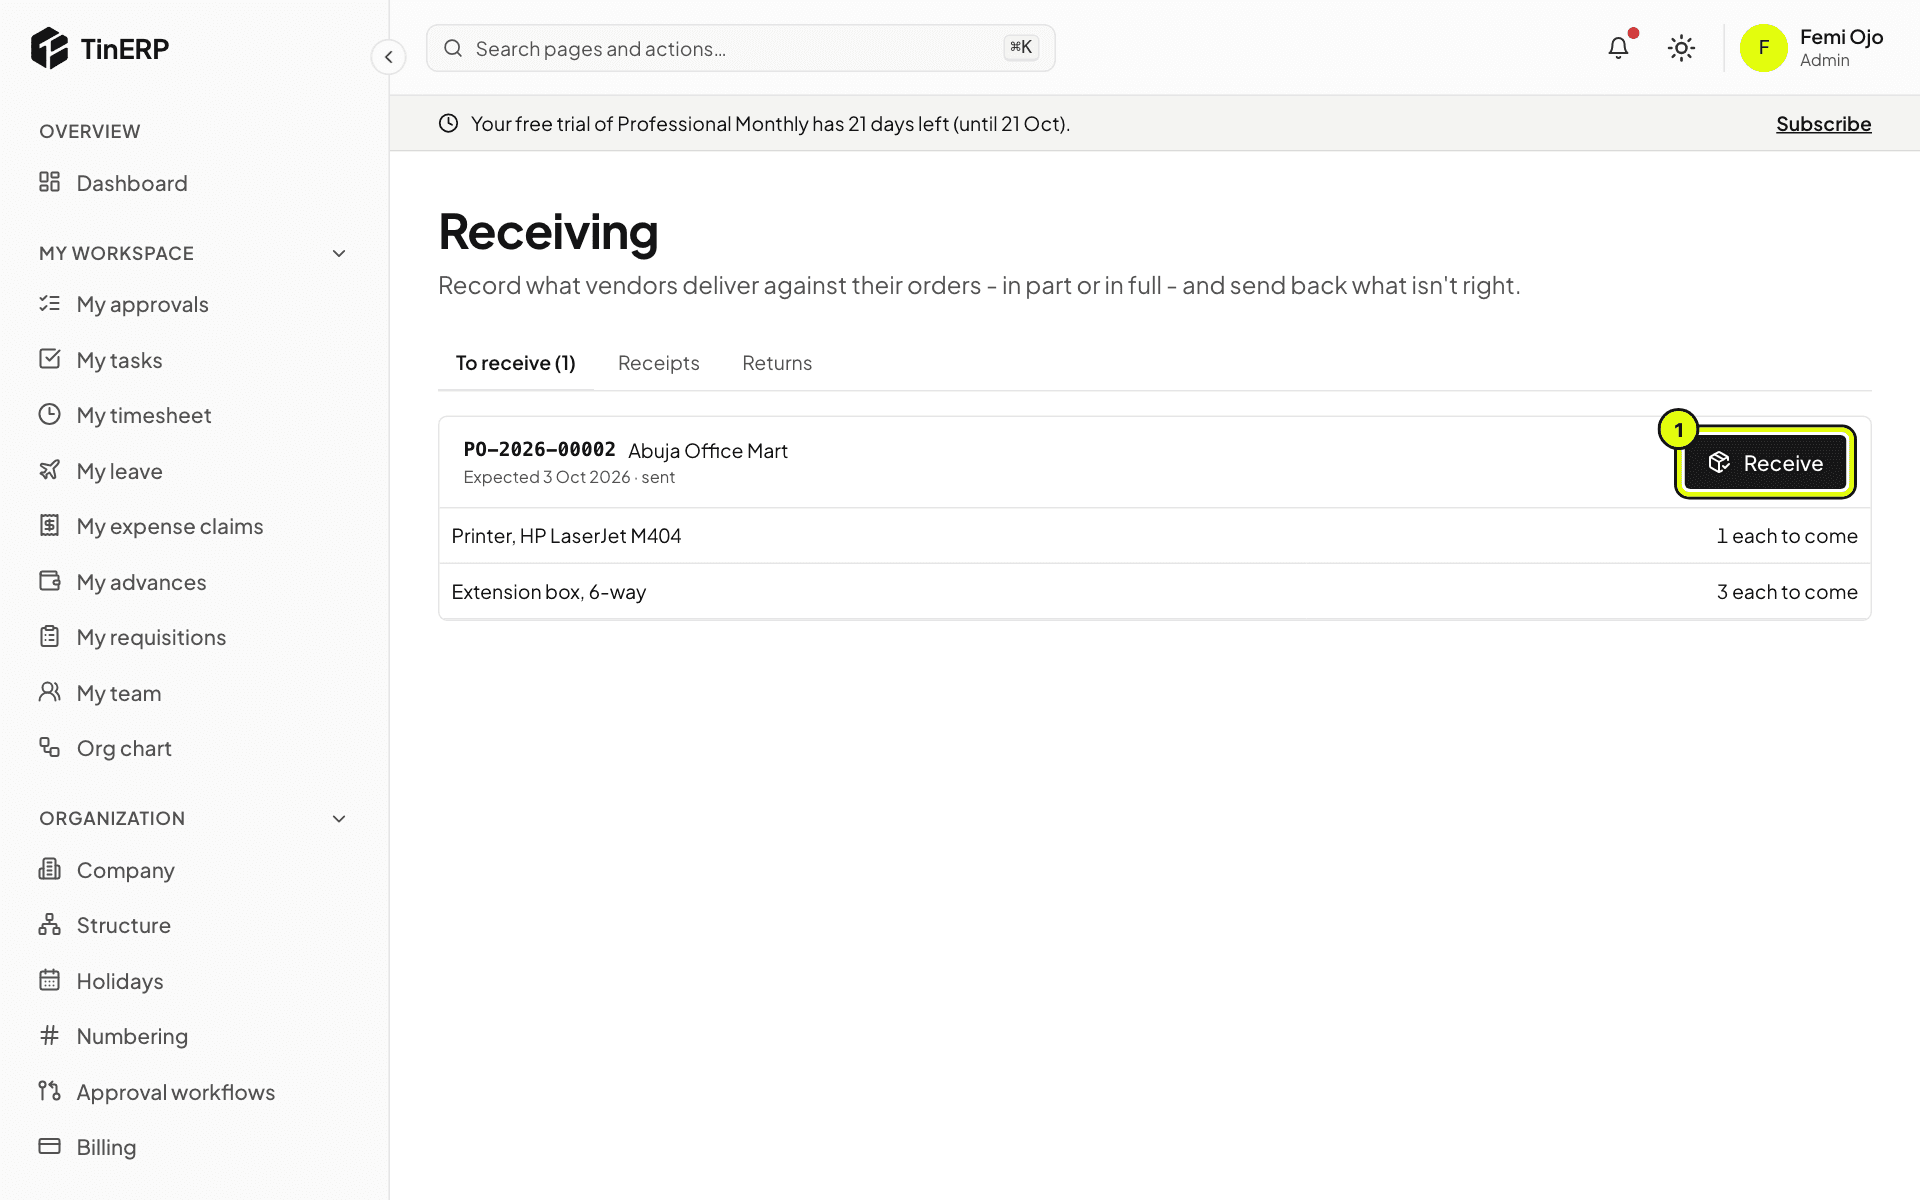
Go to Procurement → Receiving. To receive lists sent orders with what's still to come; late ones are marked. Select Receive: the date, the vendor's delivery note, and what arrived on each line (everything outstanding to start with - change it for a part delivery). For services, record a service confirmation instead.
Whoever raised the order can't receive it, unless your organization allows it.
Receiving: an order from Abuja Office Mart waiting, with Receive
2. Send back what isn't right
From a receipt, record a return: the quantities and why. They come off what's received, so the order expects them again, and the vendor's credit note can settle them later.
Procurement · Accounts and procurement · about 5 min
Match and approve vendor invoices
The three-way match compares the invoice with the order and the delivery: nobody pays for more than was received, or at a higher price than agreed.
1. Enter the invoice
Open the order and select Enter invoice, or go to Procurement → Vendor invoices. Enter their invoice number (the same one twice is refused), the dates, and what each line bills - it starts from what's been received and not yet invoiced. Save and match.
2. Check the match
Each line is checked: the quantity against what was received, the price against the order (within your tolerance, 2% by default). A line outside either is an exception, with the reason shown - invoiced 45, but only 40 received.
Correct it, or someone with the permission to override chooses Accept the difference with a reason, which stays on the invoice.
3. Approve it for payment
Select Submit for payment. By default an Admin approves - never whoever submitted it or received the goods, and not while a change to the vendor's bank details is waiting.
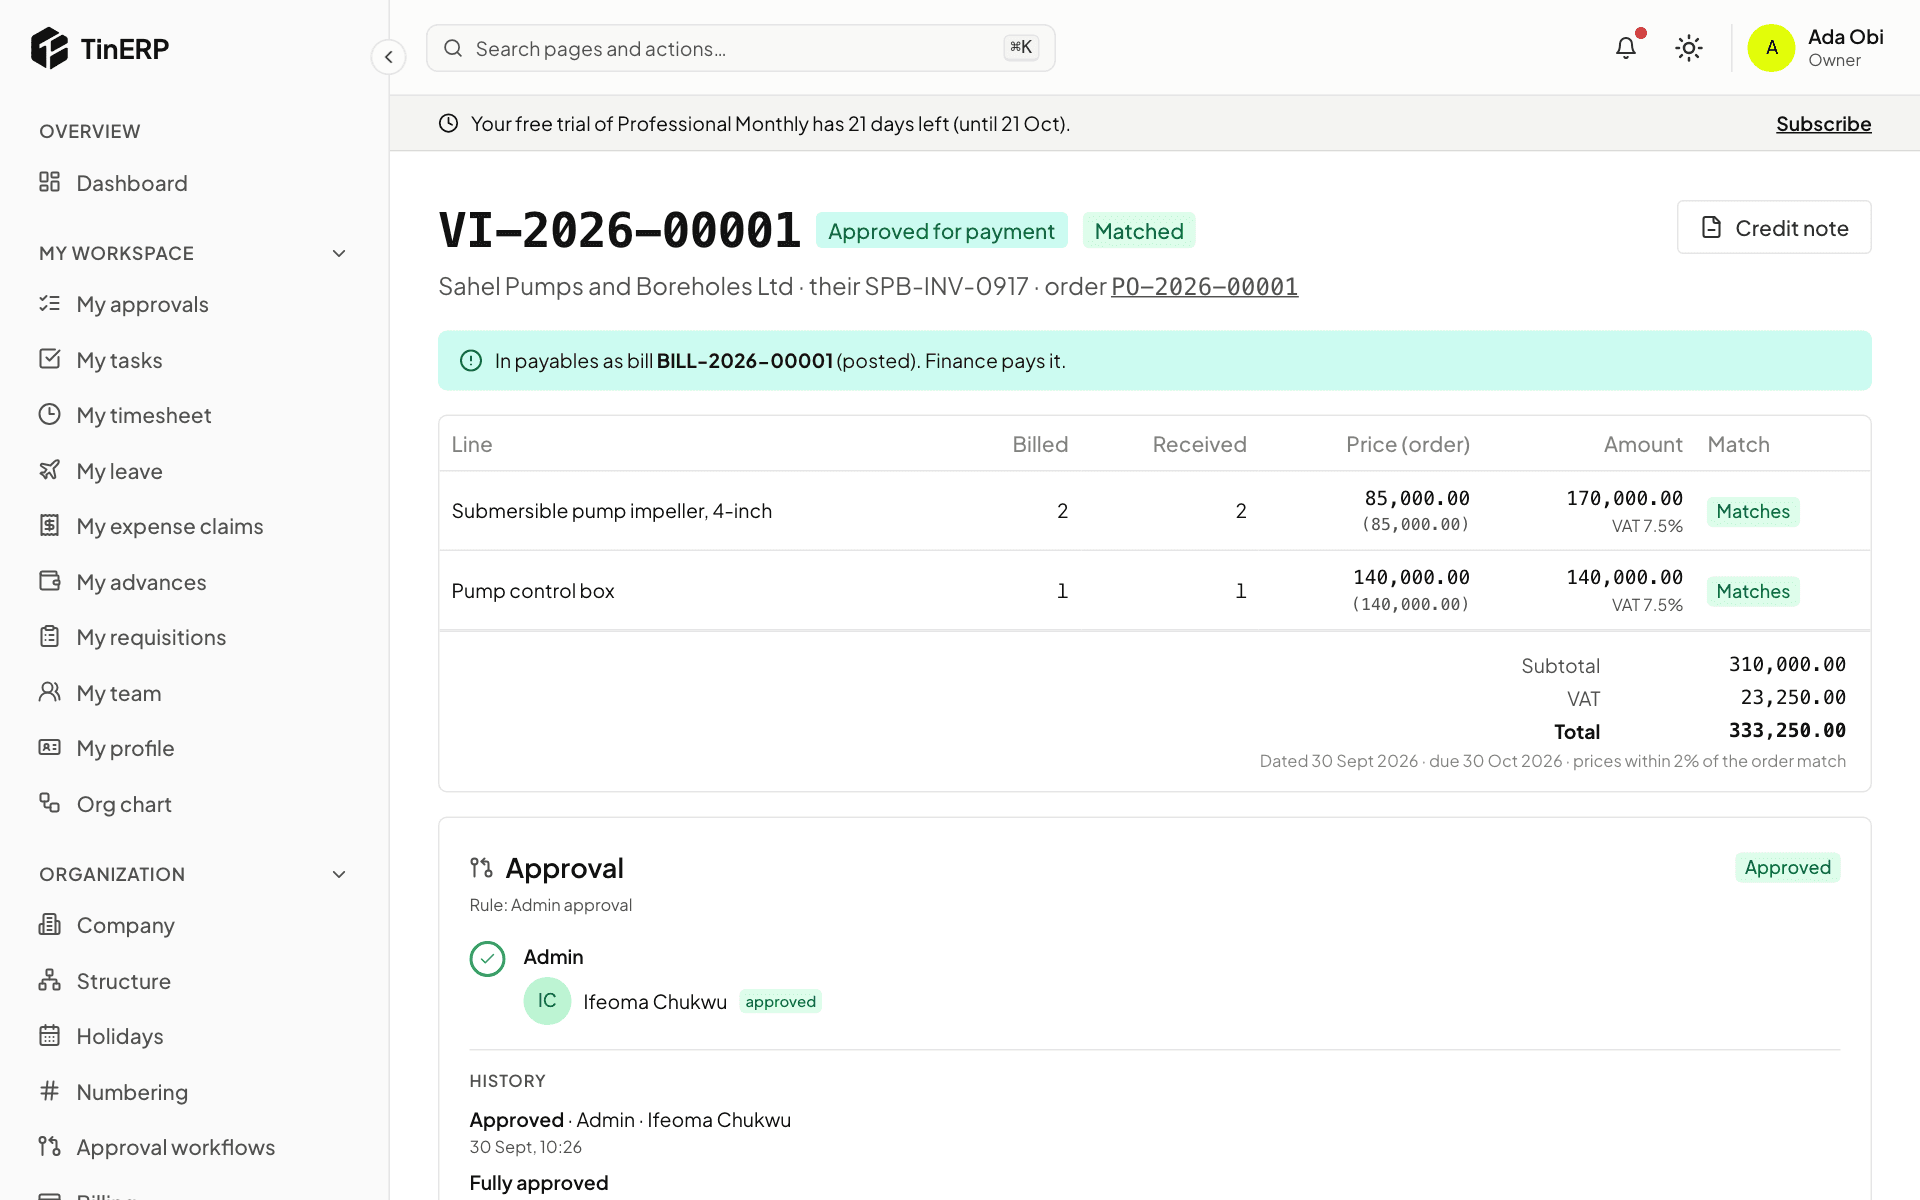
With Finance, an approved invoice becomes a posted bill in Finance → Bills, and Finance pays it; the invoice shows when it's paid. Without Finance, record the payment on the invoice.
A vendor invoice approved for payment and matched, now a bill in payables
4. Credit notes
When the vendor credits you - for a return, say - record their Credit note against the invoice, linked to the return. What's owed goes down; with Finance, a debit note is posted on the bill.
Procurement · Procurement managers · about 3 min
Procurement reports
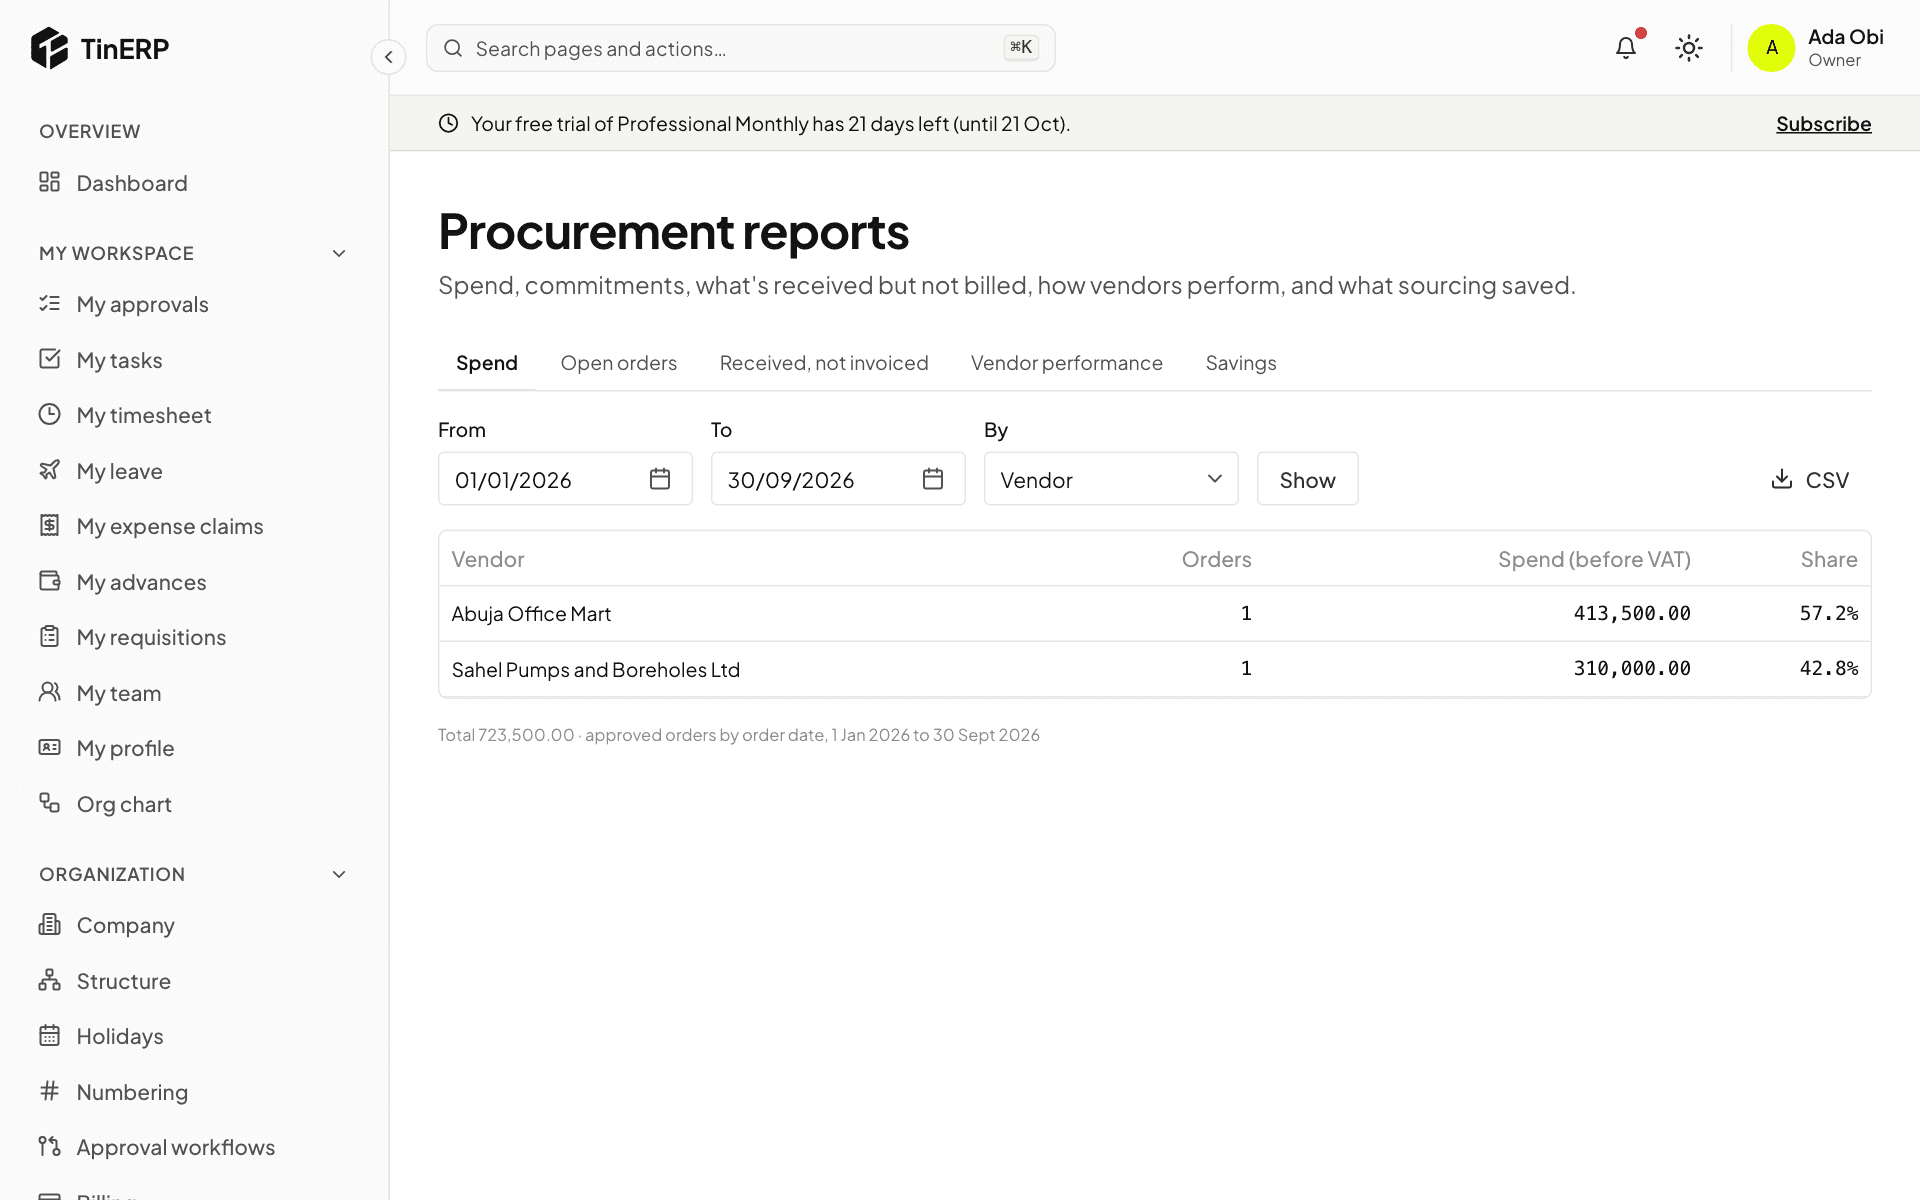
Procurement → Reports has five reports, each with CSV export.
1. The reports
Spend - approved orders before VAT, by vendor, category or department, for any dates. Open orders - what's still to come, how much is received, and days late. Received, not invoiced - delivered but not yet billed: what Finance accrues at month end.
Vendor performance - on-time delivery, average delay, returns, invoice exceptions and price differences. Savings - what each award saved against the average and lowest quotations, and orders against requesters' estimates.