
Set up your organization
Do these steps in order: each one prepares something the next ones use. You can stop at any point and come back - everything is saved as you go, and the Get started checklist on your dashboard shows what's left. Setup is free: if you'd like help, our team will do it with you.
- 1
Create your account
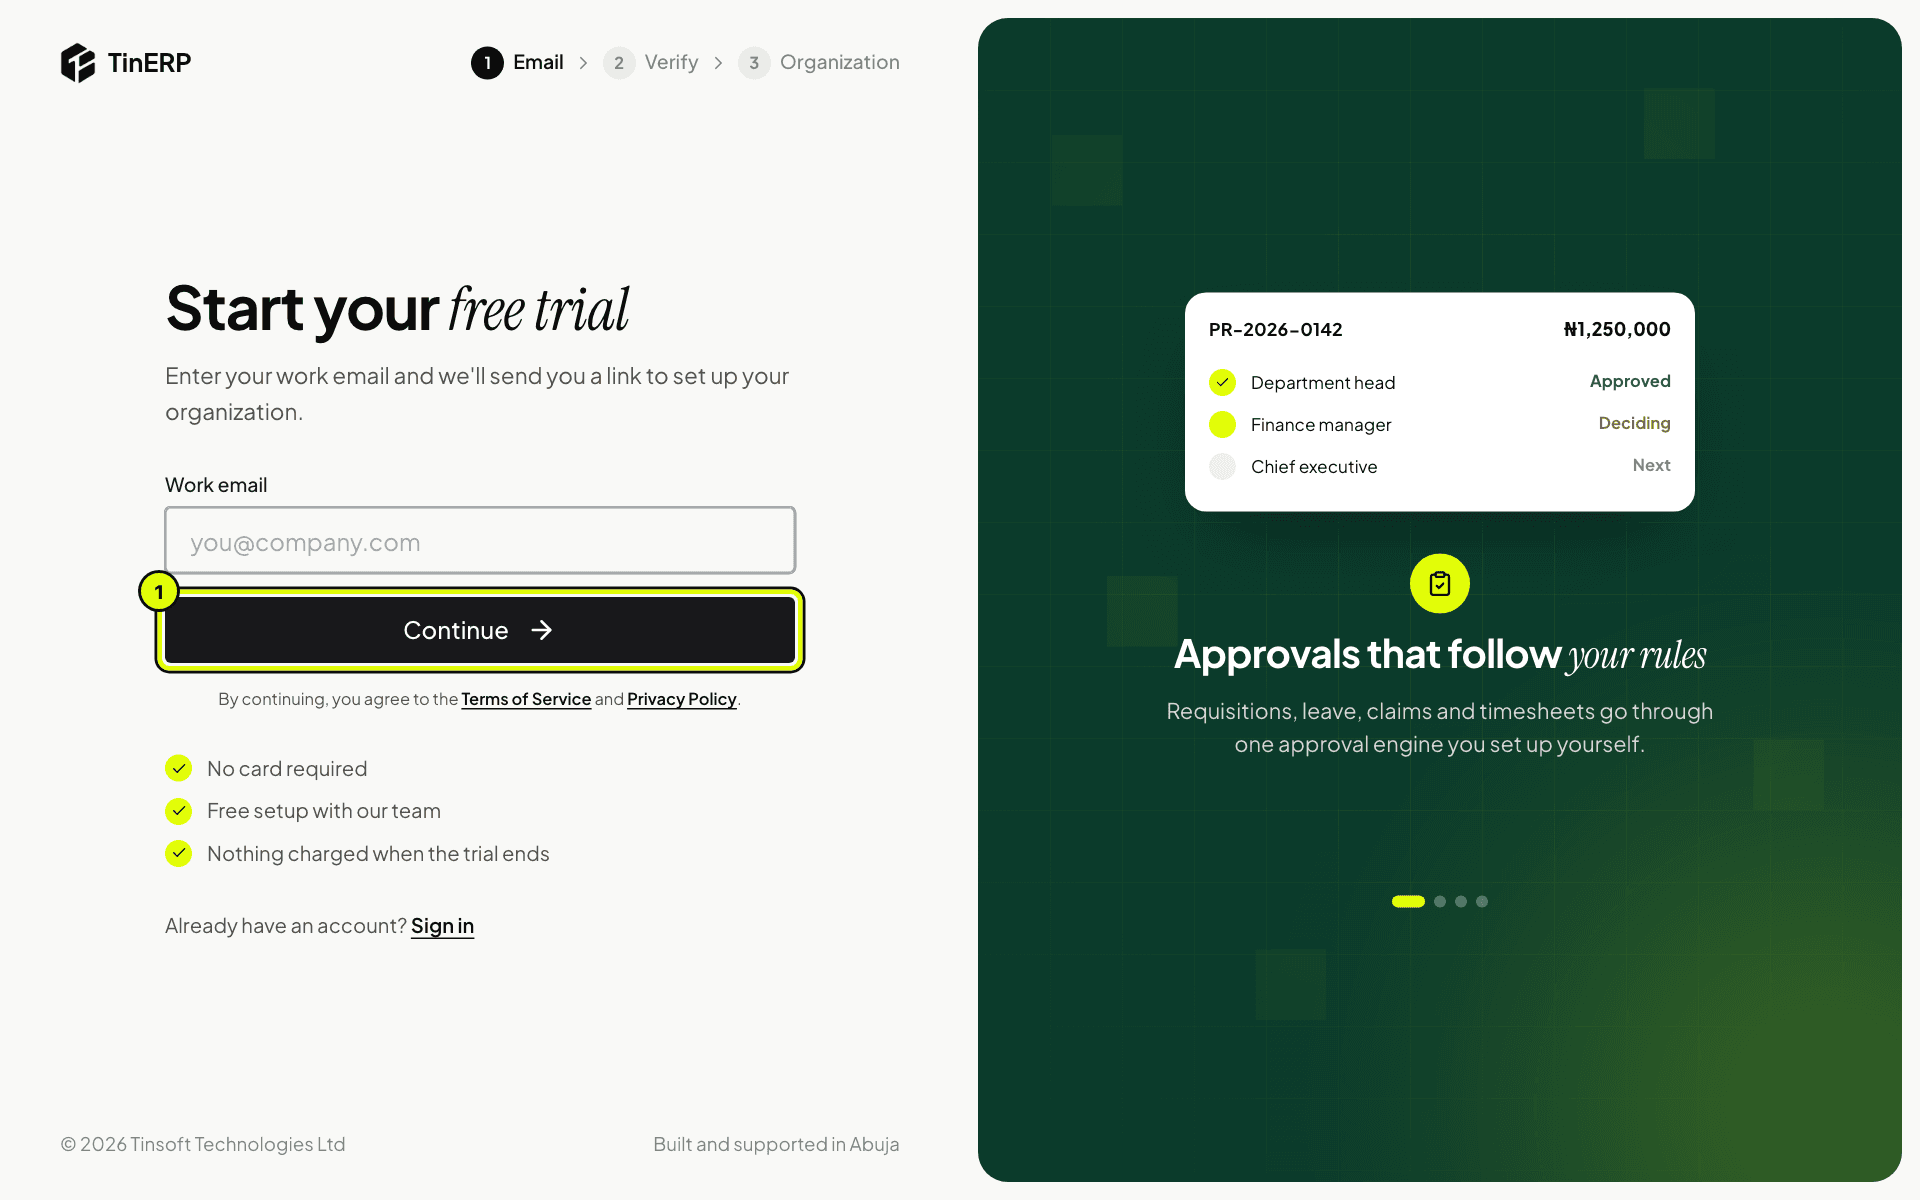
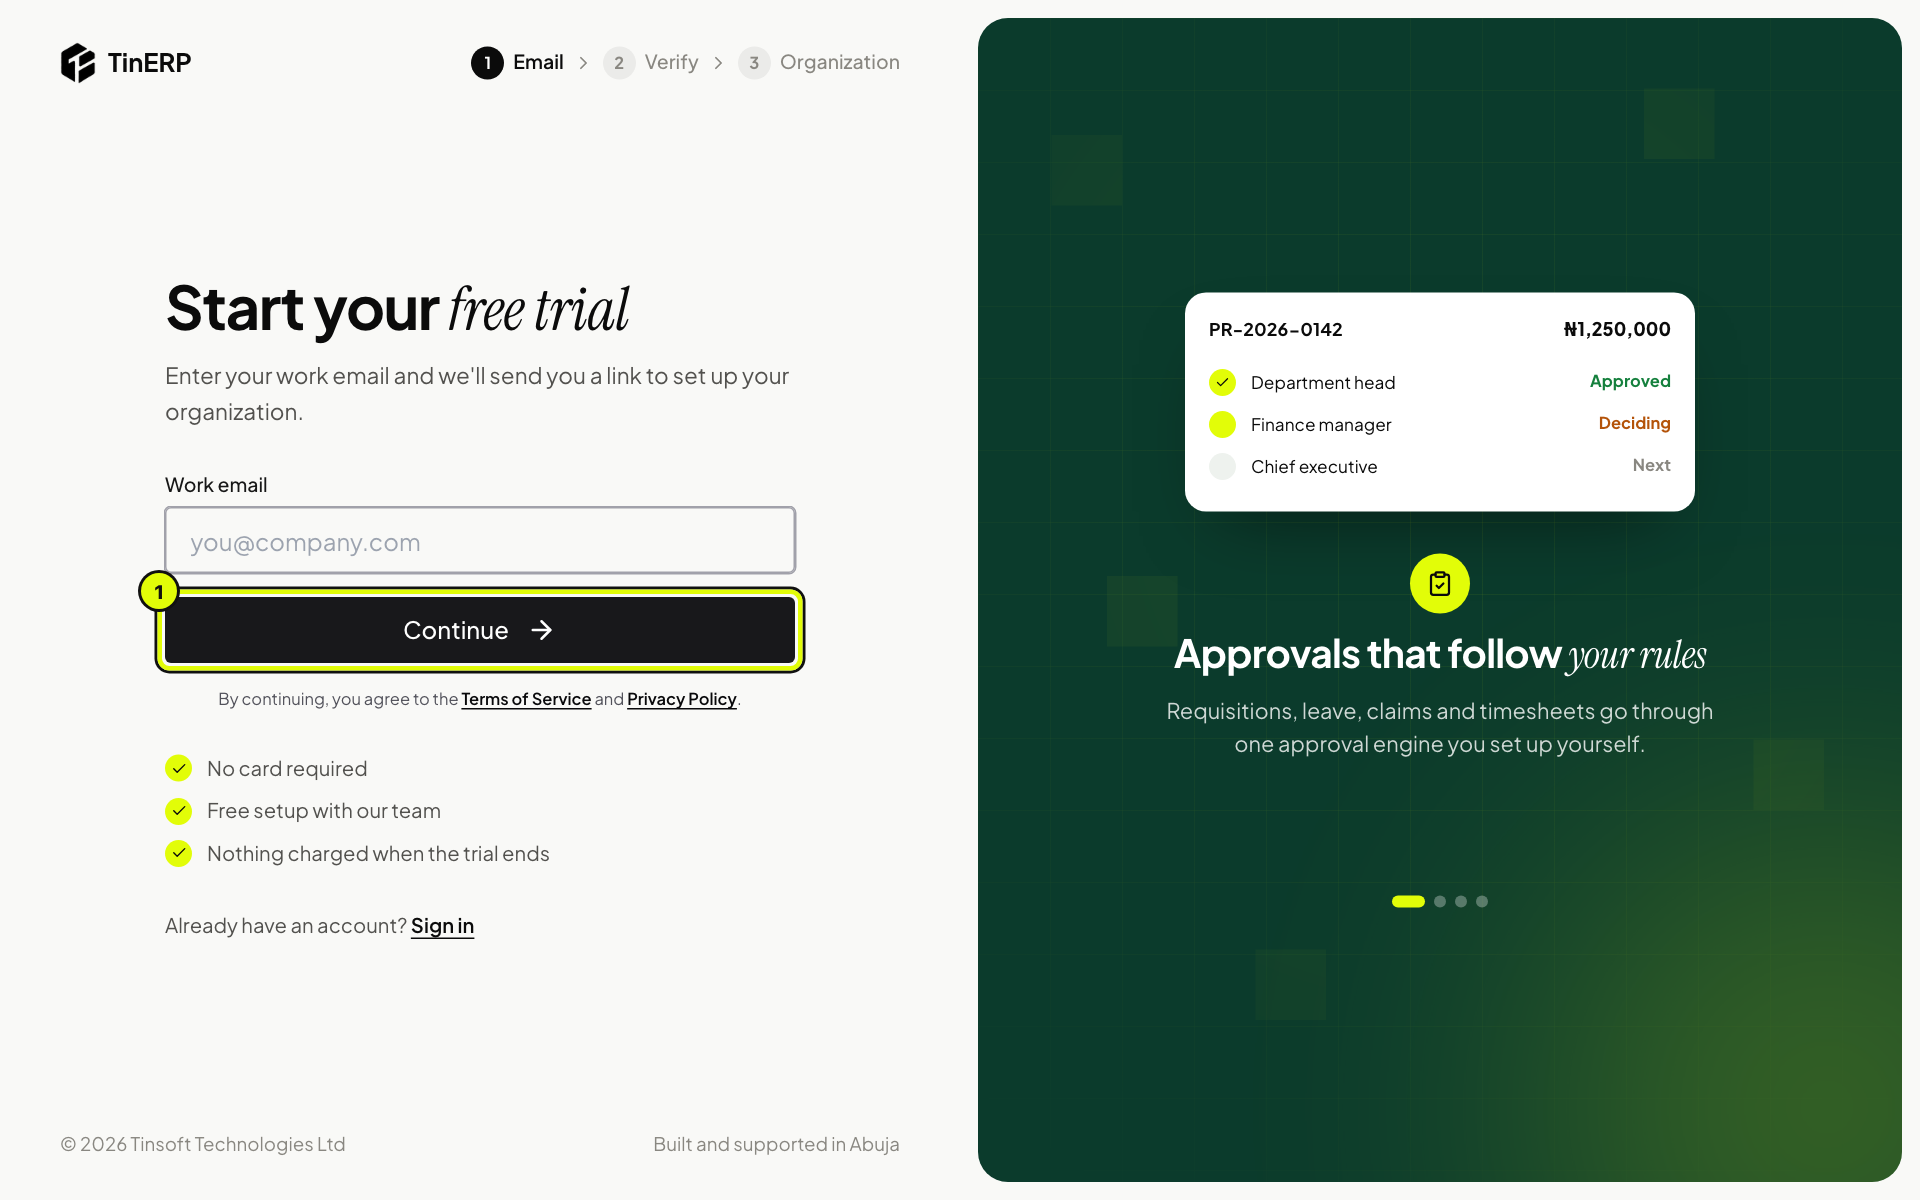
Go to the TinERP website and choose Start free trial. Enter your work email and select Continue.
We email you a link to set up your organization. The next page shows the address it went to, with shortcuts to Gmail, Outlook and Yahoo Mail - if it's the wrong address, choose use a different email.
The link works once and expires after 24 hours. If it has expired, just enter your email again.
Full size
The Start your free trial page, with the work email field and the Continue button marked 1 Tip: Use your work email: you'll be the owner of the organization's account, and invitations and approvals are sent there.
- 2
Set up your organization
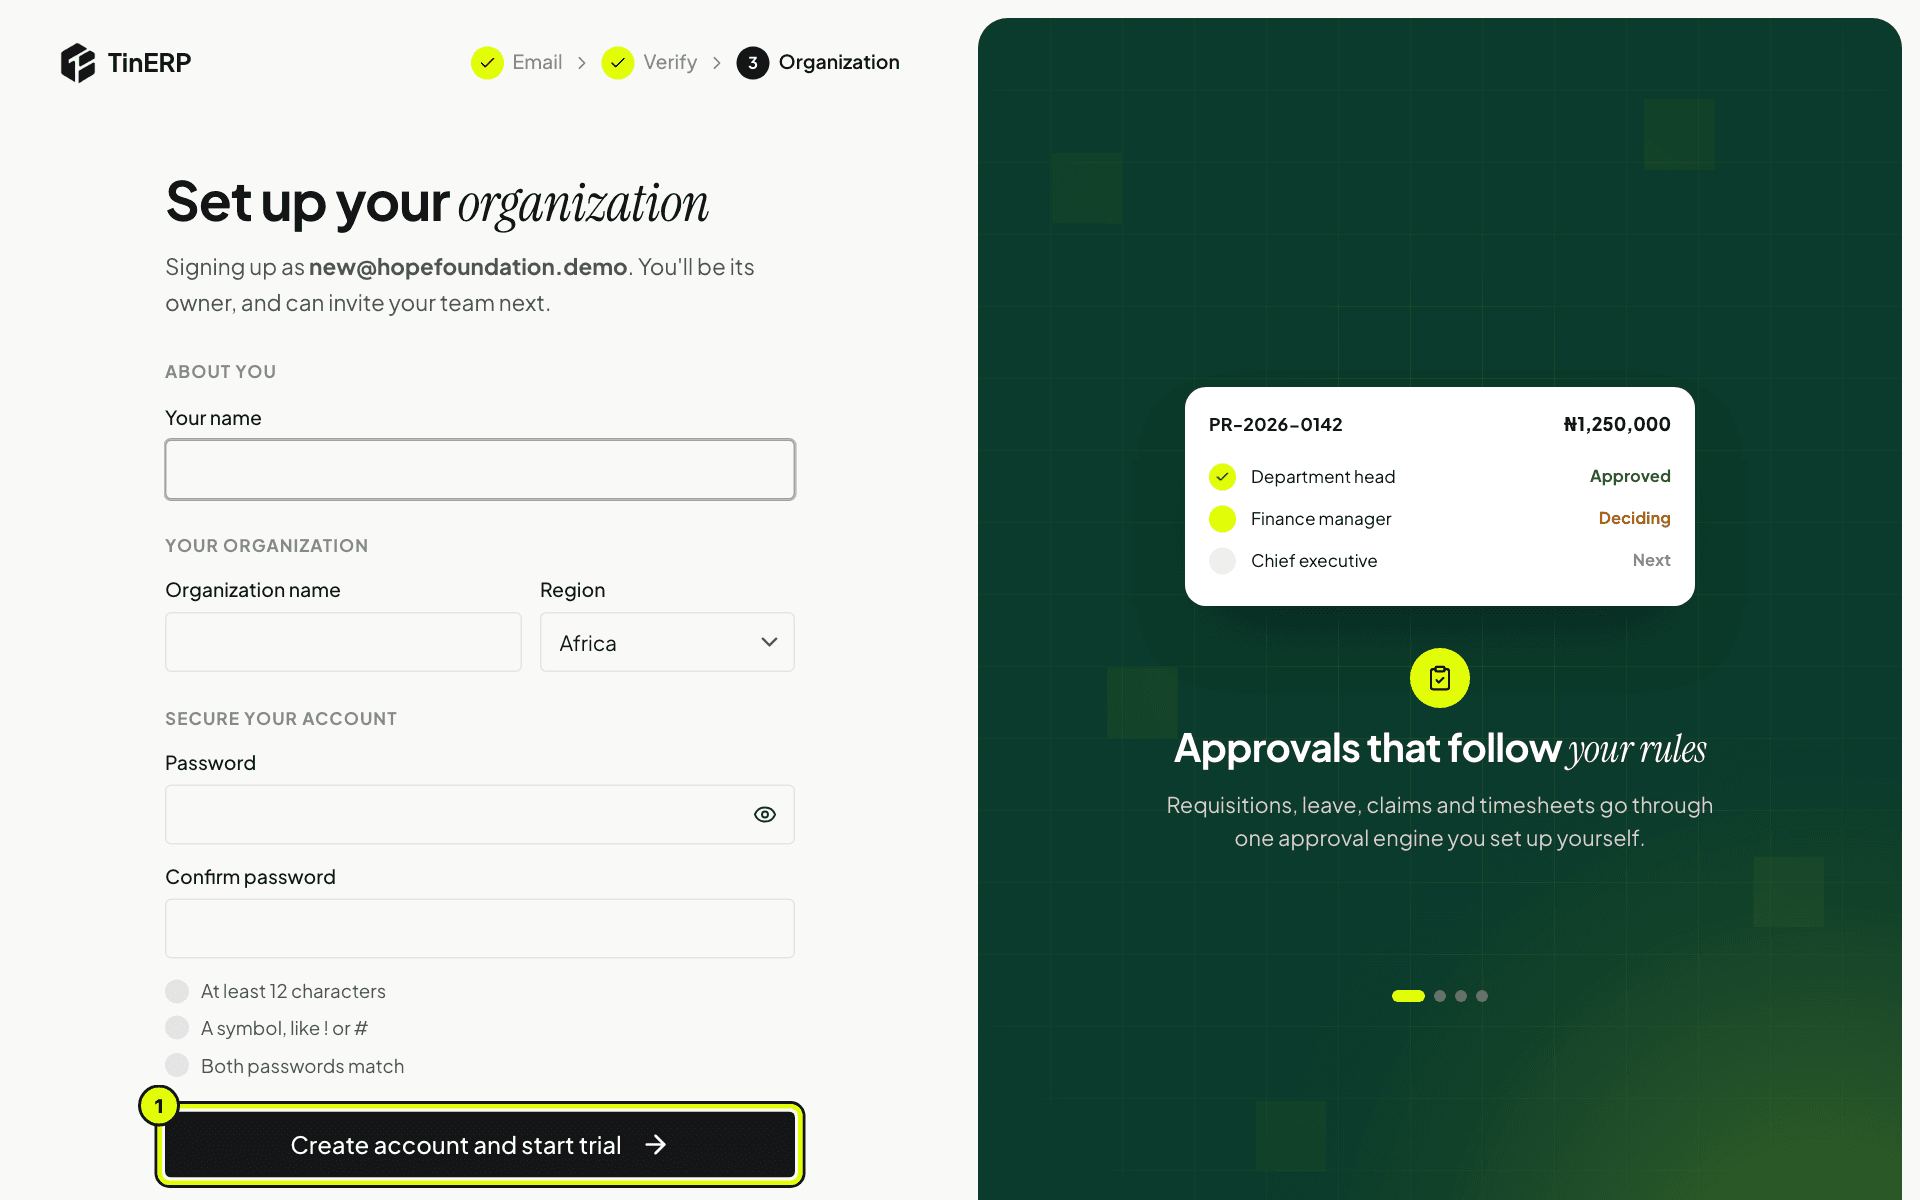
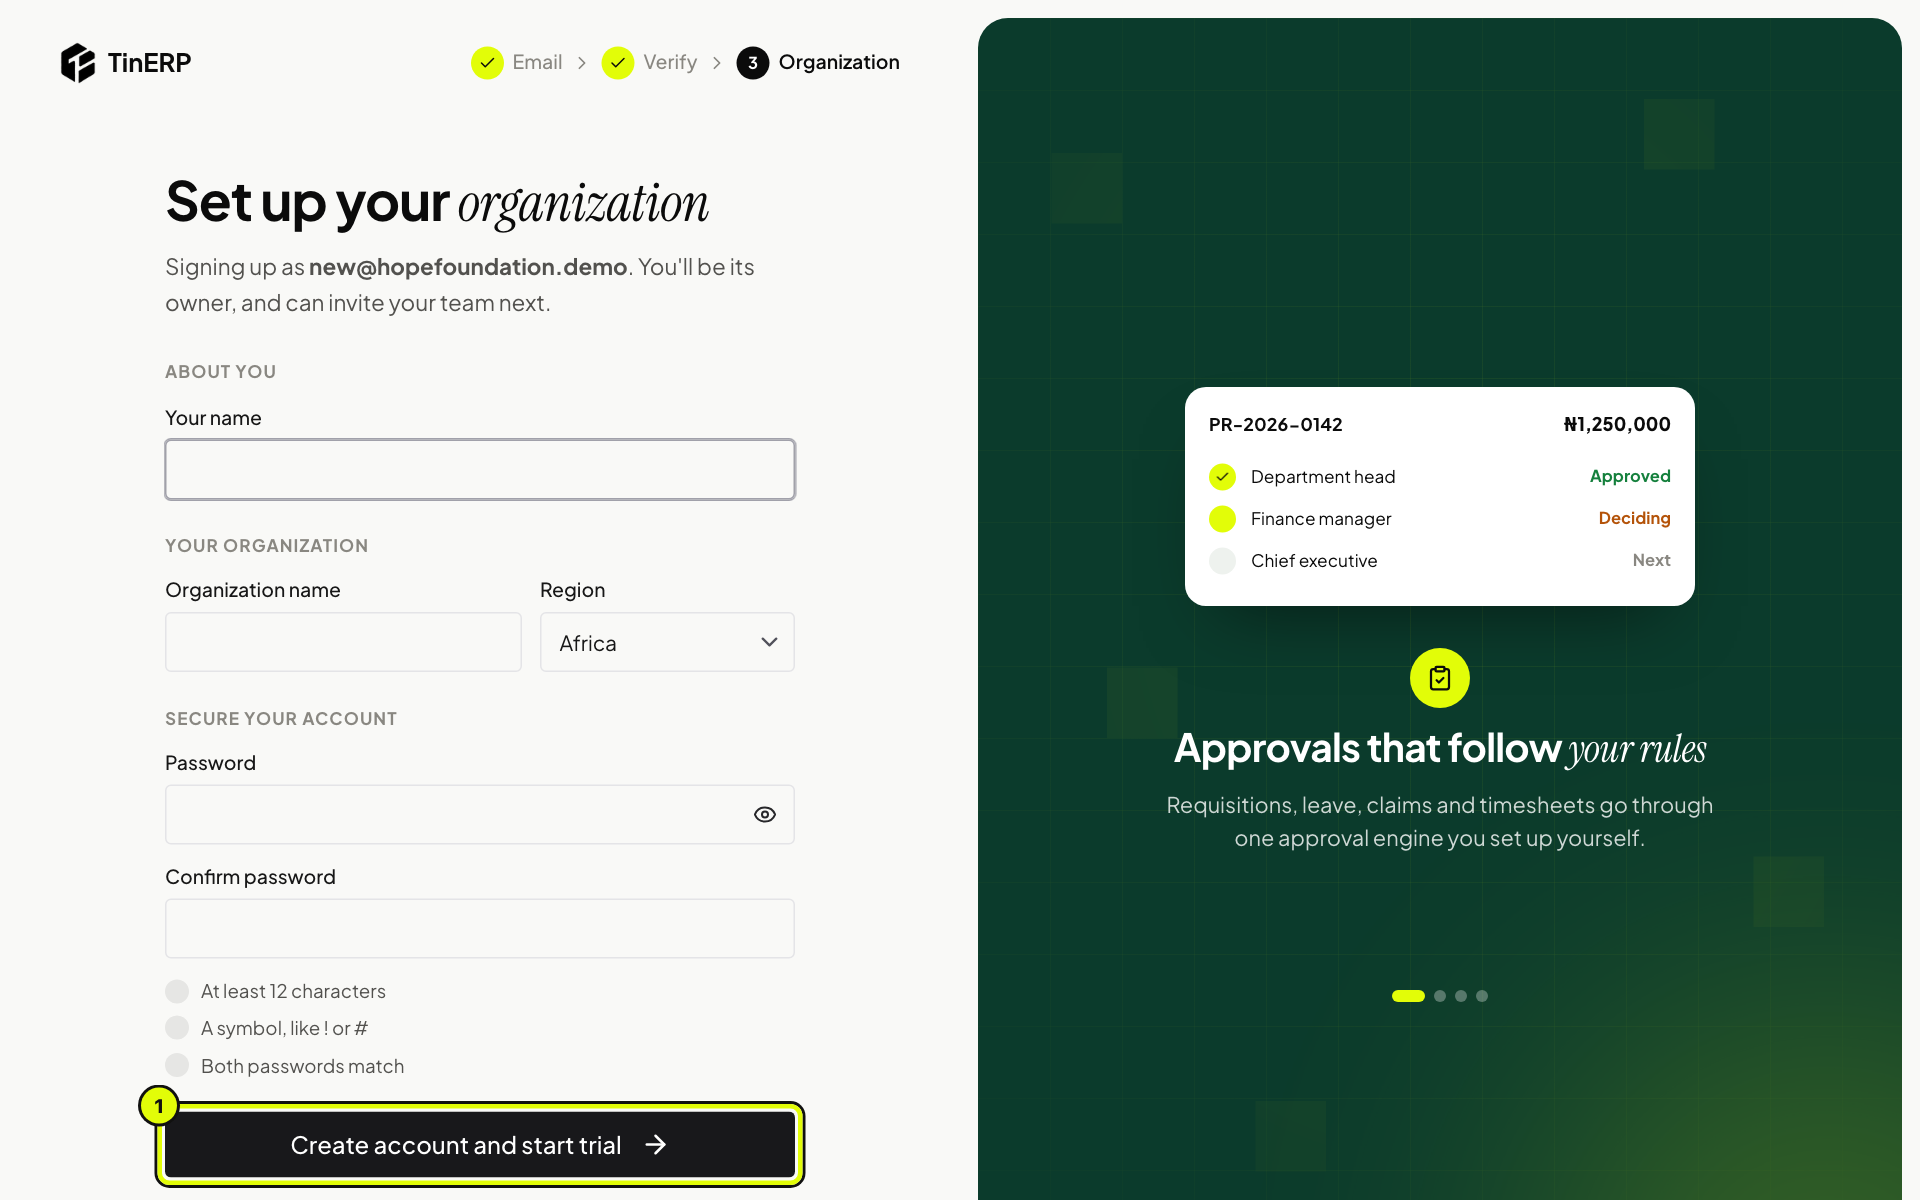
Open the link from the email. Enter your name, your organization's name and region, and choose a password - the list under it ticks off each rule (at least 12 characters, a symbol, both passwords matching) as you go. Then select Create account and start trial.
Your free trial starts straight away with everything included. No card is needed, and nothing is charged when the trial ends.
Full size
The Set up your organization form, with Create account and start trial marked 1 - 3
Find your way around the dashboard
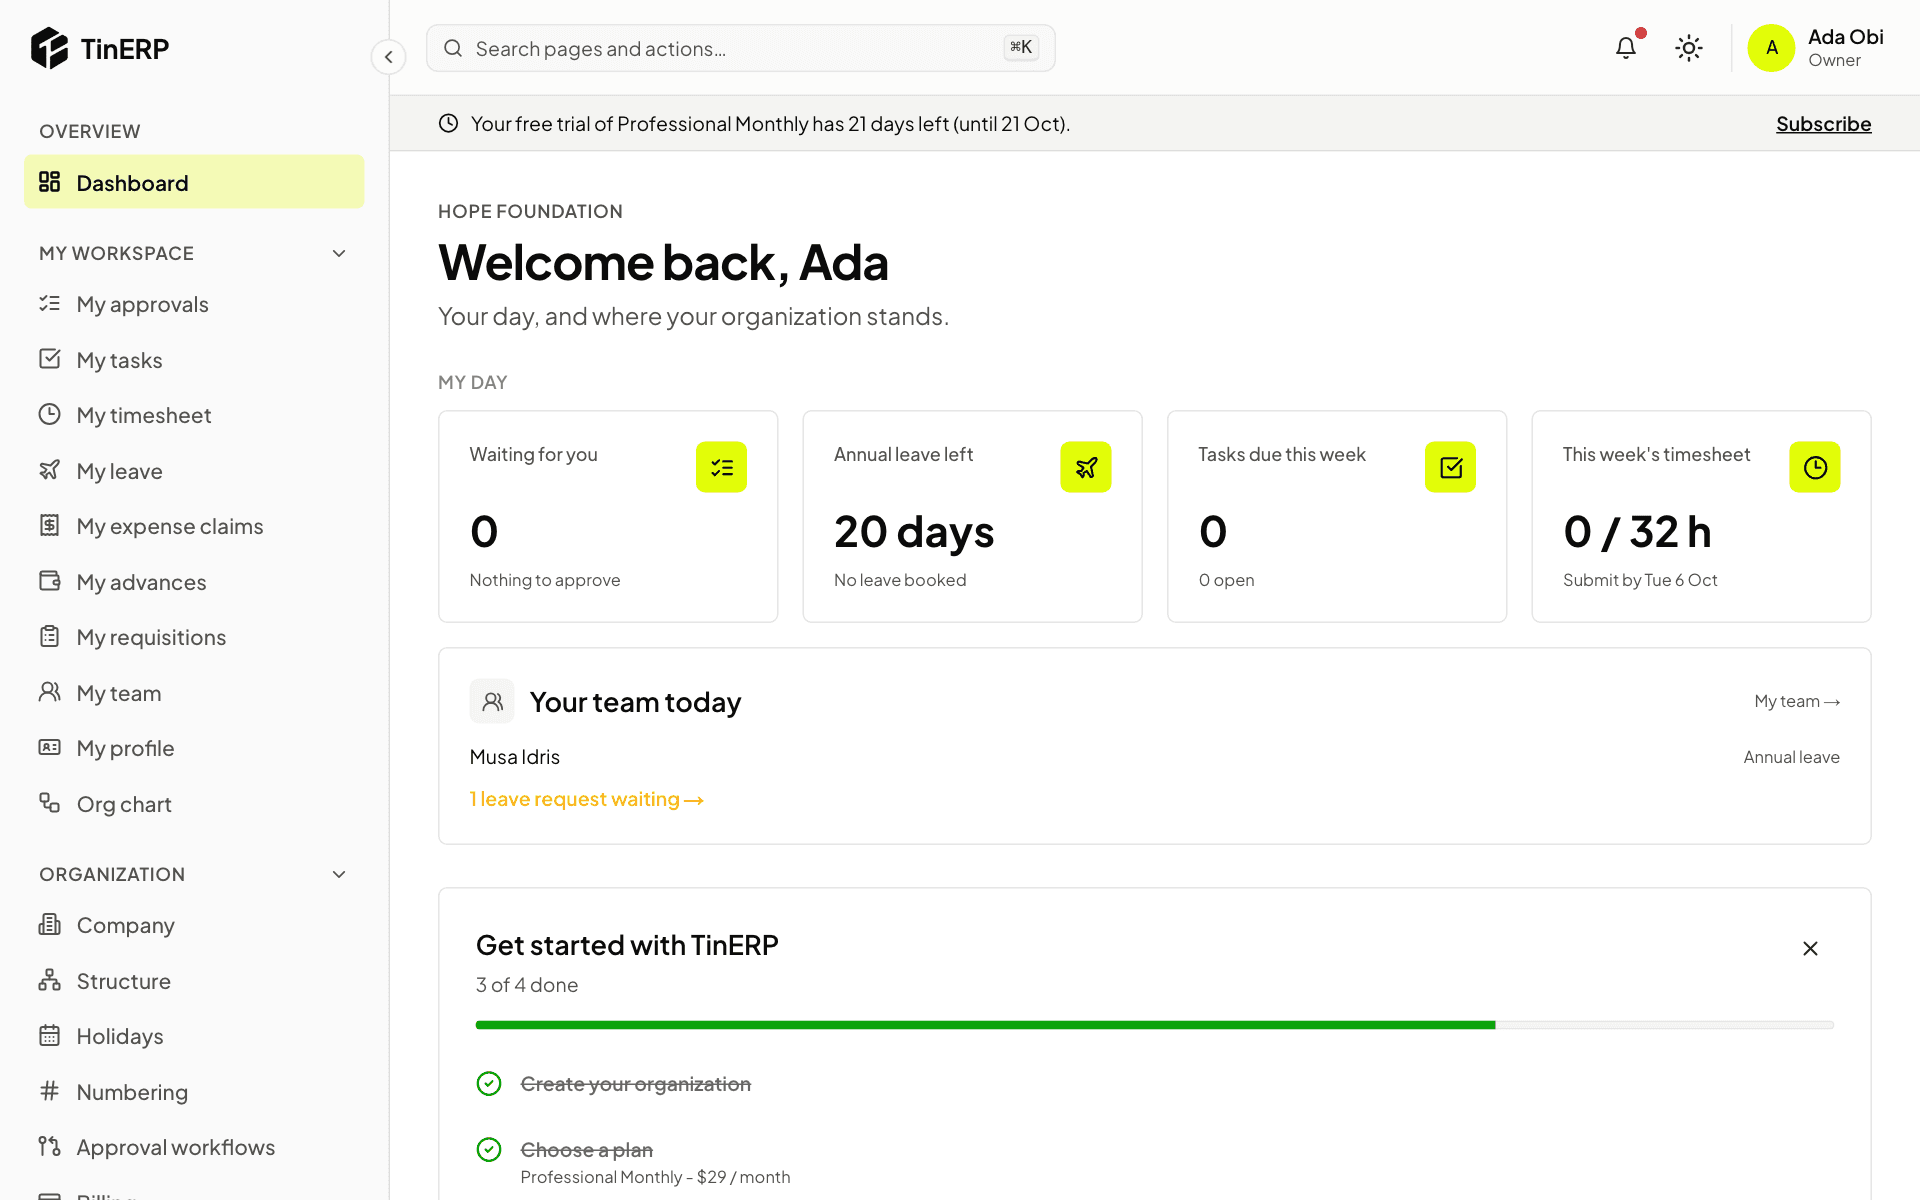
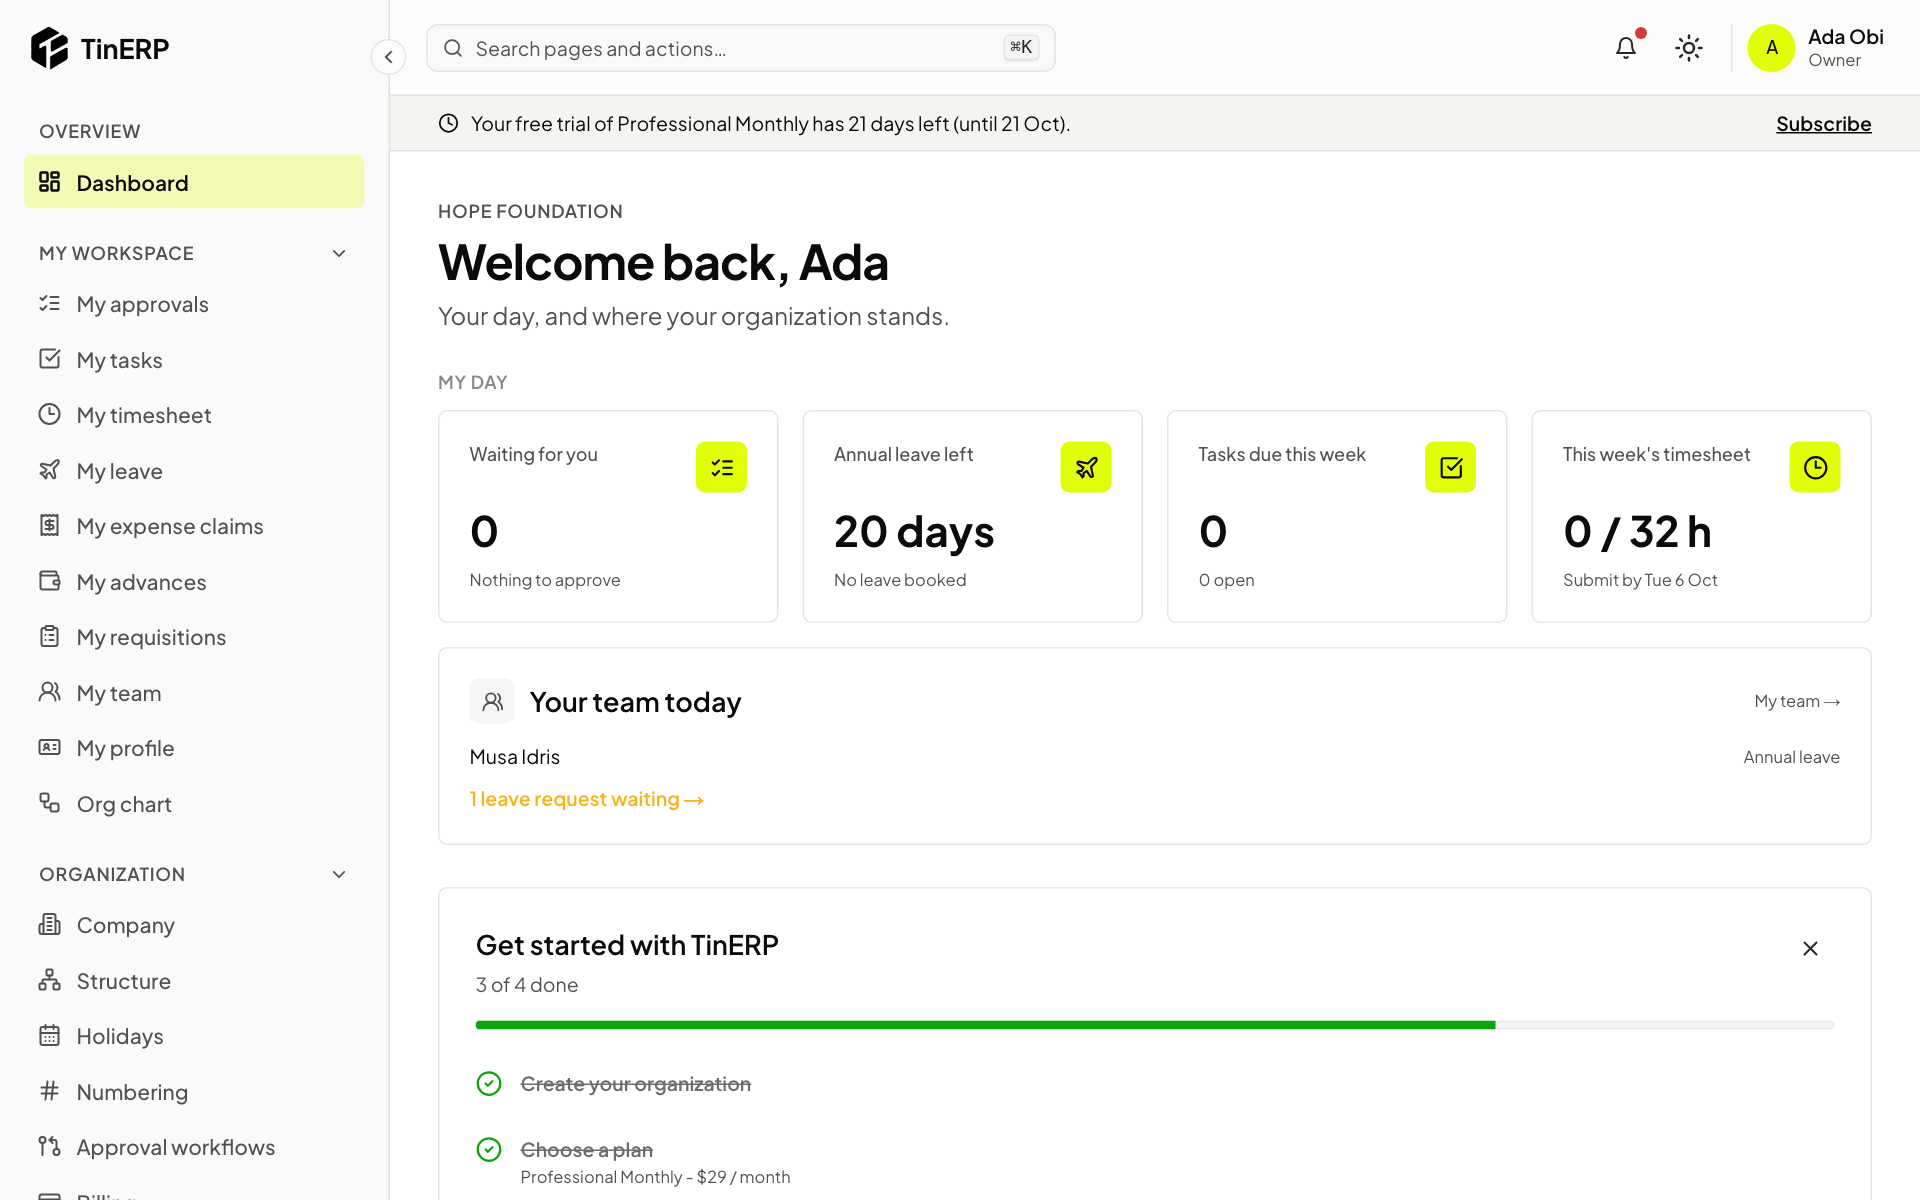
You arrive on your Dashboard. My day at the top shows what needs you today. Below it, Get started lists the setup steps and ticks them off as you finish them.
The menu on the left holds every page you can use. To jump anywhere, select the search bar at the top, or press ⌘K (Ctrl+K on Windows) and type what you're looking for.
Full size
The dashboard for an owner: My day, Your team today and the Get started checklist - 4
Add your company details
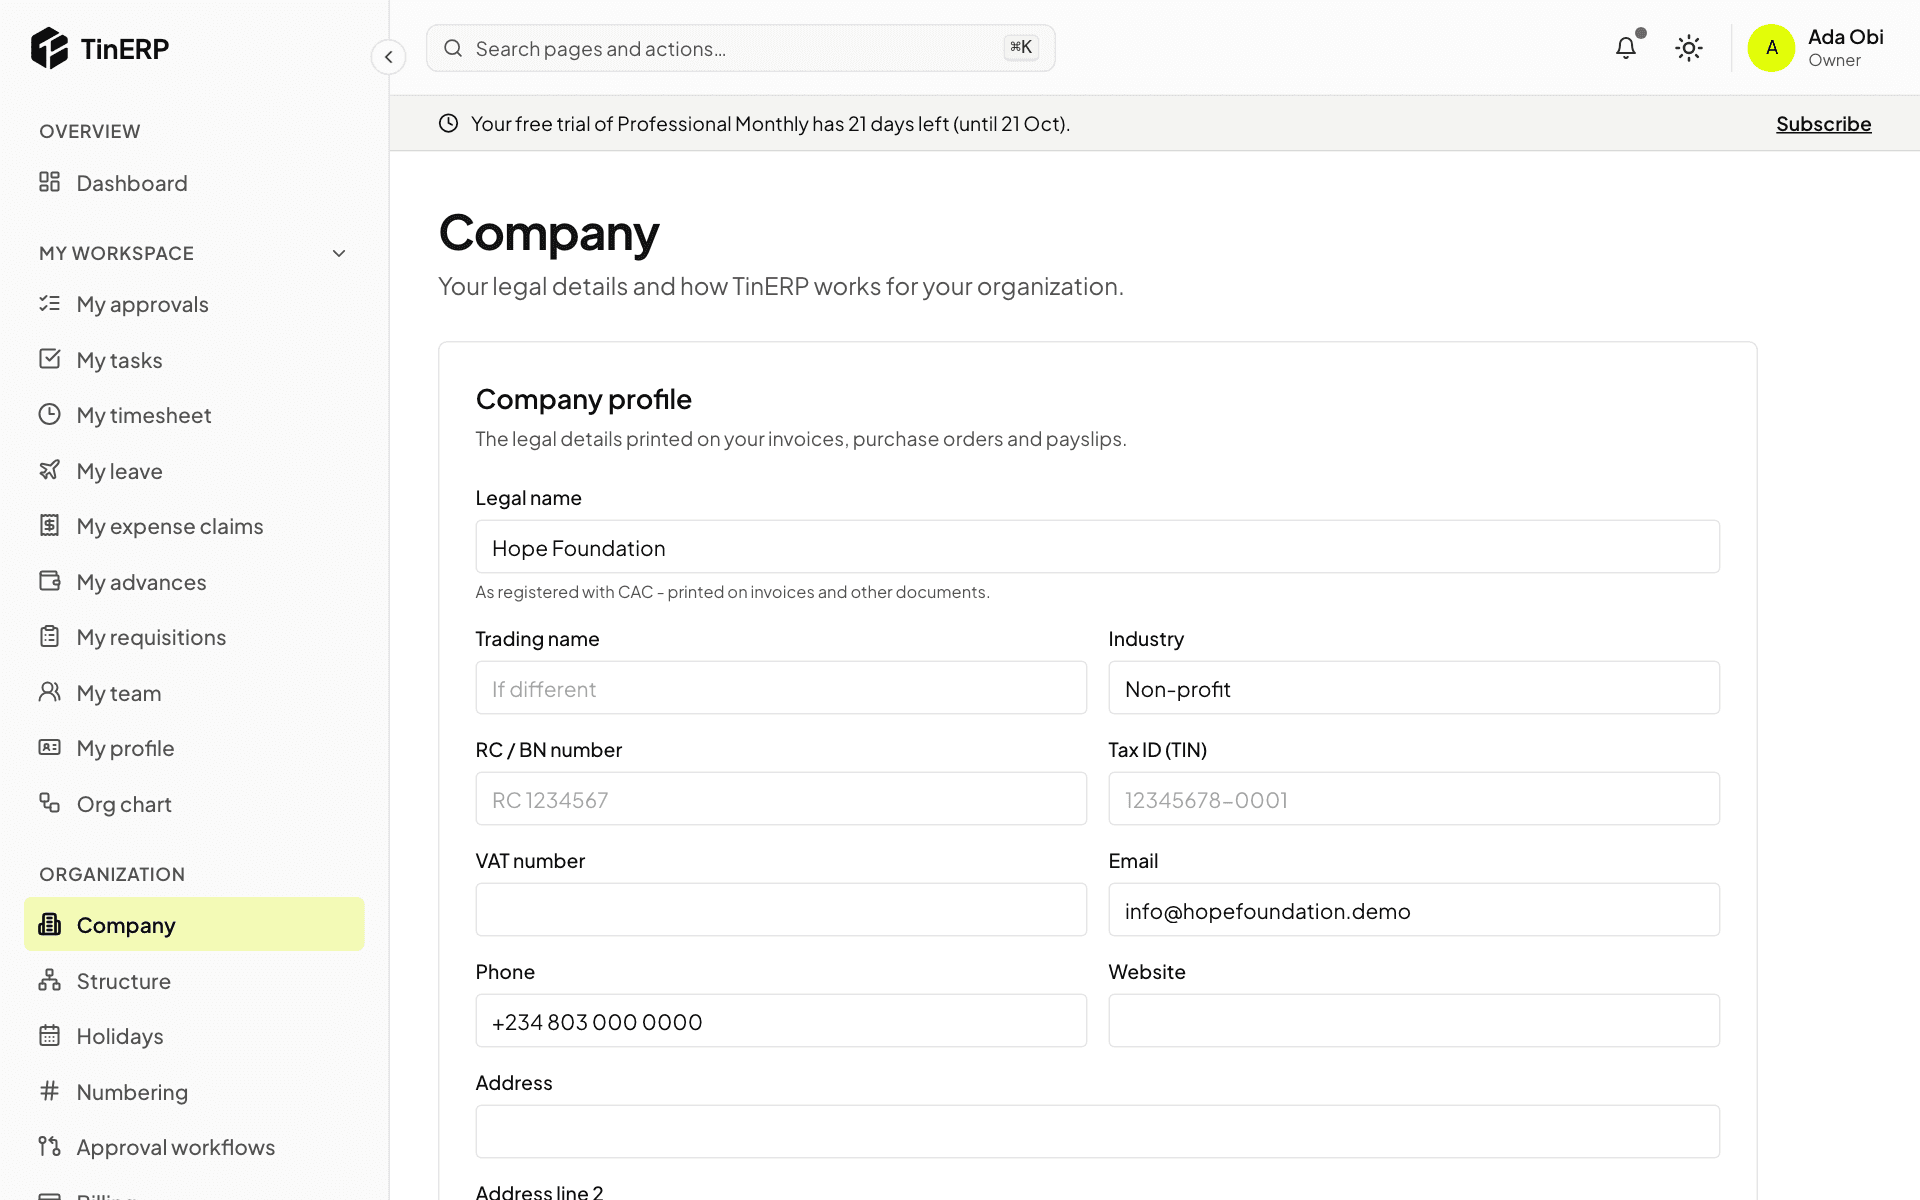
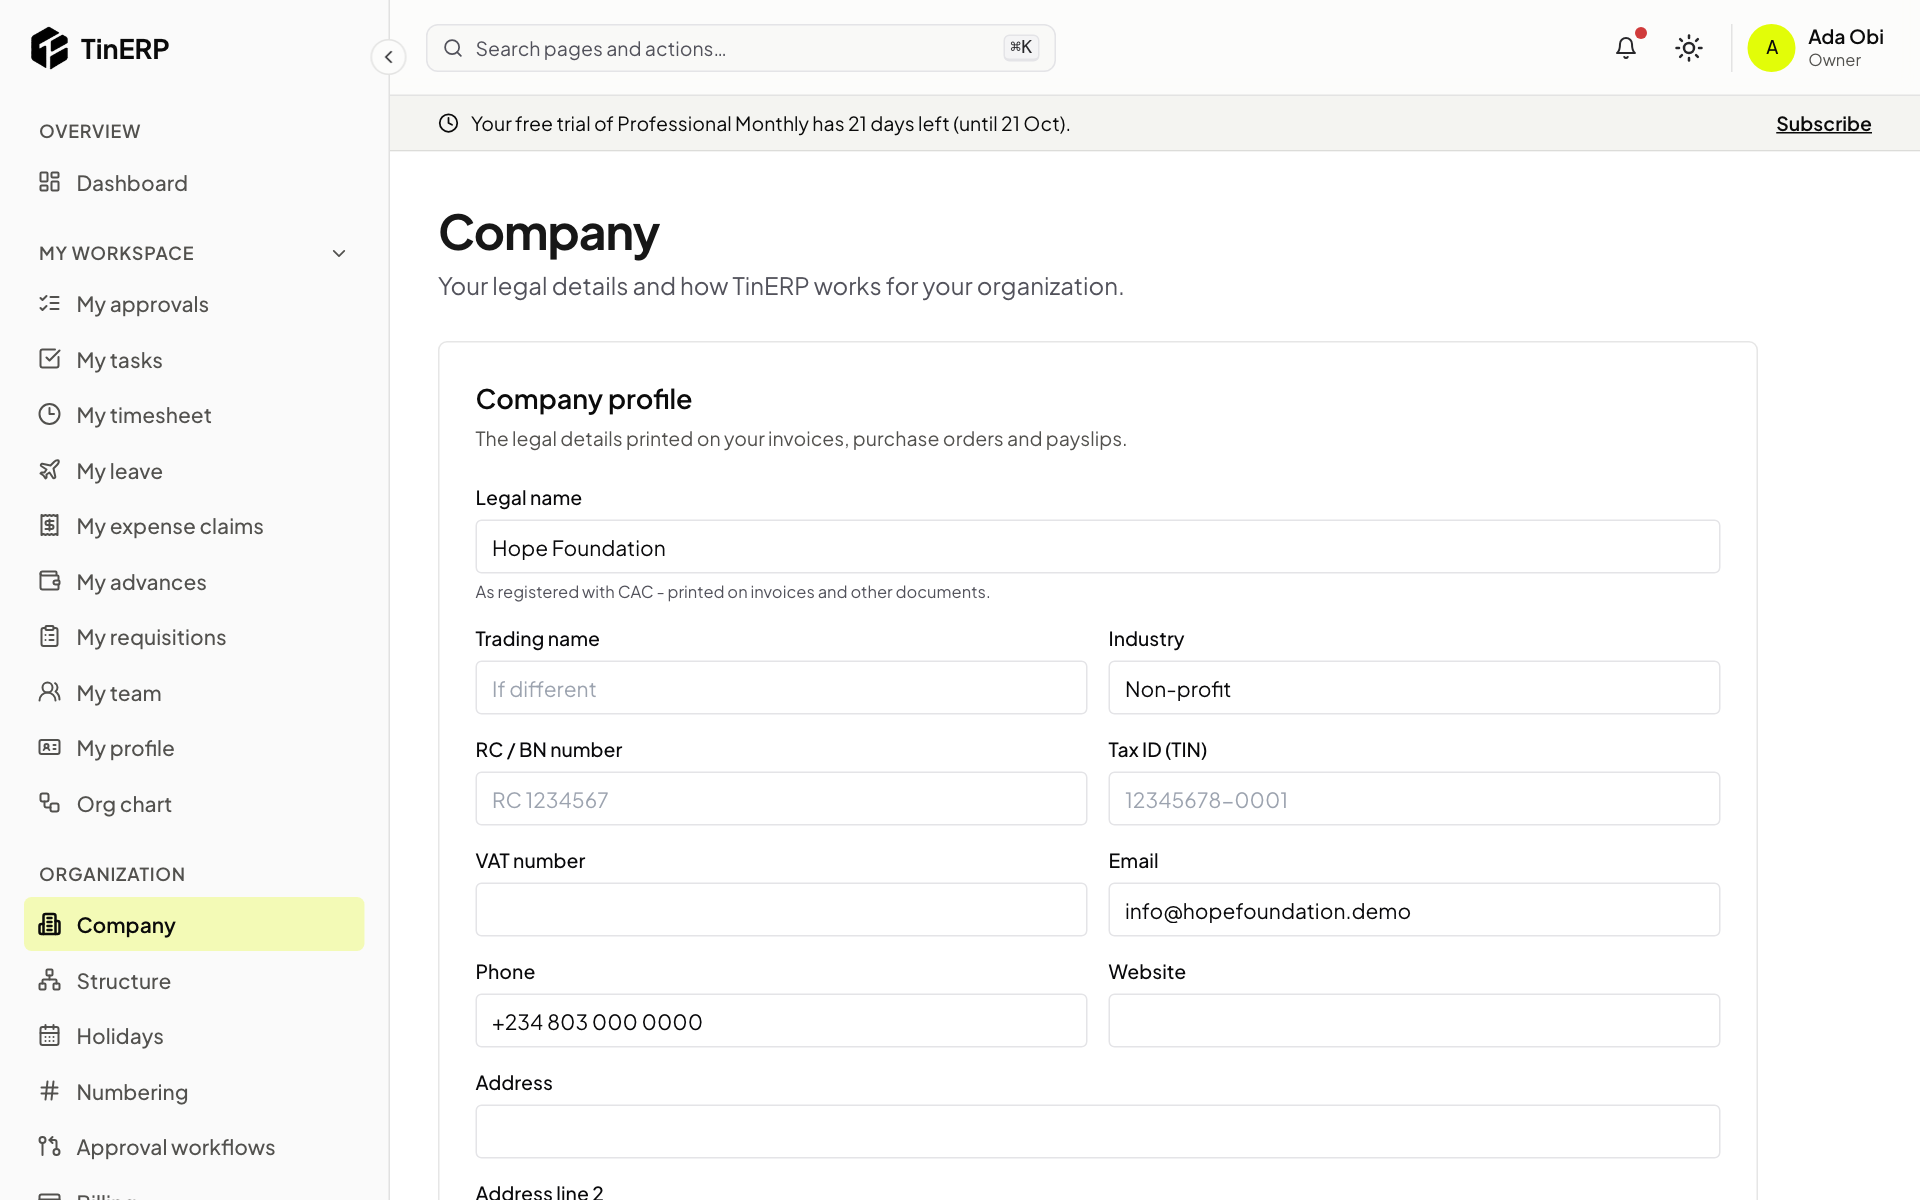
Go to Organization → Company. Enter your legal name as registered with CAC, your RC number, tax ID (TIN), VAT number, contact details and address.
These details are printed on the documents TinERP produces, such as invoices and purchase orders, so it's worth getting them right before you issue any.
Full size
The Company page with the company profile form - 5
Set up your structure
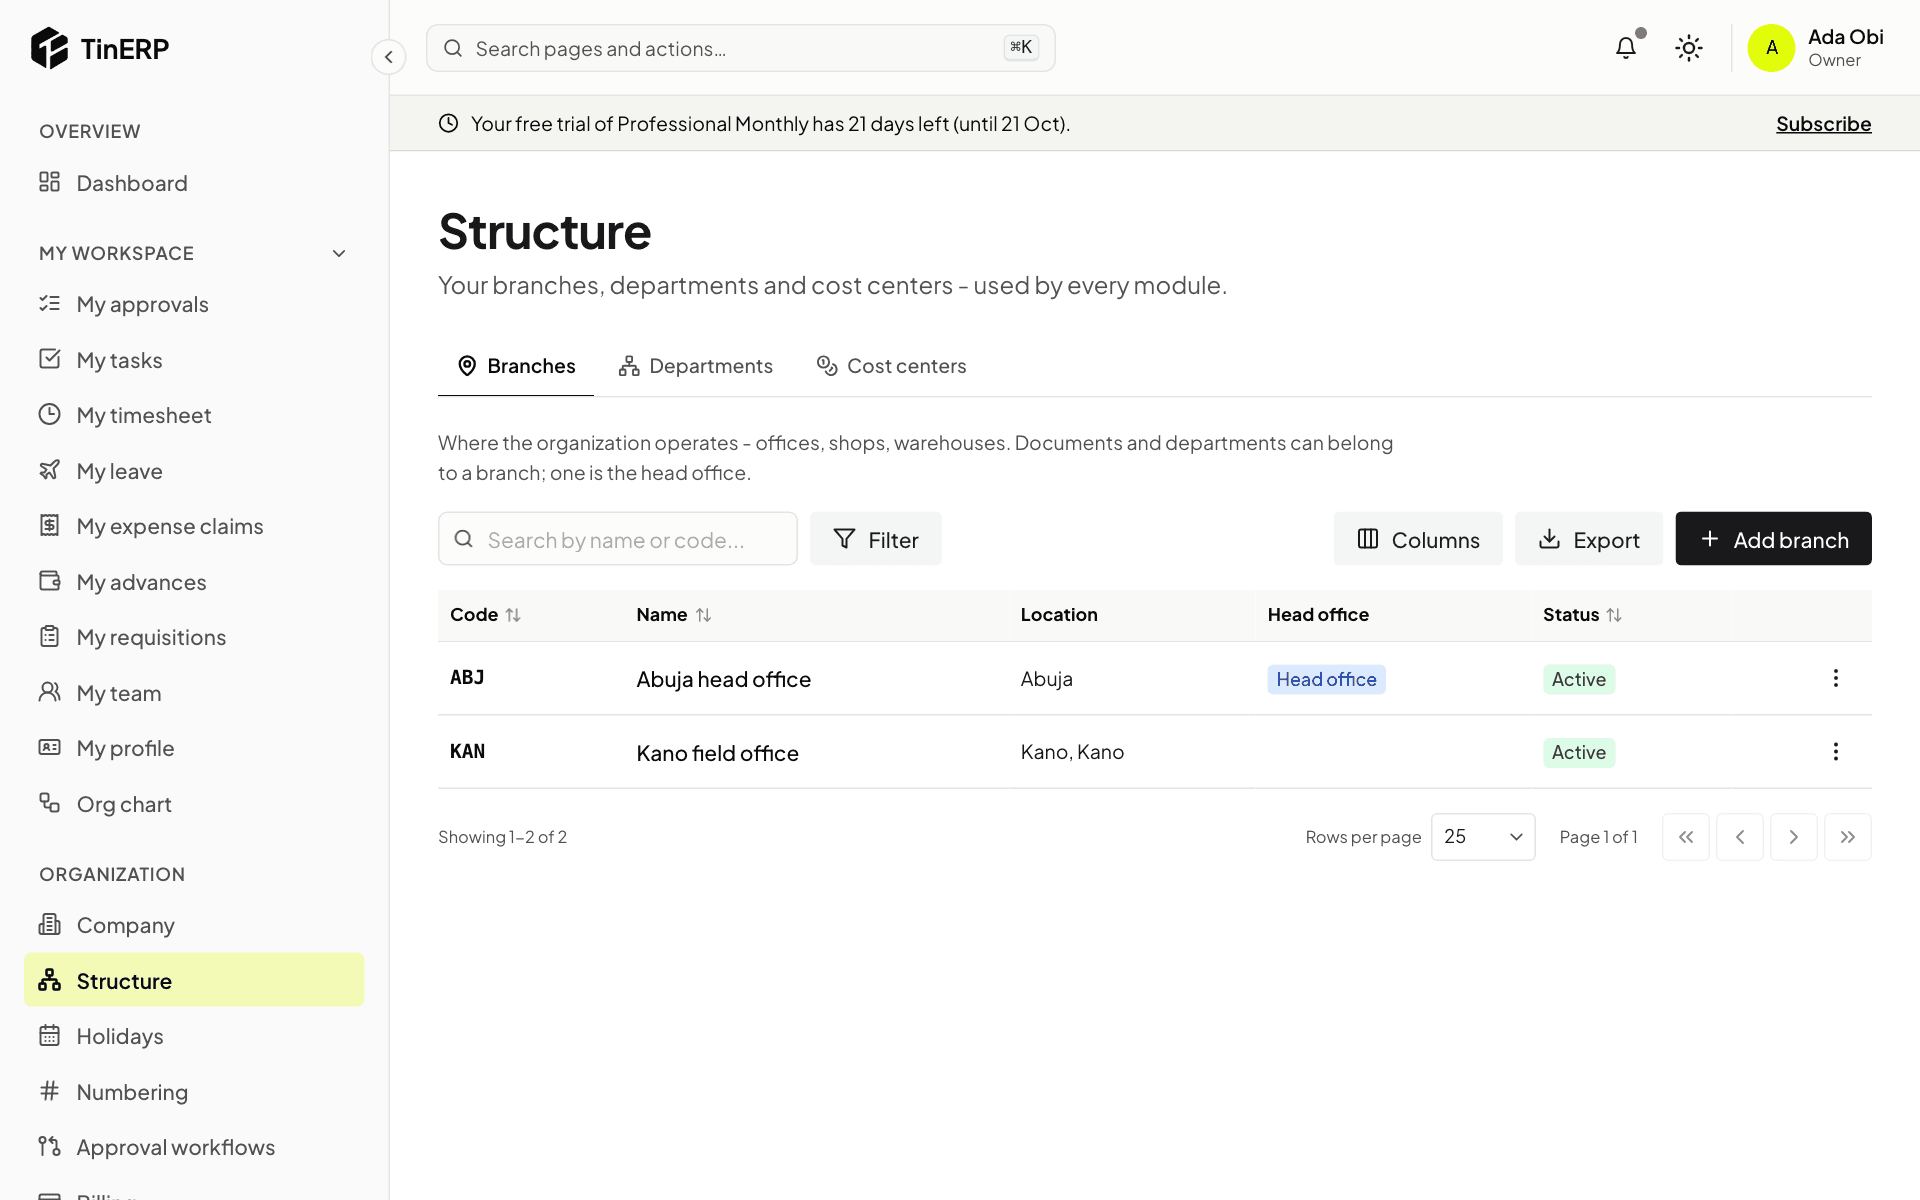
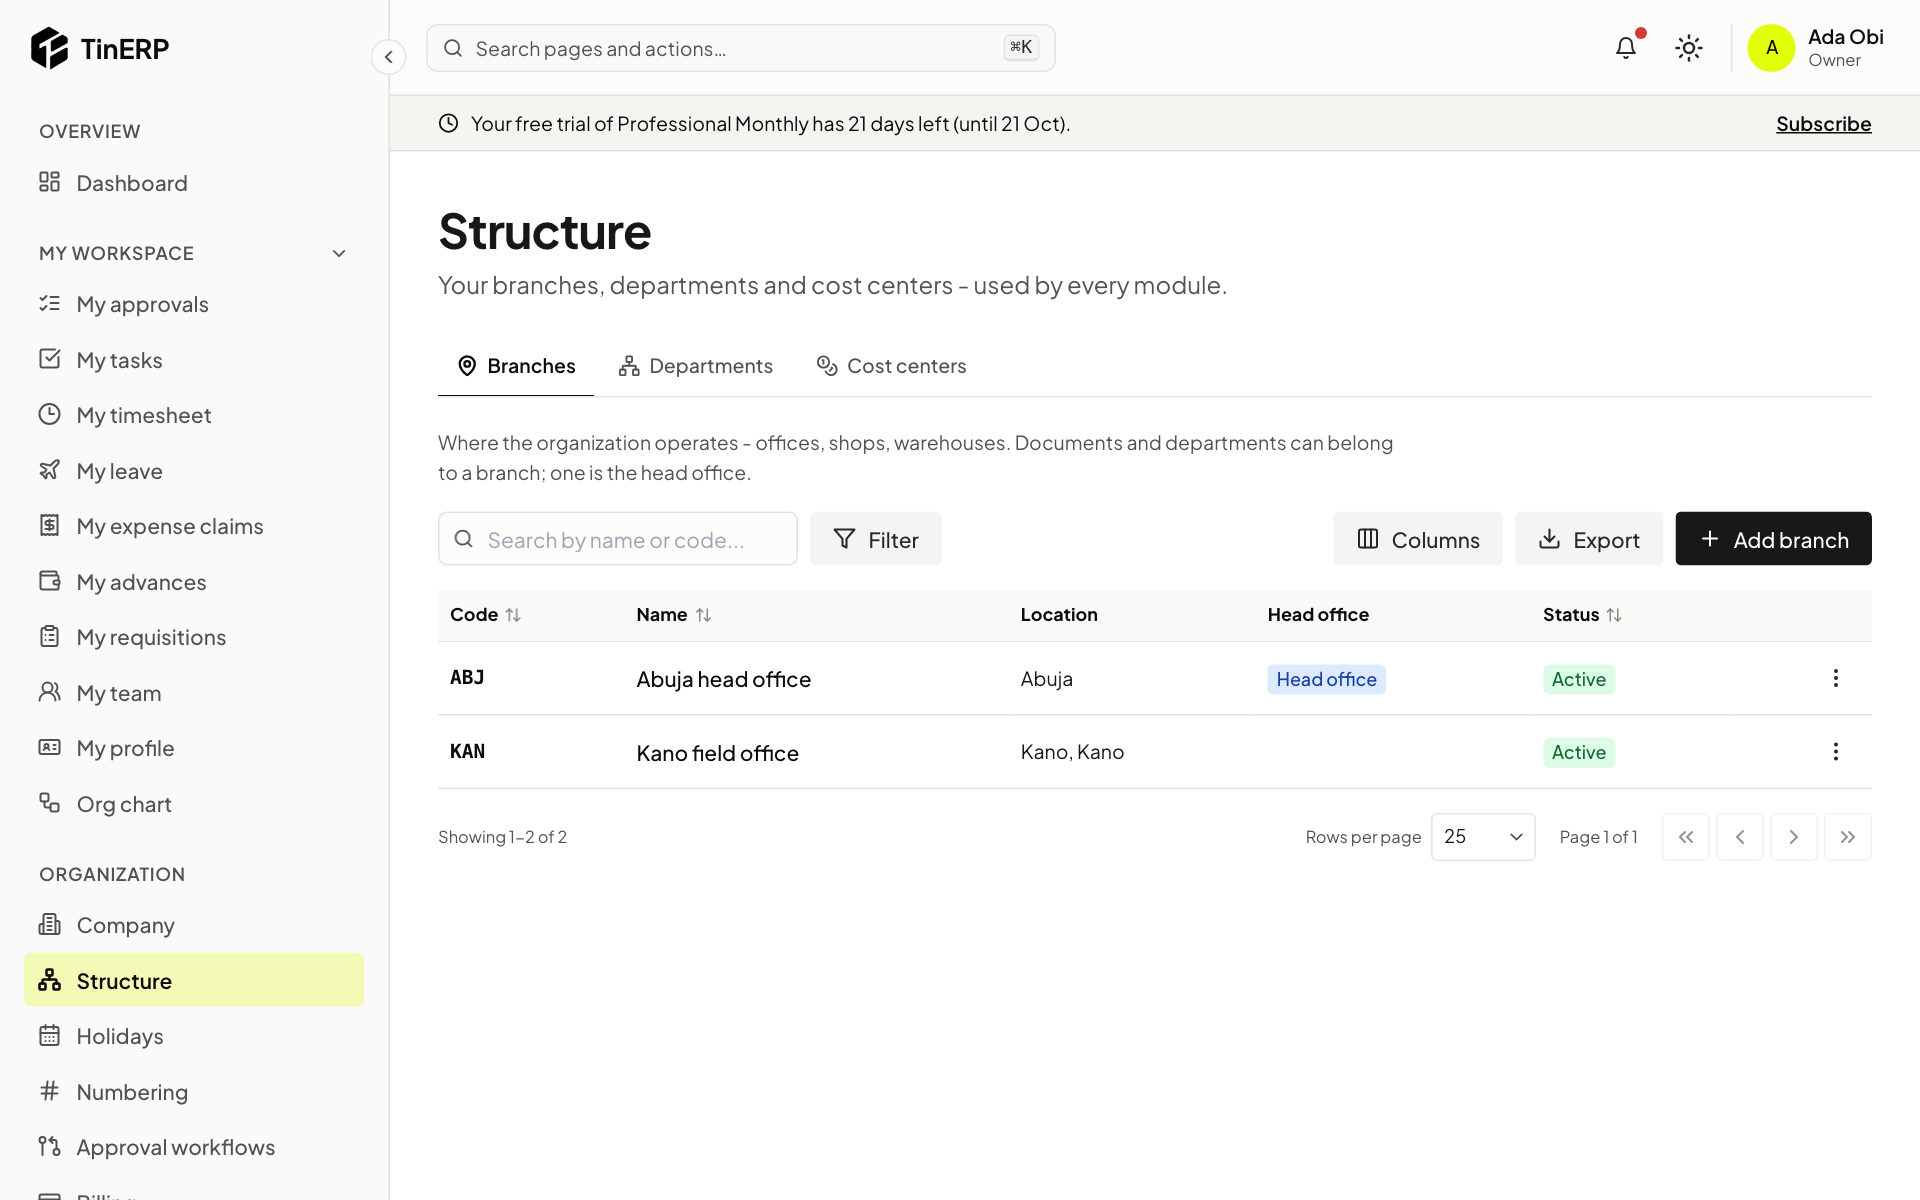
Go to Organization → Structure. Add your branches (offices, sites or warehouses - mark one as head office), your departments and, if you use them, cost centres.
Every module uses this structure: people belong to a department, approvals can depend on it, and reports can be filtered by it.
Full size
The Structure page showing two branches, Abuja head office and Kano field office - 6
Check holidays and your work week
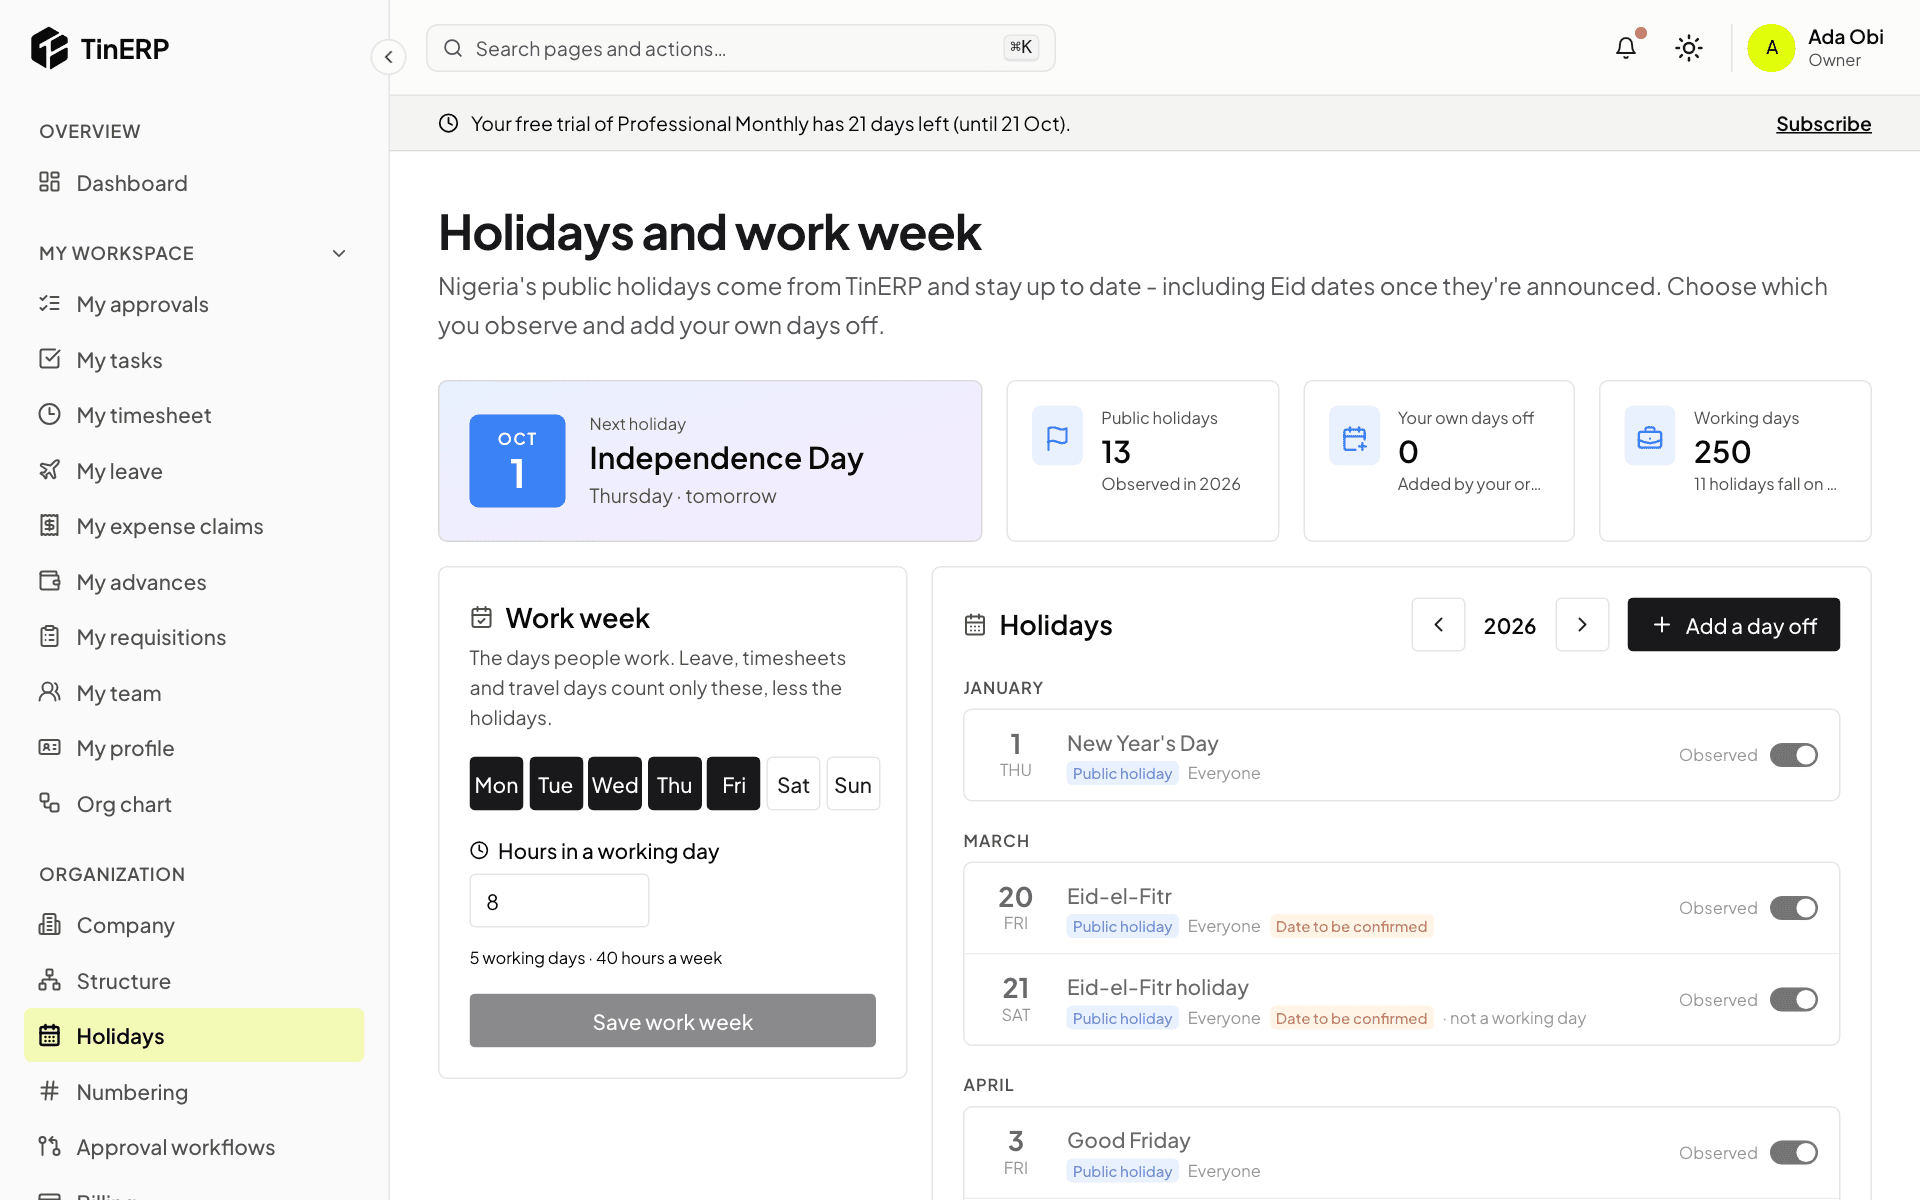
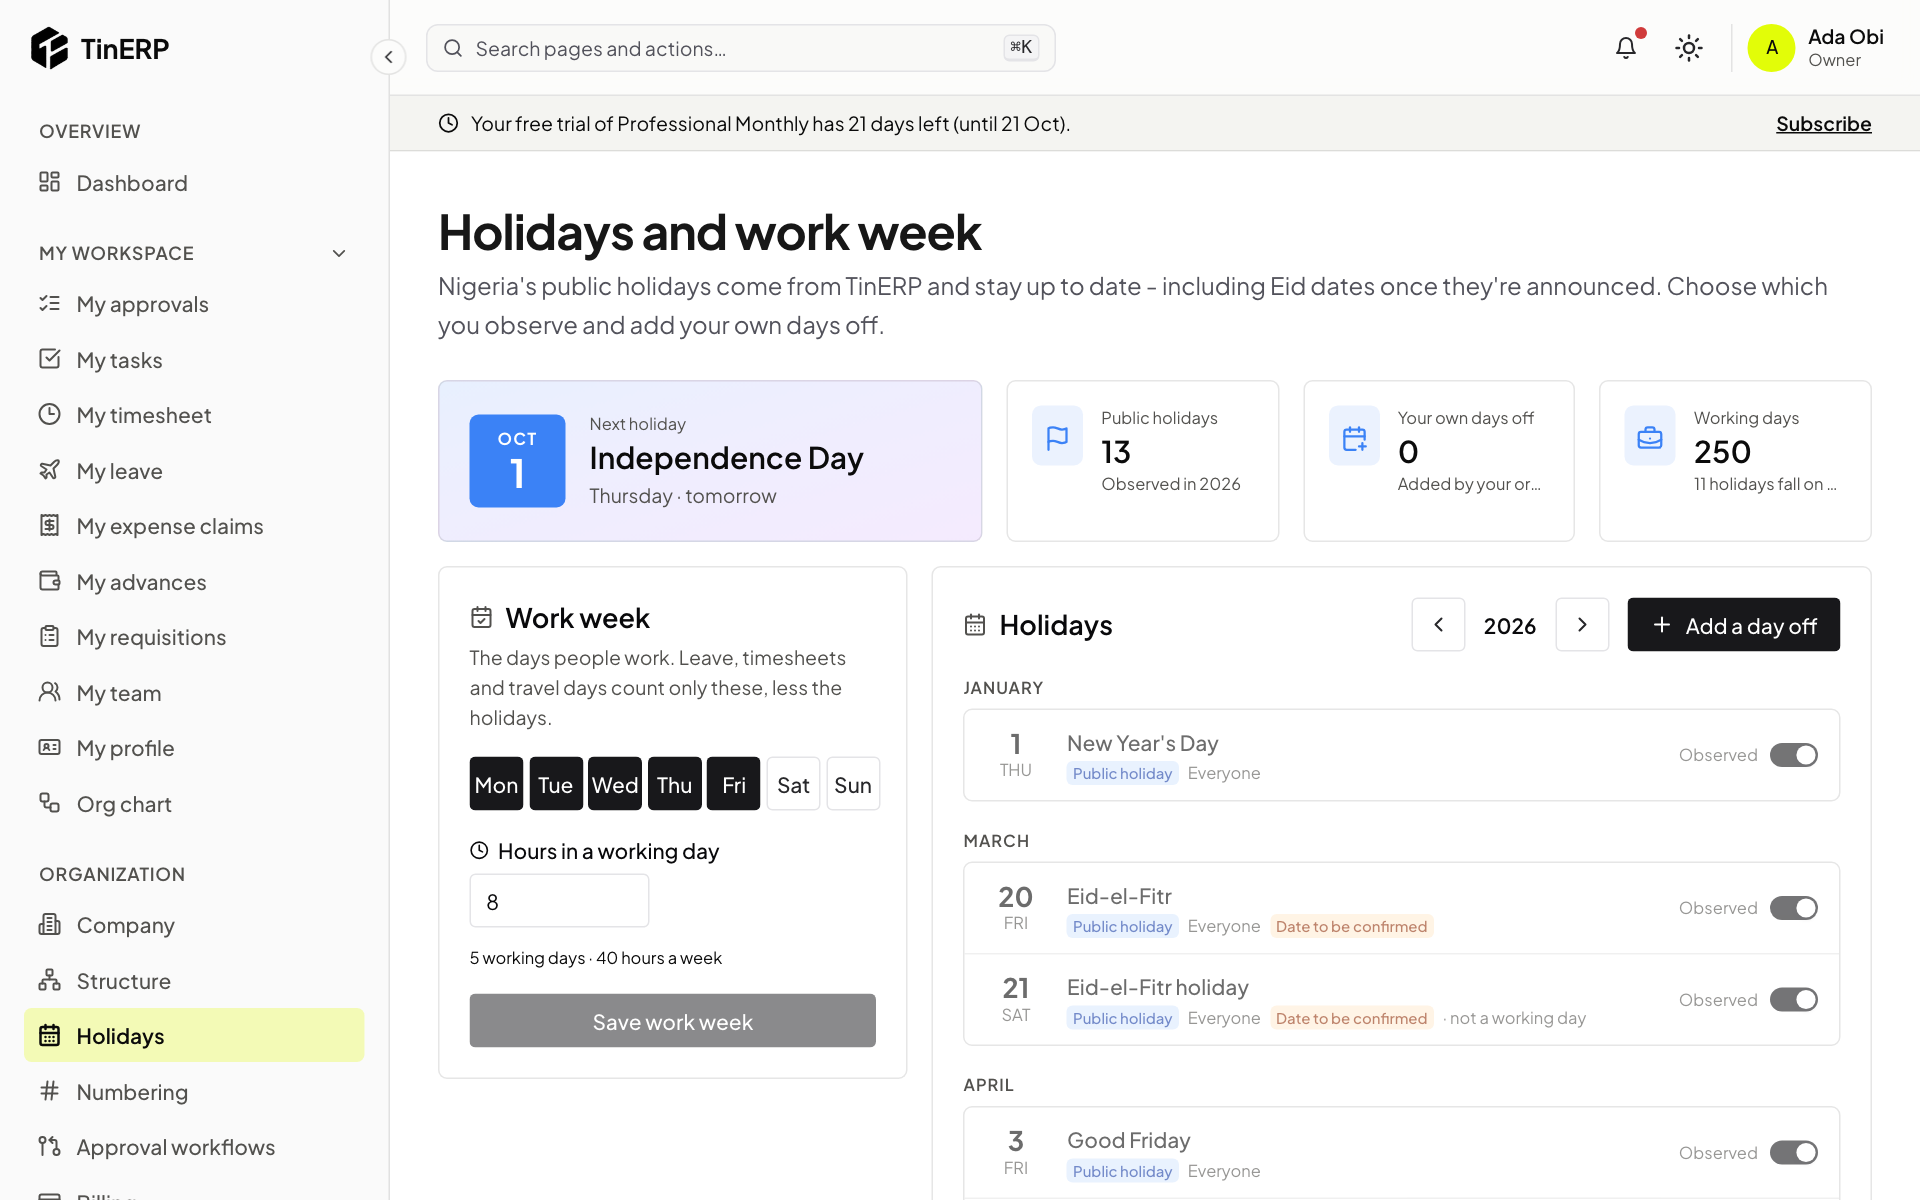
Go to Organization → Holidays. Nigeria's public holidays come from TinERP and stay up to date - including Eid dates once they're announced. Choose which ones you observe and add your organization's own days off with Add a day off.
Under Work week, choose your working days and the hours in a working day. Leave, timesheets and travel all count days using these settings.
Full size
The Holidays and work week page with the next holiday, the work week and the list of holidays - 7
Invite your team
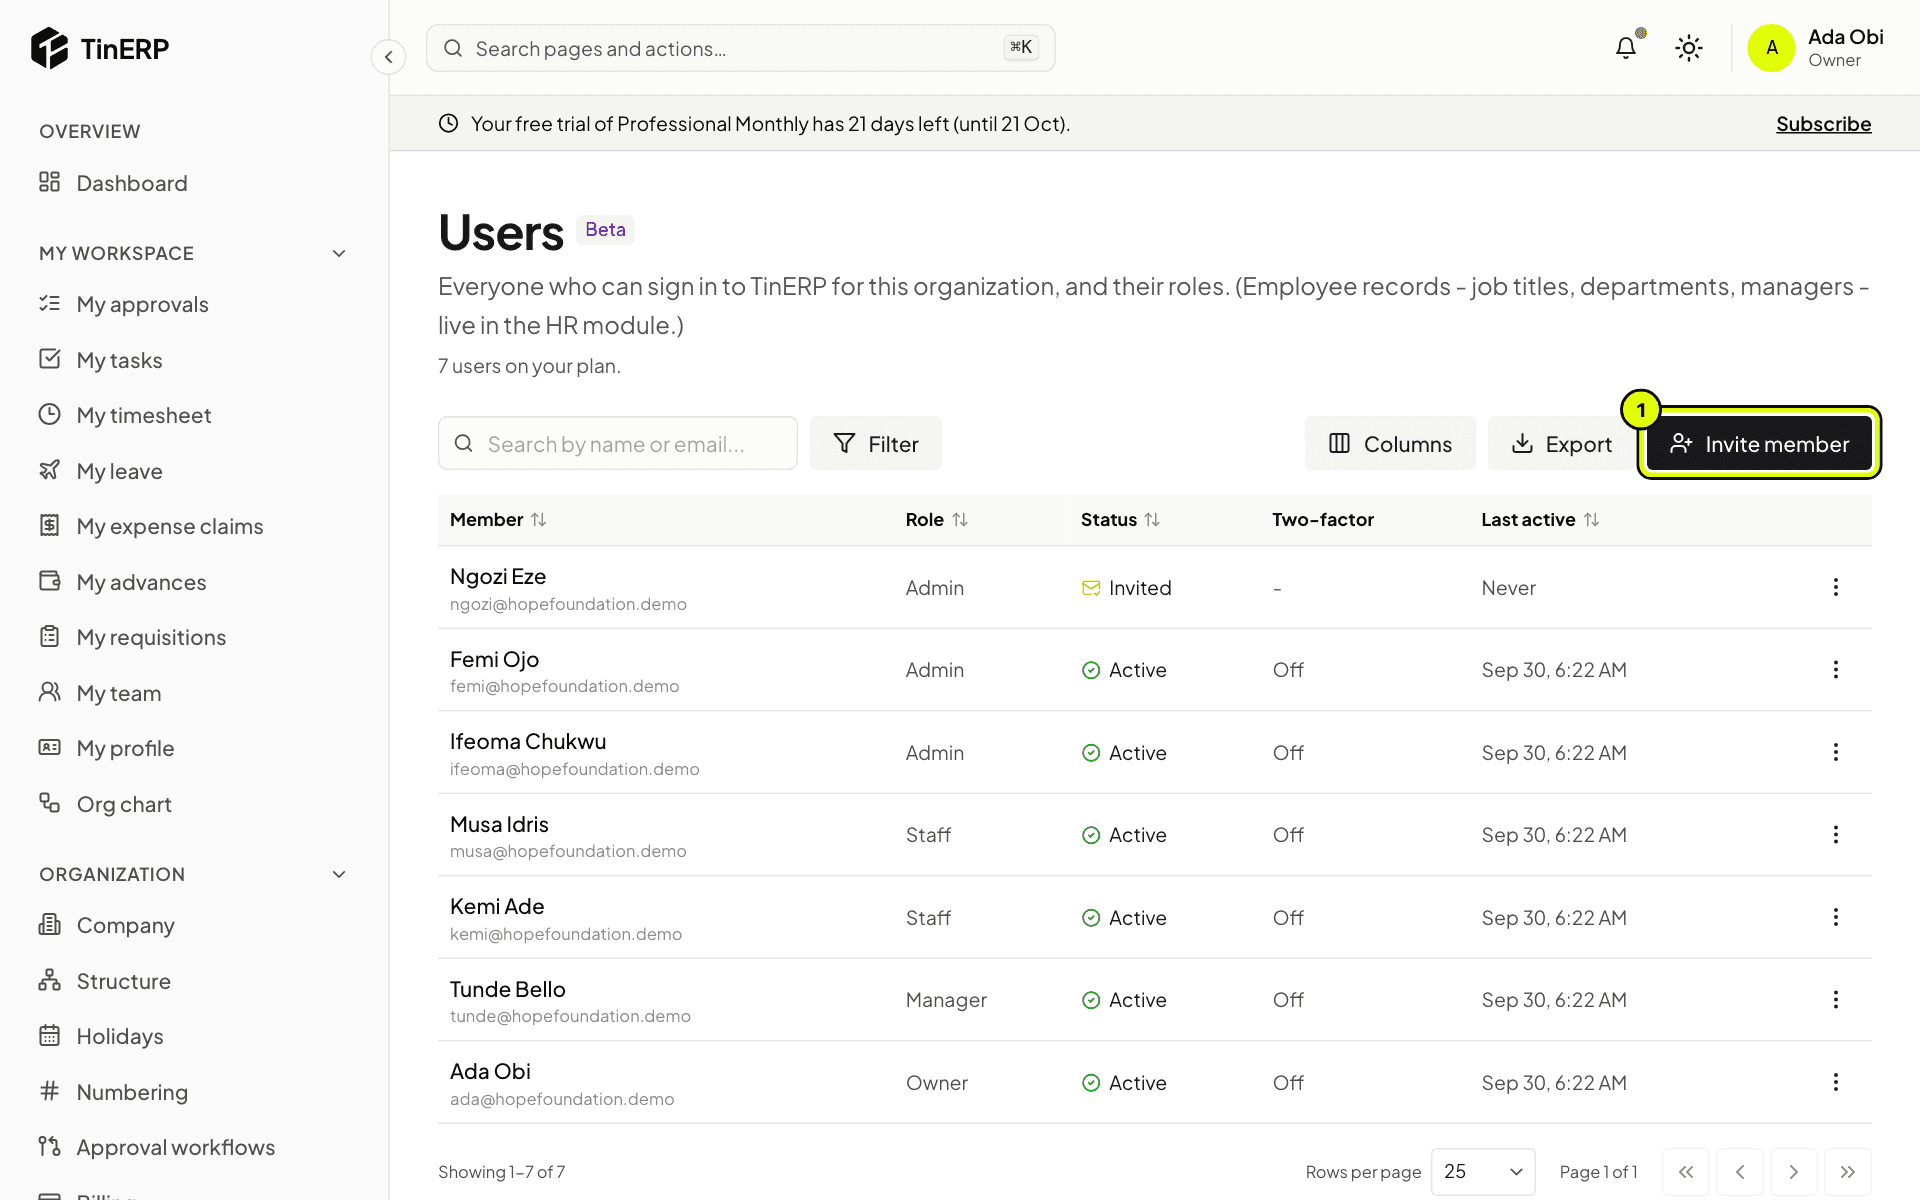
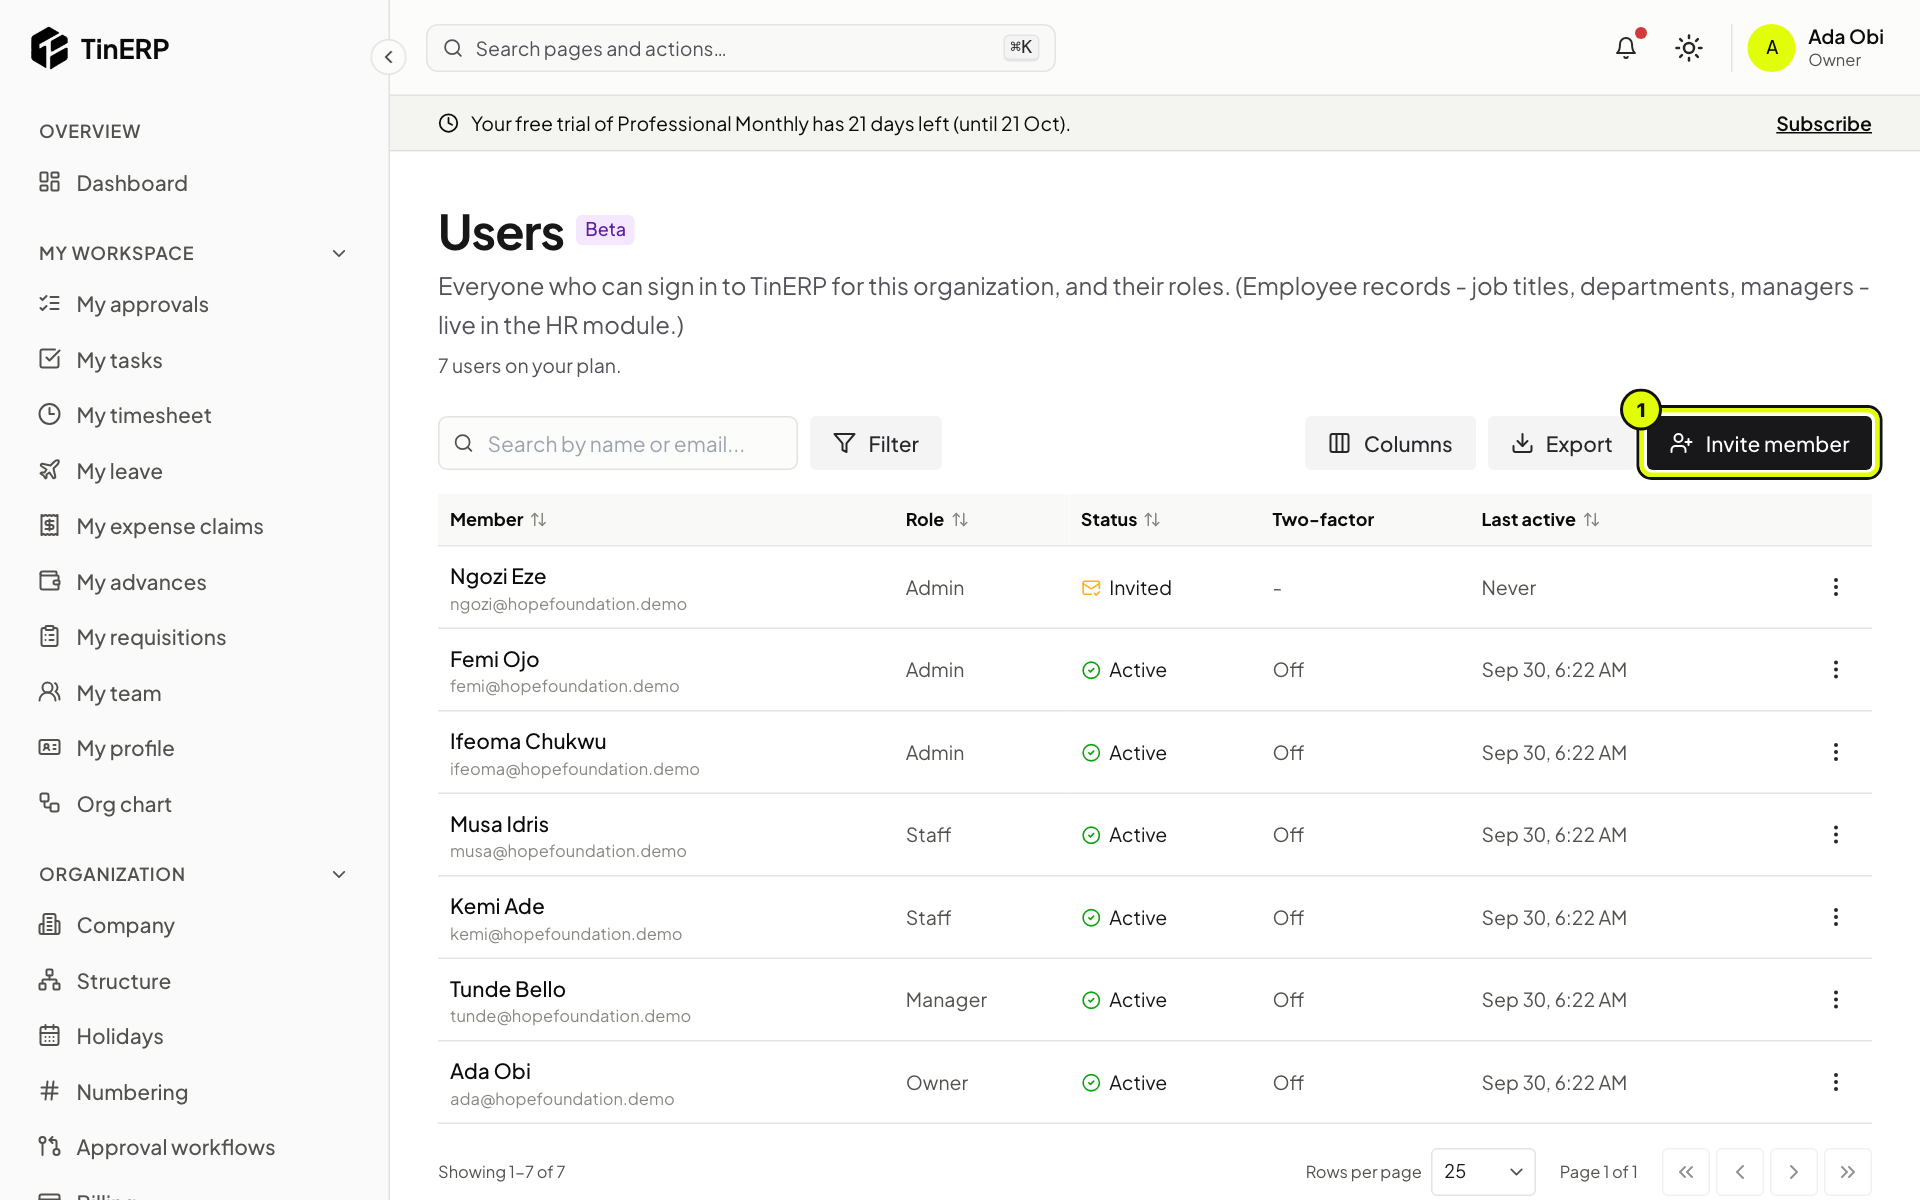
Go to Access & security → Users and select Invite member (1). Enter the person's name and email, choose their role, and select Send invite.
They get an email with a link to choose their password. The link lasts 72 hours; you can resend it from the same page. Until they join, they're listed as Invited.
Full size
The Users page with the Invite member button marked 1 Tip: You don't have to invite everyone at once. Start with the people who will set up their own modules - for example your HR or finance lead - and invite everyone else when you're ready.
- 8
Choose what each role can do
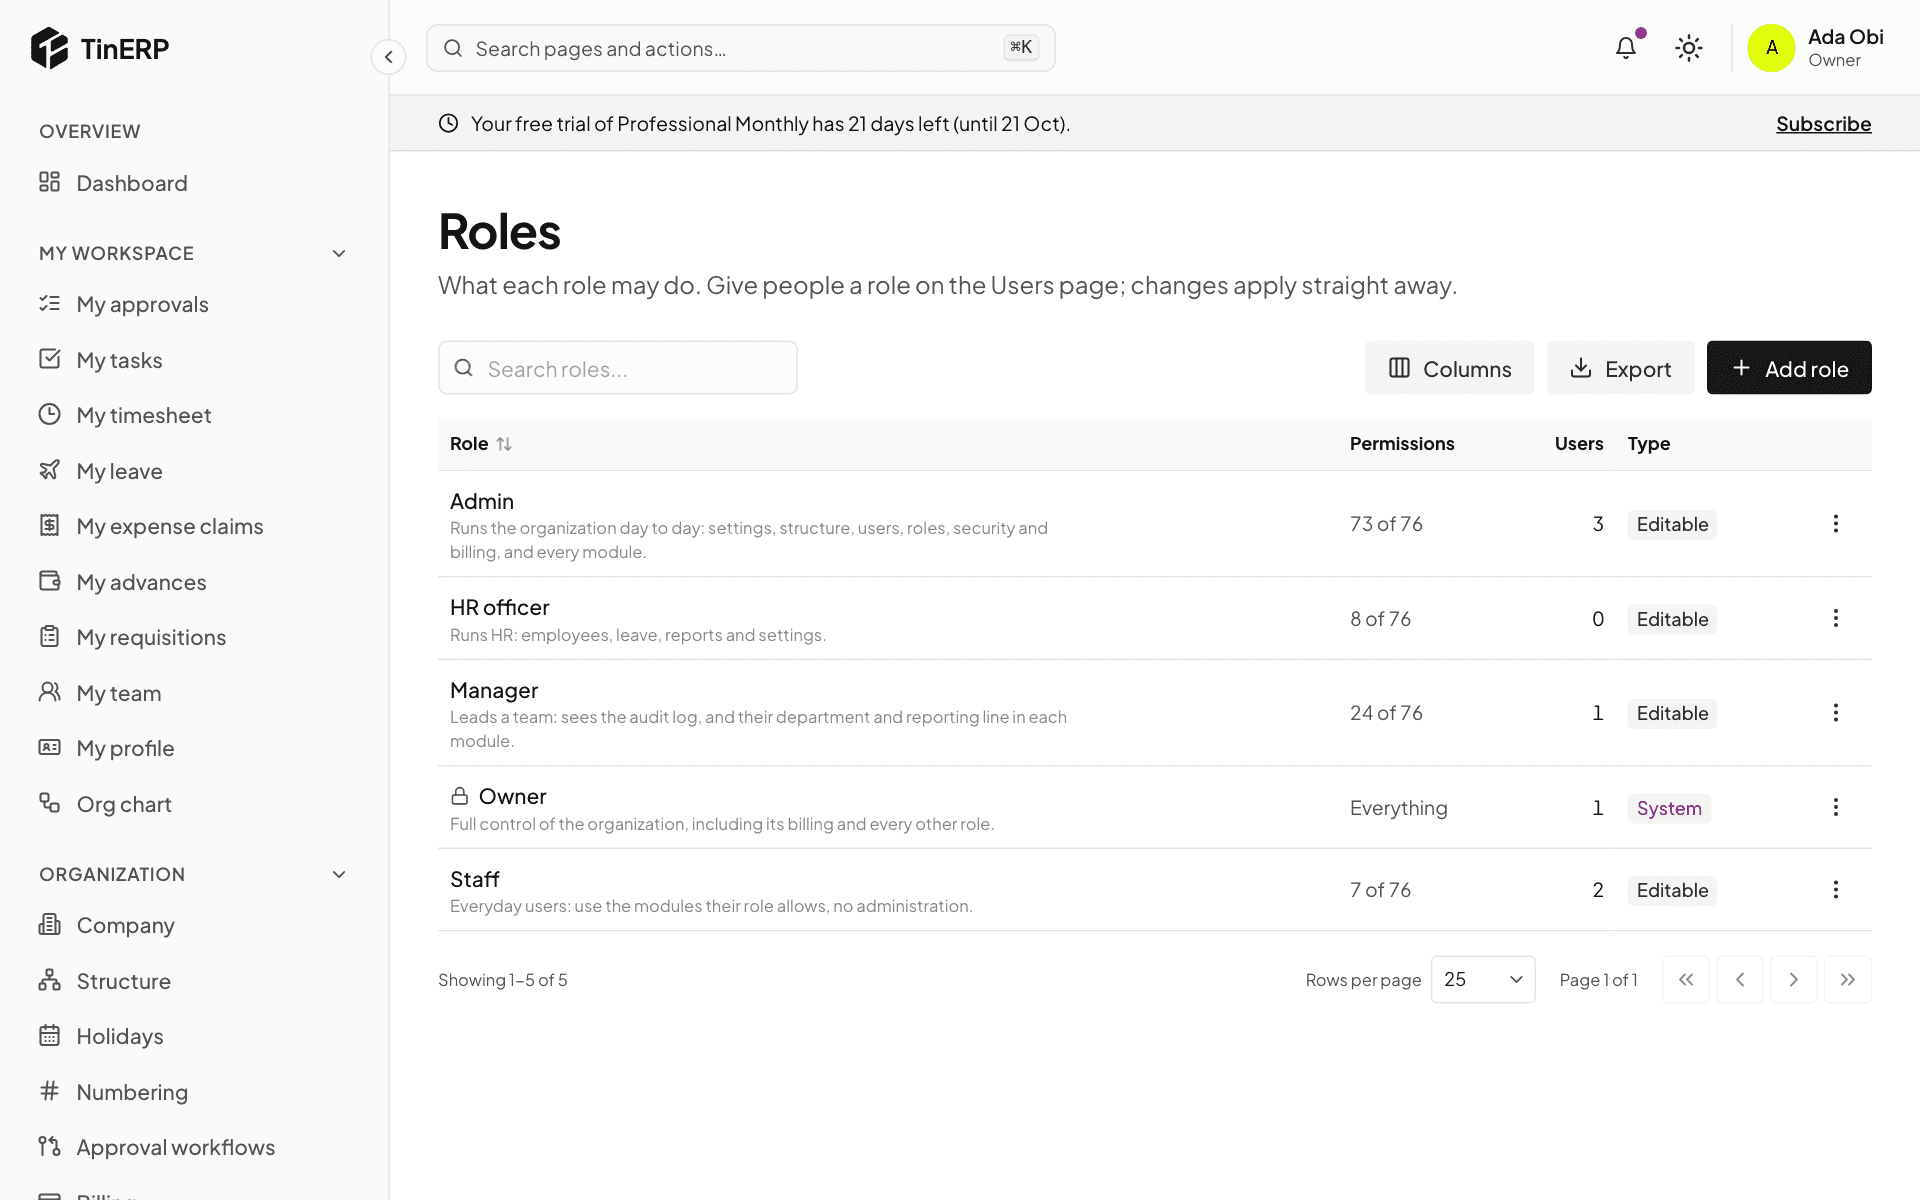
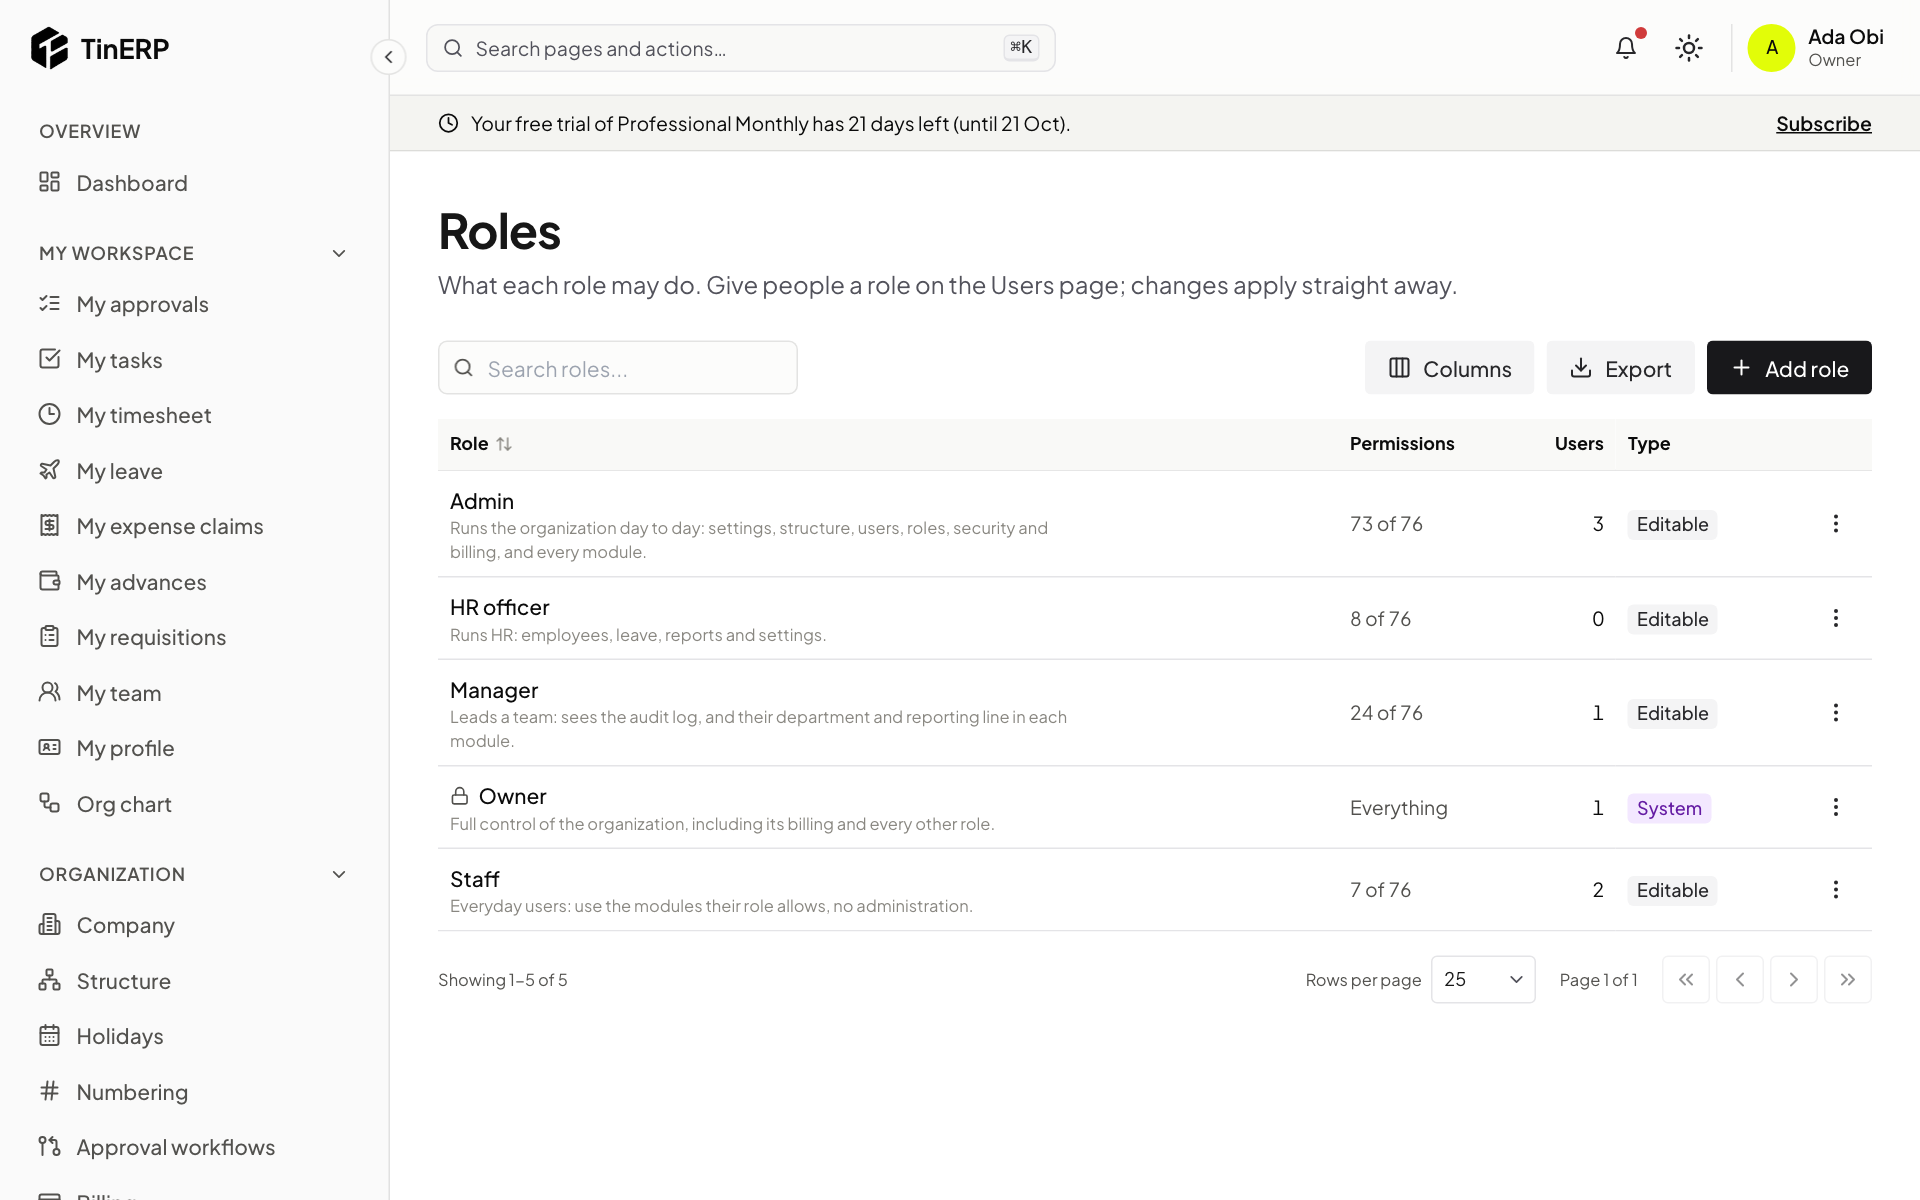
Go to Access & security → Roles. TinERP starts you with four roles: Owner (everything, including billing), Admin, Manager and Staff.
Open a role to see and change its permissions, module by module - down to whether someone sees only their own records, their department's or everyone's. Select Add role for anything the four don't cover, such as a finance officer.
Full size
The Roles page listing Admin, Manager, Owner and Staff with their permission counts - 9
Set your approval rules
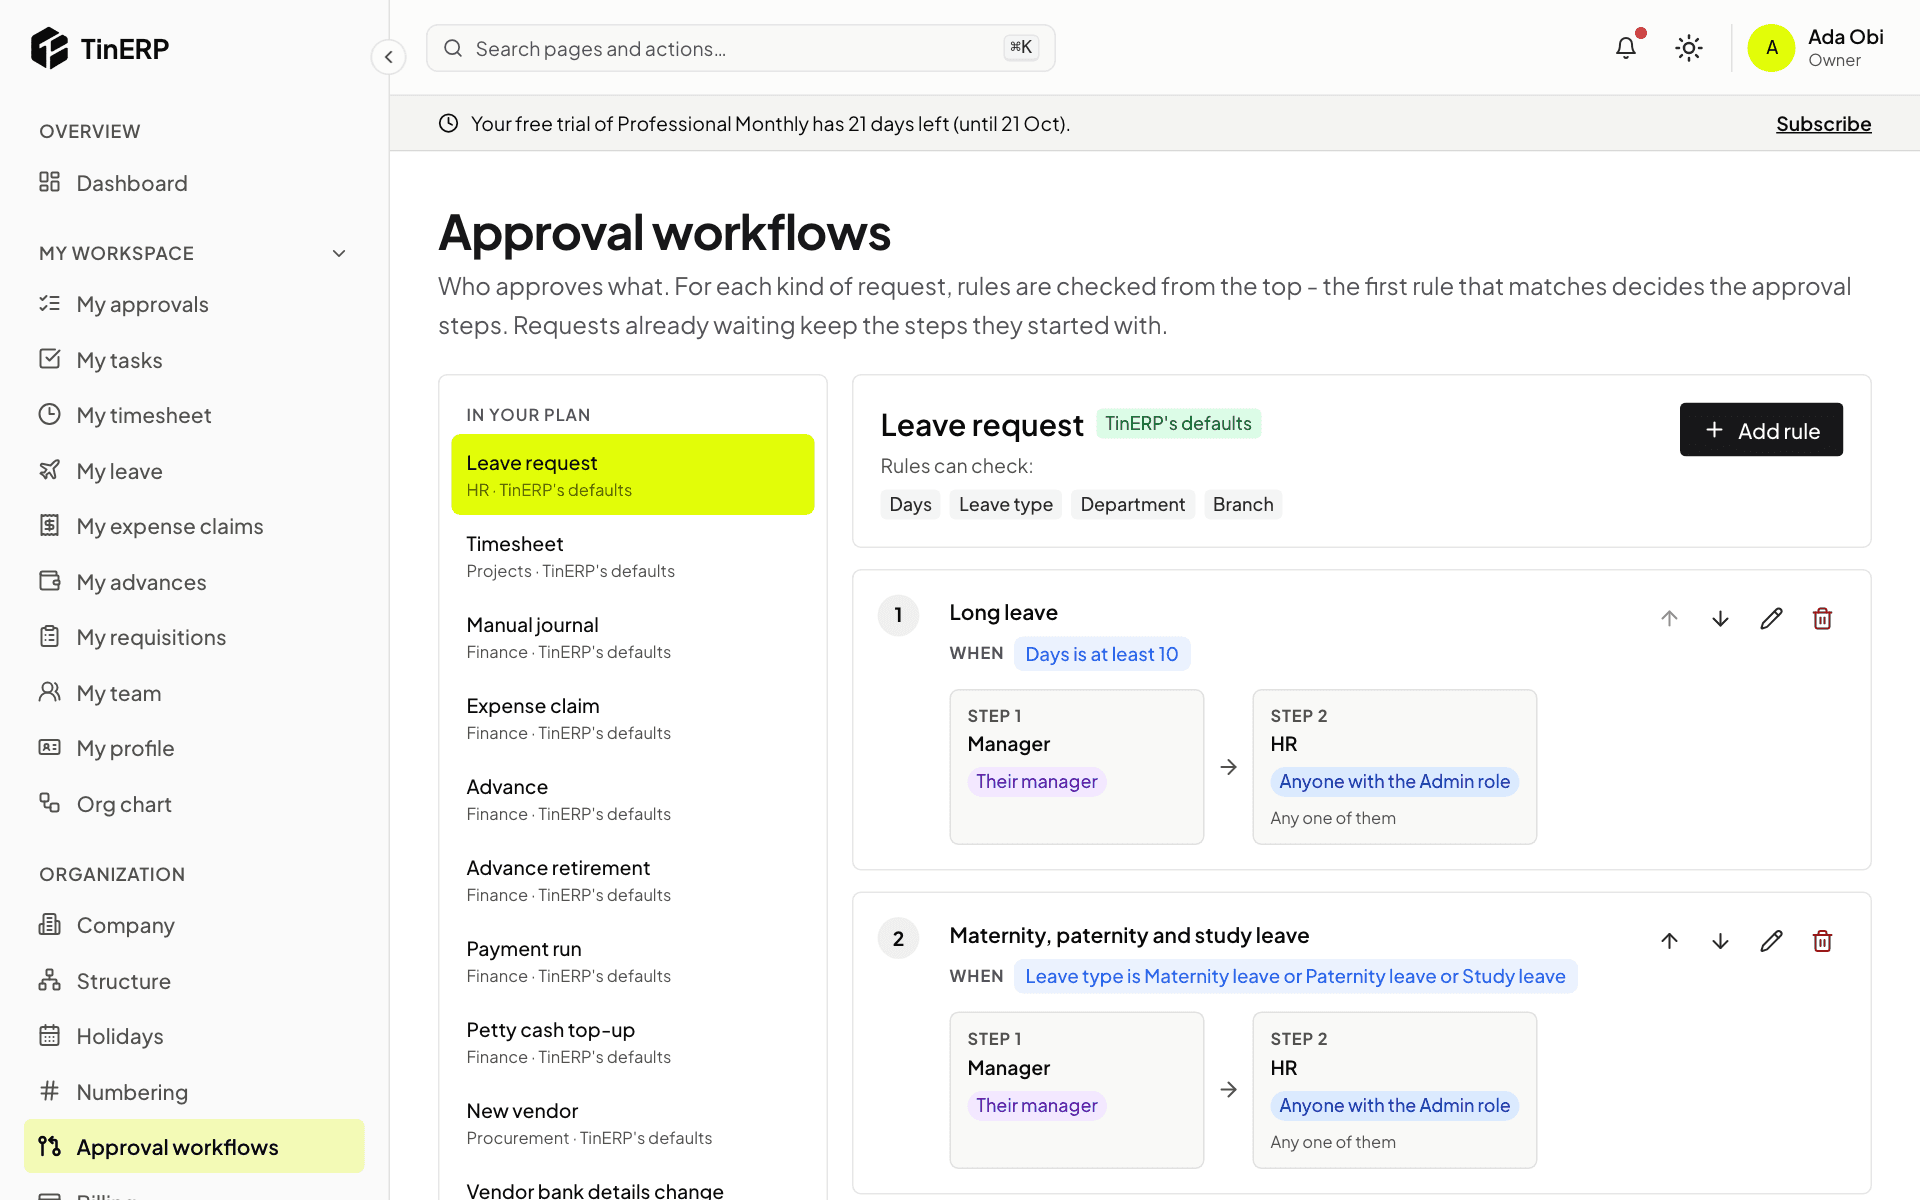
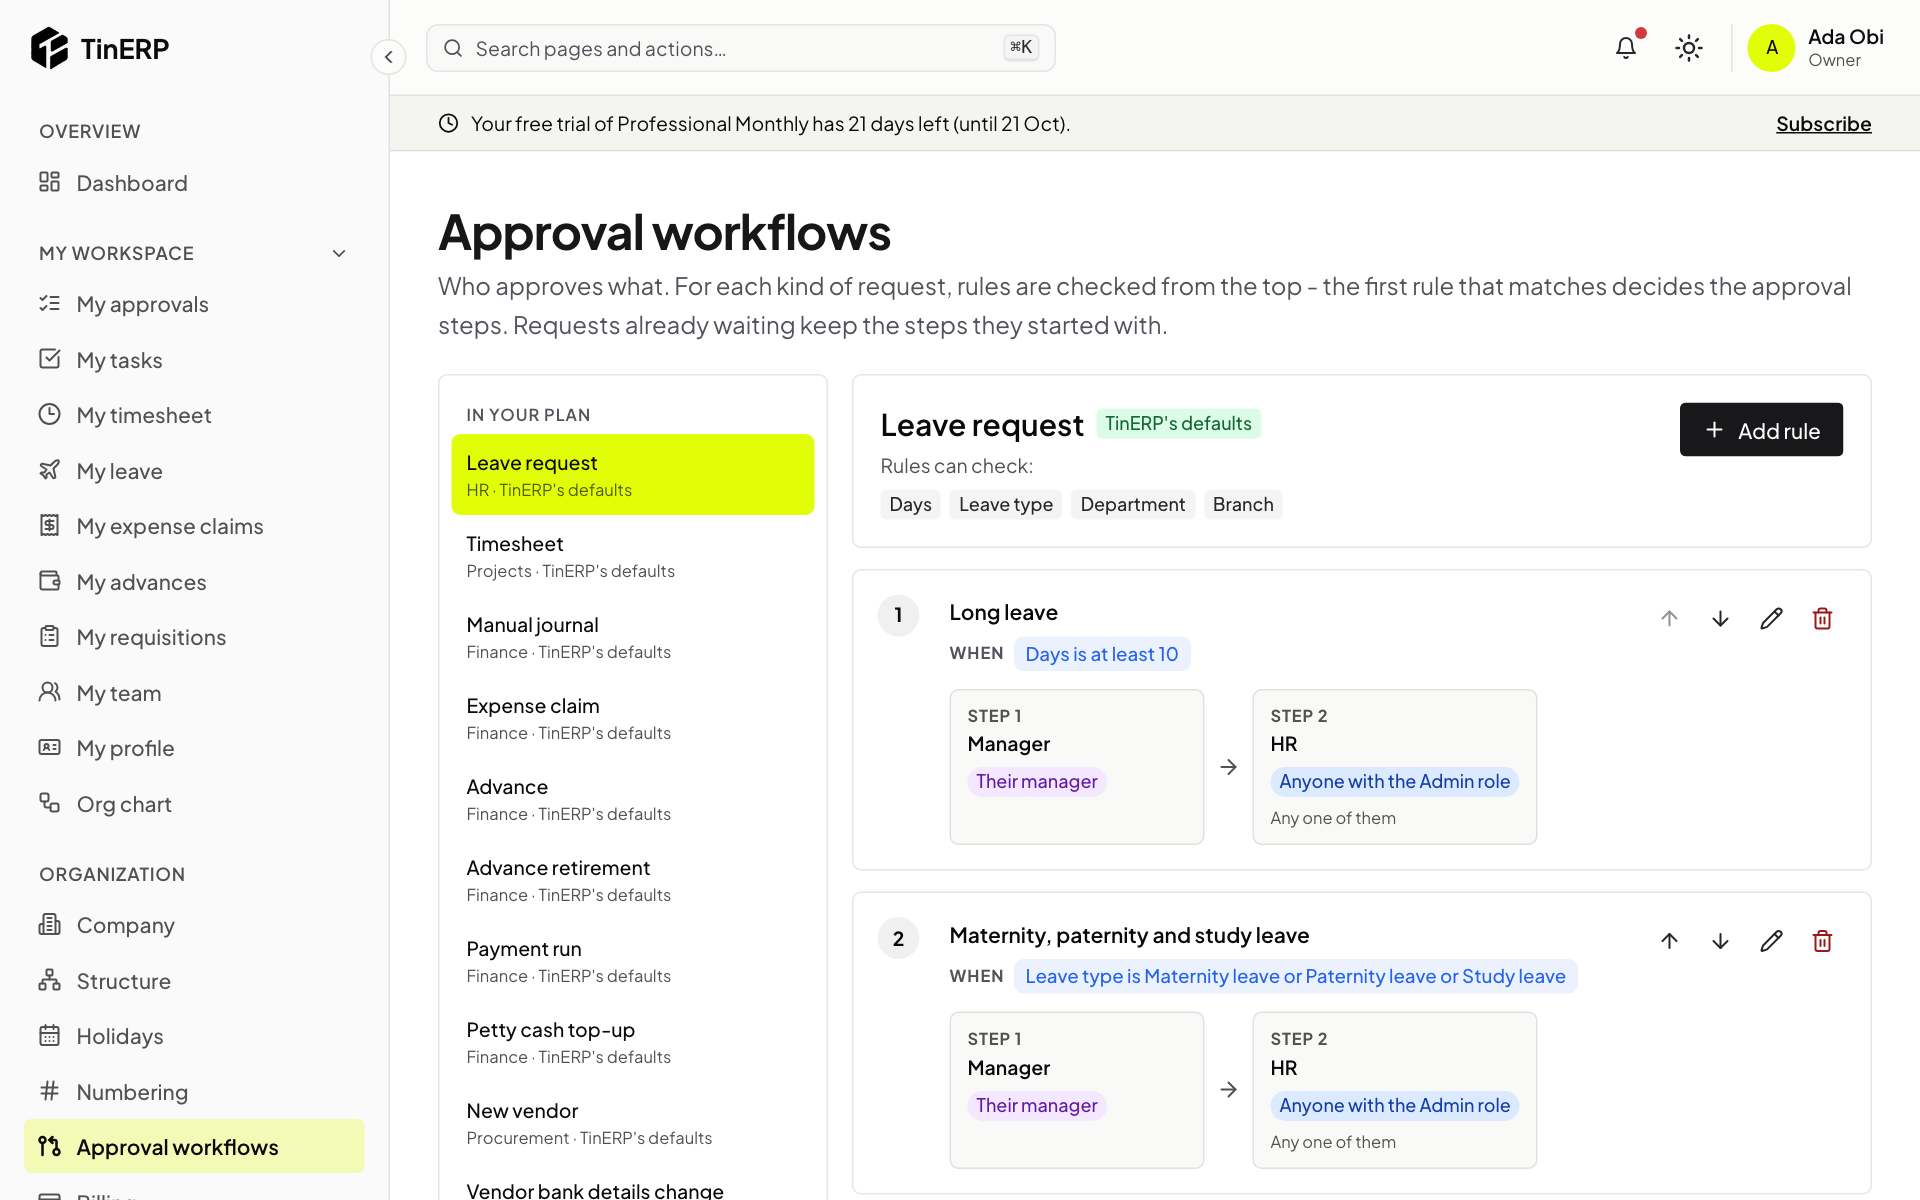
Go to Organization → Approval workflows. Each kind of request - leave, timesheets, expense claims, advances, requisitions, purchase orders and more - starts with sensible TinERP defaults, usually the person's manager.
Open a request type to change who approves it. A rule has conditions (for example Days is at least 10, or an amount over a limit) and steps in order. The first rule that matches a request decides who approves it.
Full size
The Approval workflows page for leave requests, showing a Long leave rule with manager then HR steps - 10
Choose a plan
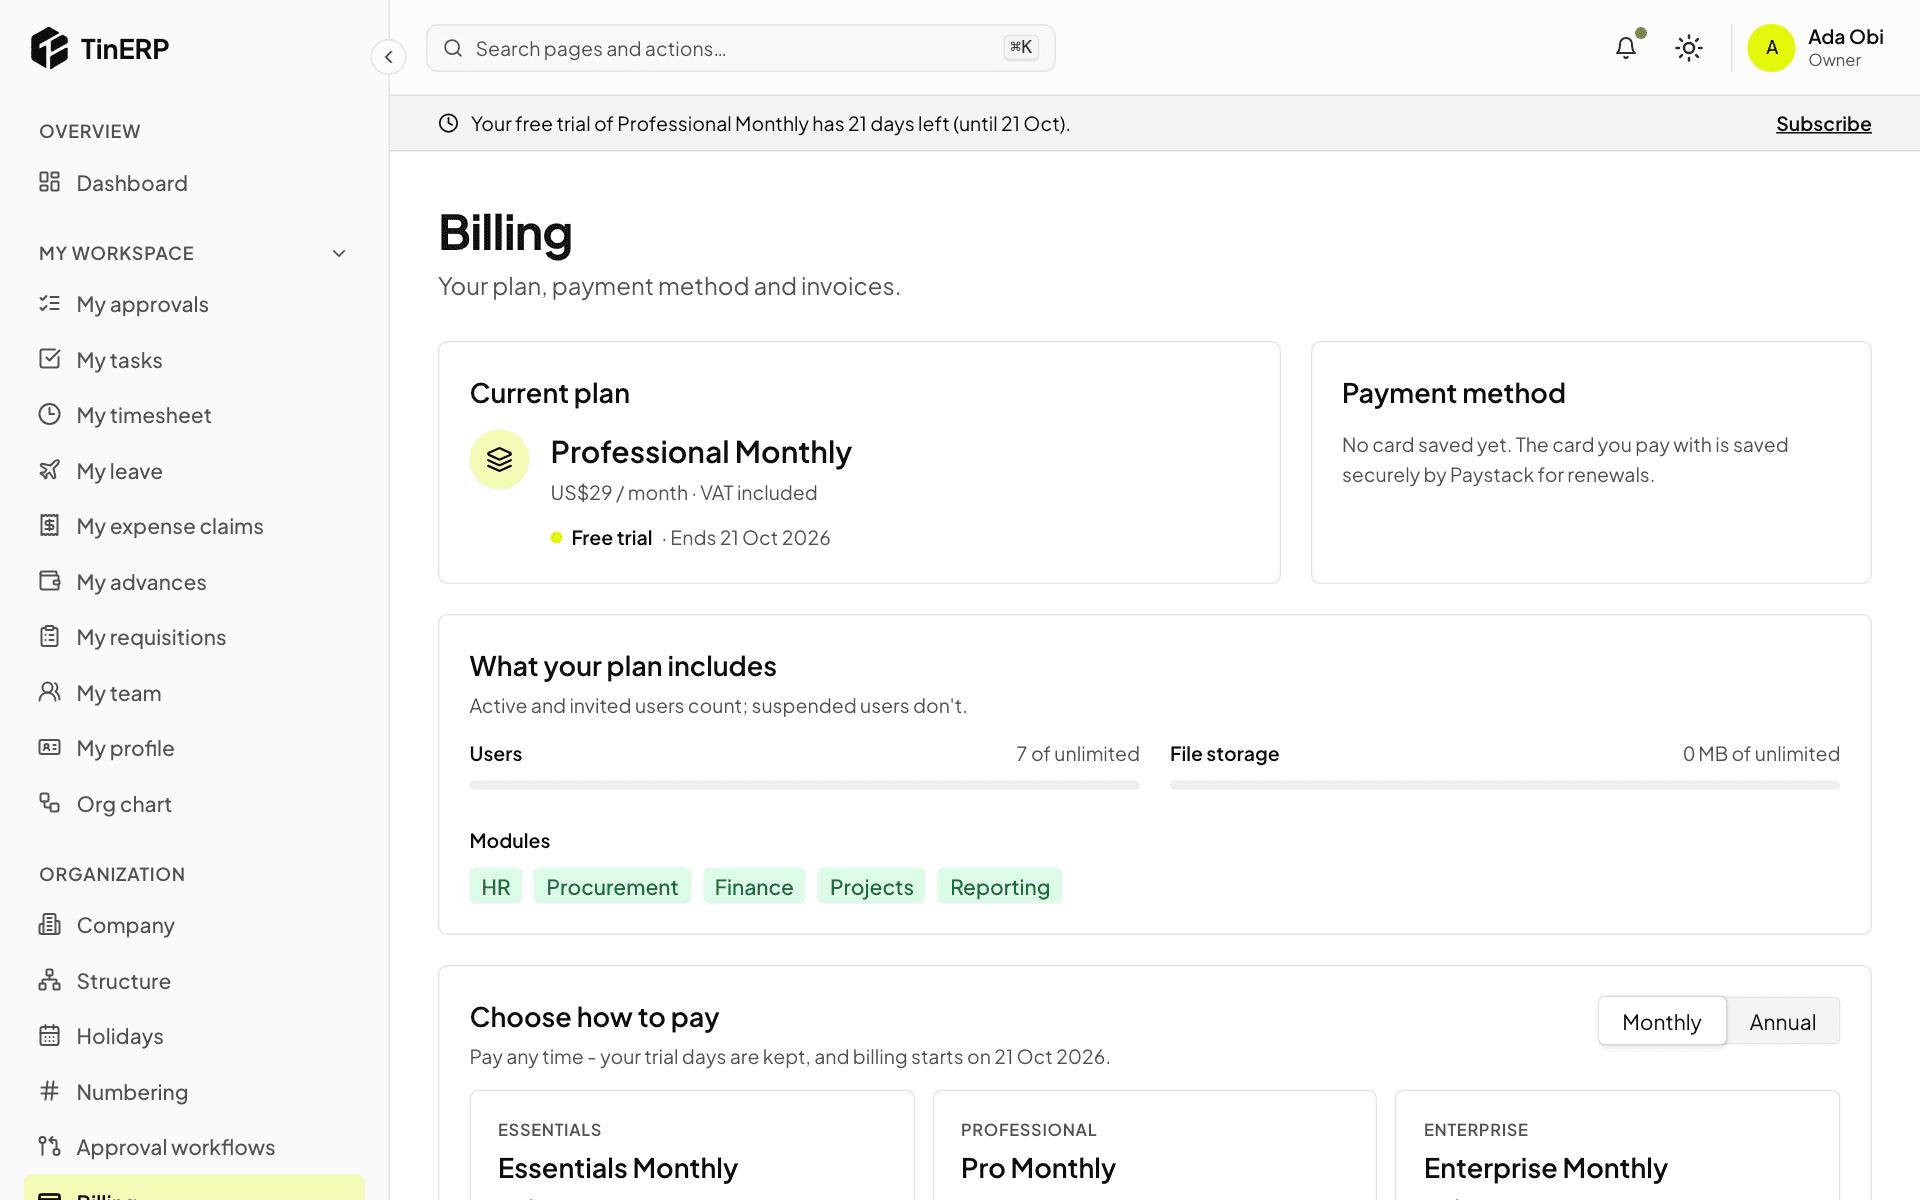
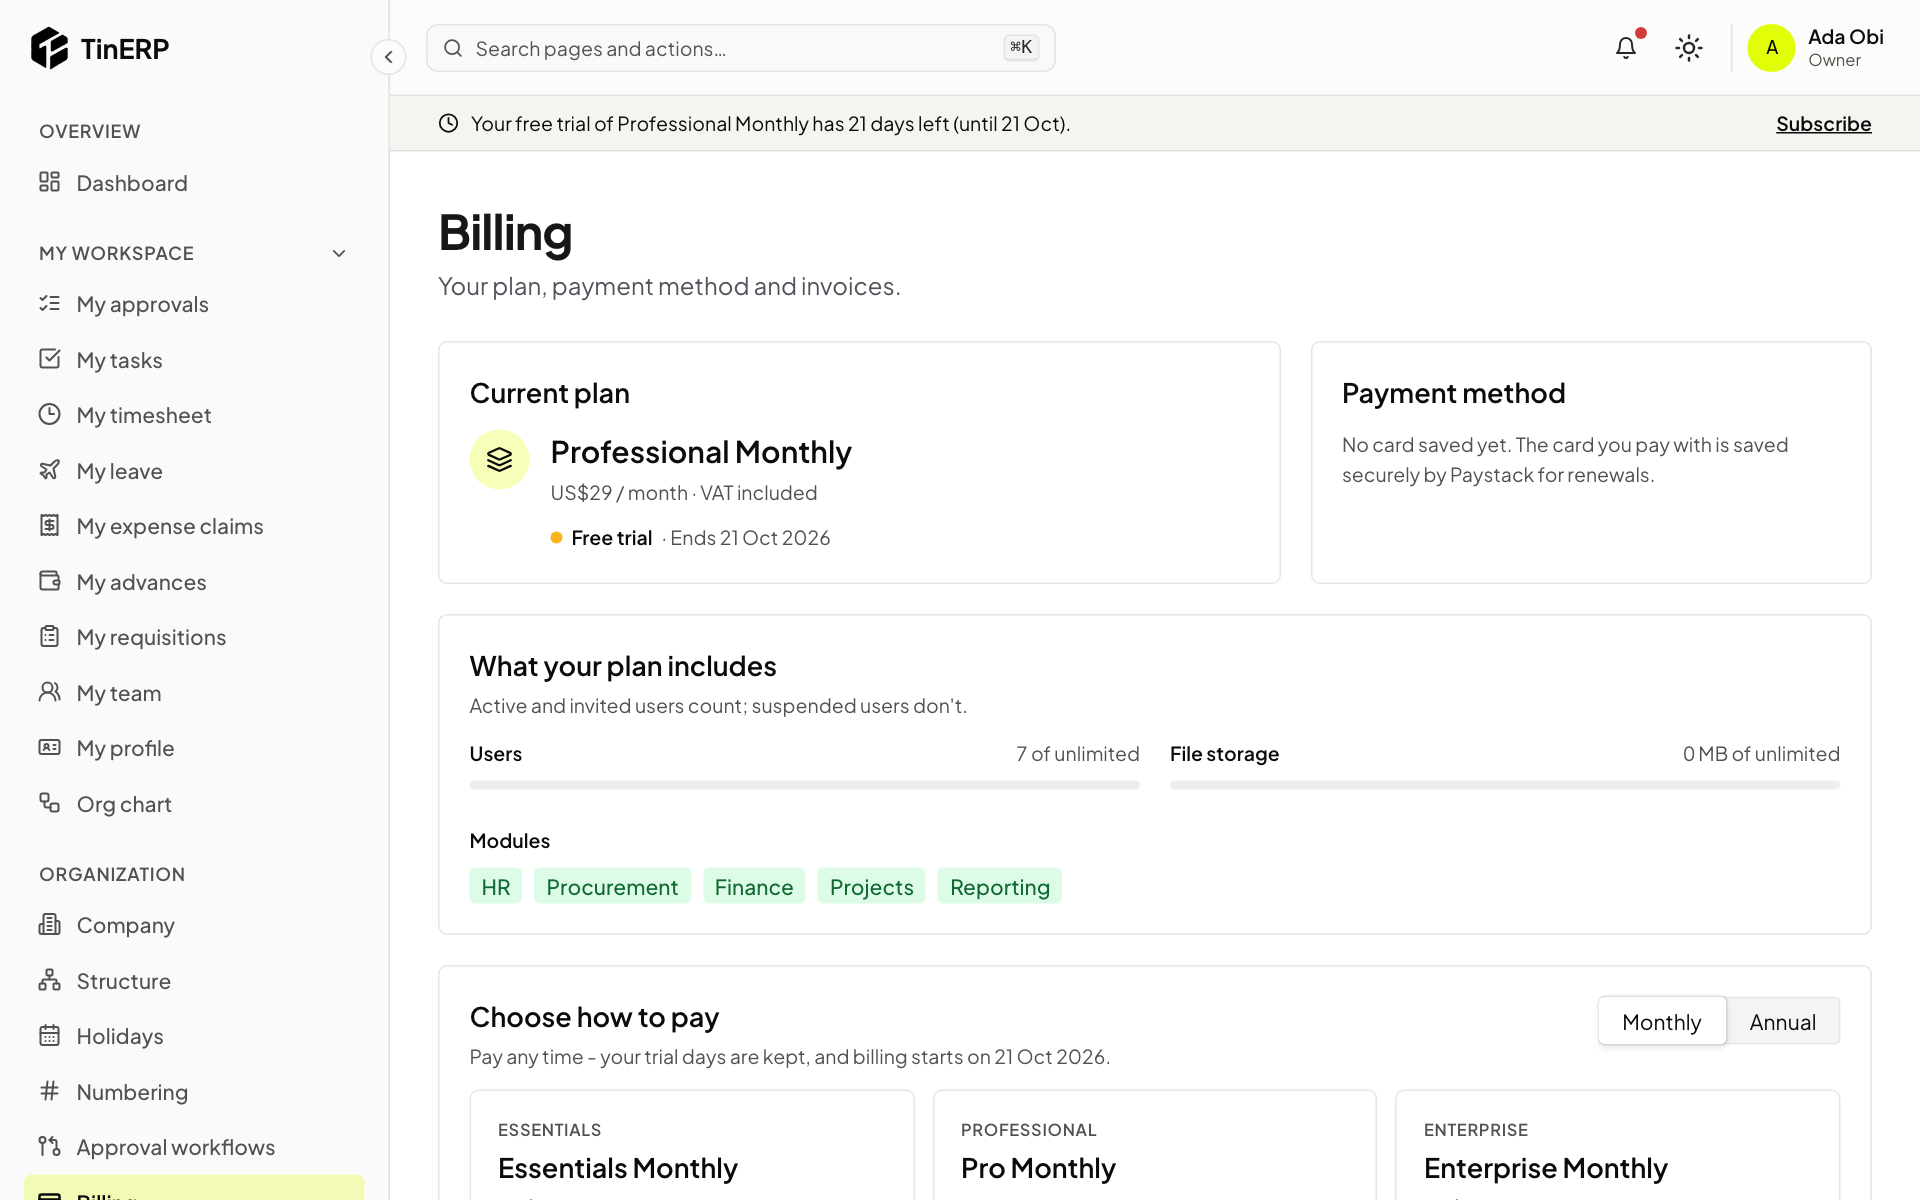
When you're ready, go to Organization → Billing. You can pay any time during your trial - the trial days you have left are kept.
Choose monthly or annual, then pay by card (securely through Paystack) or by bank transfer. Paid plans renew automatically until you cancel, and prices include VAT.
Full size
The Billing page showing the current plan, what it includes and the plans to choose from
Questions
Can someone else do the setup for me?
Yes. Invite them with the Admin role - admins can do every step here, including billing. Or ask us: setup is free, and our team can do it with you.
What happens when my trial ends?
Nothing is charged. Owners and admins can still sign in to the Billing page to choose a plan, and your data is kept.